
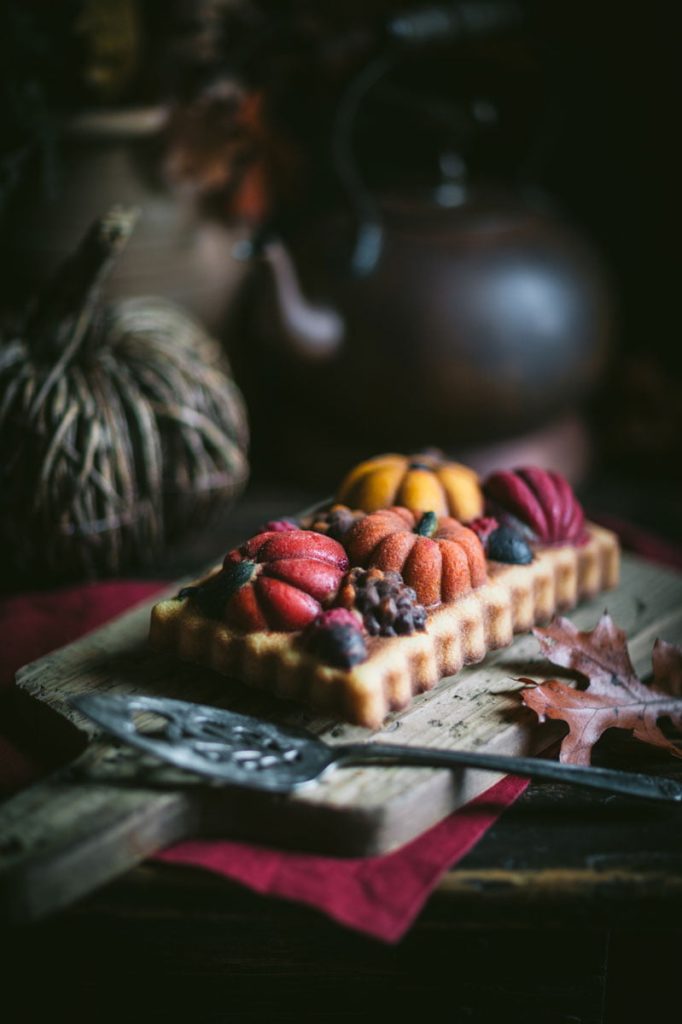
The colors of the Fall season come alive in this Bundt cake loaf where the elements practically pop off the page.
Baking a cozy cake loaf is already a treat, but when it’s adorned with colorful pumpkins, pinecones and acorns, it feels like Autumn itesle popped by for dessert.
Throughout this post, I’ll walk you through (and most likely talk you into) making this colorful Fall cake loaf part of your weekend plans.
I first spotted this pumpkin-shaped loaf on Instagram created by Rachel on Instagram @ElizaMellor.
She created such a beautiful bake, I wanted to give it a try right away. Turns out, I already had the Harvest Bounty Bundt pan in my Nordicware collection, so I was able to get going quickly.
Of course, you can create this effect on any loaf pan that has raised impressions, but if you like this particular pan, you can find it online, HERE.

After multiple trials and errors, I discovered that a Bundt cake recipe with a lower sugar content seems to produce a much lighter shade of cake.
I tried several different cake loaf recipes to try to get this right, and you can see the not-so-great outcomes in the side-by-side pictures below.
The first loaf I made was so awful, I didn’t even take a picture of it. The photo above on the left was my second attempt, and while the food coloring did show up, the hues were much darker than I really wanted. This recipe used 1-1/2 cups of sugar as well as a 1/4 cup of honey. It tasted fantastic, but the coloring was not what I wanted.
For the photo on the right, I used a recipe that called for 2 cups of sugar. Again, it was a bust from my perspective. The colors were totally lost in a loaf that was dark and dull looking.
Well, never one to give up on a true baking challenge (like my obsession with making perfect French macarons), I gave it another shot. I’m so glad I did.
Now, that’s more like it, right? The recipe that produced this version called for 3/4 cup of sugar.
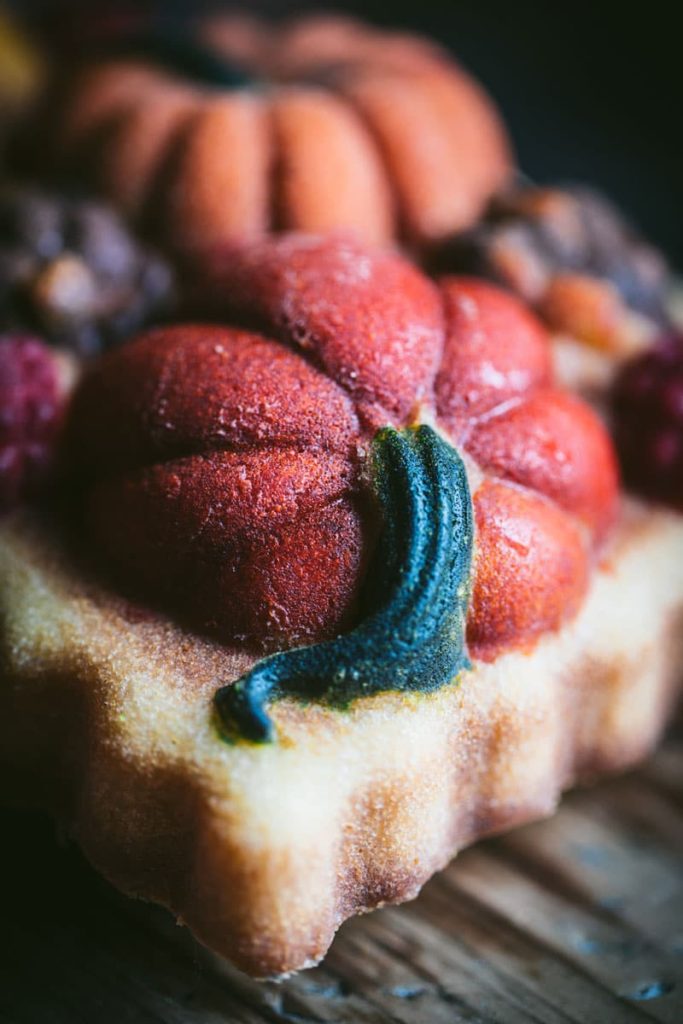
While I can see where some of my painting lines could have been more precise, the colors are really popping on this cake loaf. The cake base on this one has a much softer tone which really showcases the vibrant pumpkins and acorn shapes that jump right off the dessert.
Huge thanks to Rachel on Instagram @ElizaMellor for granting me permission to reprint her recipe and share it here.
Colorful Fall Loaf Cake
Ingredients
- 1-1/2 cups all-purpose flour
- 1/2 teaspoon baking powder
- 1/4 teaspoon salt
- 1/2 cup olive oil butter, softened
- 3/4 cup granulated sugar
- 4 eggs, room temperature
- 2 teaspoons vanilla
- 1/2 cup whole milk, room temperature
- assorted food gels or coloring
- fine paint brushes
Instructions
- Preheat oven temperature 320-degrees.
- Grease and flour the pan, making sure to get into all nooks and crannies.
- In a small bowl, whisk flour, baking powder and salt and set aside.
- Mix butter and granulated sugar until creamy, add and mix eggs one at a time.
- Add vanilla and milk and mix.
- Mix in flour until smooth. Don't overmix the batter.
- Grease pan and lightly flour. Mix equal parts vegetable oil, Crisco shortening and flour to create a foolproof substance that can be brushed into the baking pan to prevent sticking.
- Tint a small amount of batter with food gel coloring. Use a fine paint brush to paint food color directly into lower level areas of the pan. Add the tinted batter directly into the same area. Place pan in freezer for ten minutes.
- Repeat these steps with the higher level areas of the pan, making sure you freeze between each batter-painting effort.
- After all areas of the pan have been painted, freeze for another final 10 minutes before adding the remaining plan batter into the pan.
- FREEZING THE PAN AFTER EACH PAINT SESSION IS CRITICAL TO PREVENT THE TINTED BATTER FROM BLEEDING INTO EACH OTHER.
- Bake at 320 degrees for about 35-40 minutes or until lightly golden. Test cake doneness with toothpick test.
- Allow cake to cool in the pan for about 15 minutes before inverting.
- Refer back to original blog post for additional tips.
Let’s Get Painting
OK, now that I’ve wowed you with these edible Fall colors, let’s walk you through how you can achieve this fun and colorful presentation.
The effect is achieved by tinting batter with food coloring and carefully painting the colored batter into the shapes of the pan.
Start with coloring the batter in the shades that you want to see in the cake. I used a mixture of gel coloring and liquid color (because that’s what I had on hand). Both work.
You’ll only need a very small amount of each color, no more than a teaspoon or two depending on what area you’re painting.
I didn’t figure that out until cake number two and ended up having to toss quite a bit of colored batter that I didn’t need.
Only tint small amounts of batter.
Lightly grease and flour the pan first and make sure you get into all the nooks and crannies. You don’t want any baked batter getting stuck.
Before adding the tinted batter into the targeted crevice, I lightly brushed a small amount of the actual food coloring into the specific area, just to boost the color a bit. Then, I added the tinted batter directly over the same area.
Start painting the lowest areas of the pan with the batter and then pop the pan in the freezer for about 10 minutes before moving on to higher shape levels.
IMPORTANT STEP: It’s important to freeze the pan in between EACH painting to prevent the batter from bleeding into other colors.
The multiple freezing sessions will add to the prep time, but it’s critical to include these various freezing times or you’ll ended up with a muddle-colored mess on the other end.
Once each design in the pan is painted and frozen, it locks and hardens those colors in place, making it safe to add the remaining batter on top of it all.
Make sure you freeze the pan one final time before adding the remaining batter.
Tips For Painting the Pan
I learned plenty about making this colorful loaf cake through trial and error. You could say, I messed up several loaves, so you don’t have to. Here are a few things to keep in mind below.
- Study the interior and exterior shapes of the loaf pan design beforehand. This way, you’ll have an idea of what areas to paint and where the individual shapes intersect. Sometimes the pan’s shapes are hard to distinguish once you get started because the pan itself is so dark and greased and lightly floured. I actually snapped a photo of the exterior view of the pan which provided the clearest look of the overall design (albeit in reverse). Still, it was helpful to refer back to the photo to help guide my painting.
- Use a fine paintbrush for painting for small detailed areas. Invest in a small set of inexpensive brushes from your local crafts store and add them to your kitchen Tool Kit. I use the same brushes to add stardust to my sugar cookies so, fine brushes are worth having in your stash.
- Take your time. This is precision work. It’s fun but don’t rush, especially the first time out.
- Have a few toothpicks handy to help push errant batter back into place. This helps to prevent smearing color into unwanted areas.
- Do NOT skip the freezing steps between each paint. The colors need to freeze to prevent batter bleeding.
Despite the fact that I’ve made three of these pumpkin loafs already, I will try to make a few more as we head into the holidays. I have another NordicWare pan in the shape of limes and lemons. How cute would this technique be on that pan?
Meanwhile, here are a few more of my favorite Fall bakes and crafts that I’ve created over the years.
Candy Corn-Shaped Sugar Cookies
Thanks for popping by for a visit.
I hope you’re inspired to give this Colorful Fall Cake Loaf a try.
If you discover any additional tips, feel free to share them.
See you back here next time.
xoxo
It’s a work of art!
Thanks so much for popping by, Wendy.
So glad you like the cake.
I hope you give it a try too.
Happy Fall.
xoxo
Happy Fall to you, too! Hope it’s a good one, the leaves are starting to change here in my part of VA!
Yes, it’s my favorite season with cooler temps and so many gorgeous Fall colors.
Have a great week.
xoxo