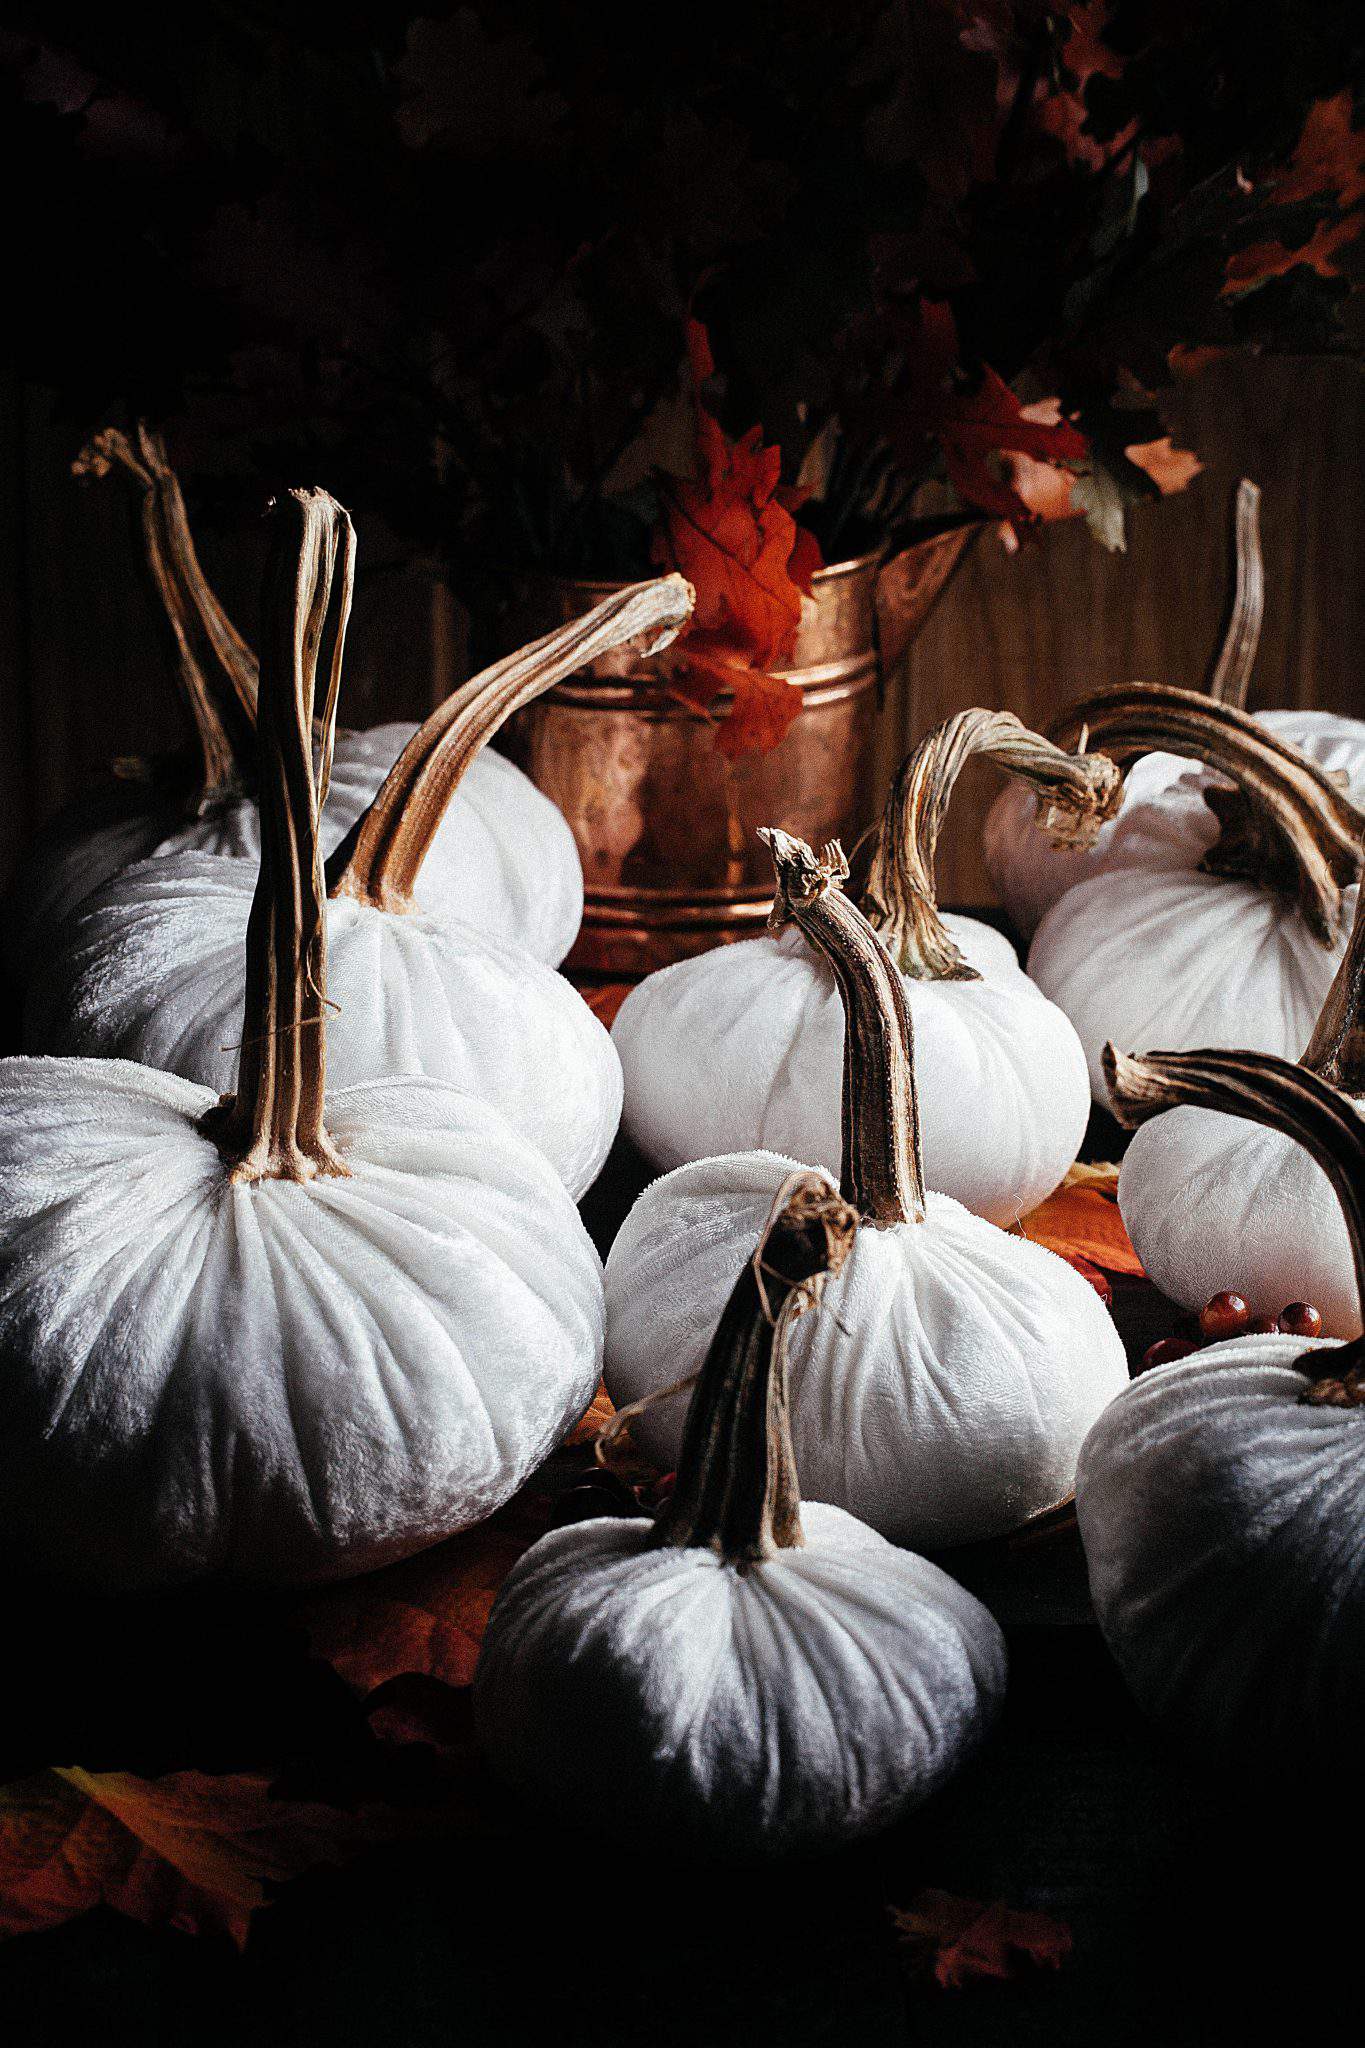
Out of all the seasonal projects I’ve created over the years, I’ve gotta say, these soft pumpkins with real stems are among my favorite.
Maybe you’ve already seen similar versions around at upscale shoppes or boutiques.
What you may not realize is that you can make these yourself…. fast, simple and for a fraction of the cost compared to any store-bought soft pumpkin?
In this case, White is the new Orange.

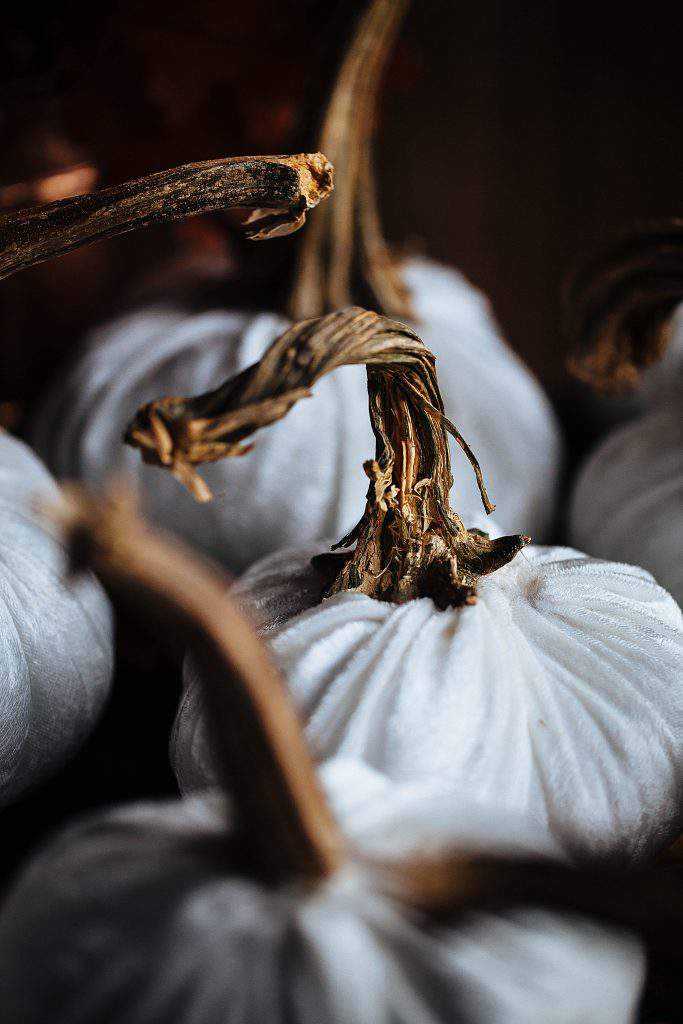
How cool and creepy is this stem?
Aside from the the dried pumpkin stems which I’ll talk a little more about further down in this post, you’ll only need a few other supplies.
You’ll only need a long doll making needle, thread and cotton stuffing and fabric to make the pumpkin forms.
While I really love the look of velvet, it is very pricey and can run as high as $25 a yard. Ouch.
If you don’t want to spend a ton for velvet, the next best fabric is Crushed Panne (pronounced pa-nay). It looks very much like velvet without the hefty price tag attached.
I found this crushed panne at Joanne’s Fabrics for about $6 a yard.

Cut the fabric into various circle sizes. The size of the soft pumpkin depends on how large a fabric circle you cut.
I like to mix up the sizes because that’s what you would find in a real pumpkin patch.
Double thread the needle, knot one end and gather-stitch the edge of the the fabric circle about a 1/4-inch from the edge.
Gently pull the stitches to bring the edges closer together to create a pouch.
Don’t pull the threads too hard or tight or they may break even though they’ve been doubled.

Fill the pouch with the cotton stuffing.
Once you’ve added the desired amount, gently pull the gathering threads again to close the opening.
Hold in place and stitch the opening several times to securely close.
Snip any long loose threads.

I was able to create 10 soft pumpkins with a yard and a half of fabric and a bag and a half of cotton stuffing.
You can whip these up in no time at all too.
It only took me about an hour to make all of these while I was sitting catching up on a favorite TV show.
It’s going to be easier if you make as many forms as you like and then assembly-line the dried stem application.

The real pumpkin stems are really the star of this project and the more twisted and viney the better.
I collect my stems right after Halloween and dry them out so I can use them for potential craft projects the following year.
Try to save various shapes and sizes because the variety will really make a big difference if you make and display multiples.
Please DO NOT use fresh, raw stems for this project because they will rot quickly and ruin the fabric.
Always use dried stems.
If you don’t already have dried stems, you may be able to find them online. Before I started saving and drying my own stems, I bought them on Ebay.

Use hot glue to adhere the pumpkin stem to the pumpkin form.
Make sure you add glue to the entire bottom of the stem including points.
Then, press the stem into the top of the pumpkin form and hold in place for a bit until the glue cools.
The points have a tendency to pop up away from the pumpkin form so, you may need to add a little more glue here and there to secure the stem completely.

I’ve been making these soft pumpkins for years and they’re just as gorgeous in various vibrant colors and they are in monochromatic white.
You can see how my jewel-toned pumpkins turned out my previous post HERE.
Also check out my similar soft acorn projects HERE for FELTED WOOL acorns and HERE for VELVET acorns.

There are so many ways you can incorporate these soft pumpkins into your holiday decor.
Consider making a dozen or so soft pumpkins and piling them into a basket to display in your home.
You could also stretch several of them down a long table as a centerpiece.
Place a few on a fireplace mantel or just scatter them around your home for a touch of whimsy here and there.
I’m sure you can come up with even more ideas to put these to great home decorating use.

Don’t forget to save your pumpkin stems this year and ask your friends and neighbors to save them for you too.
You can see how to dry stems for future use in my previous post HERE.
The holiday season is right around the corner and these pumpkins make for lovely seasonal decor.
Actually, the white pumpkins in this photo kinda remind me of a gaggle of turkeys.
Perfect for Thanksgiving table decor.
Gobble-gobble.

Thanks for stopping by.
See you back here next time. ♥

I’m linking this Soft Pumpkins with Real Stems post to the following:
Botanic Bleu | Stone Gable | Home Stories A to Z
The Everyday Home | Our Southern Home | Dwellings, the Heart of the Home

How clever!! I love the look of the pumpkins. Now, if I want a really tough thread you can use upholstery thread which is strong as well as topstitching thread which is tougher than regular sewing thread. I am on the look out for pumpkin stems. Happy Monday!
Marisa, that is great advice. I’ve never used upholstery thread for this but you’re right, it would be much stronger.
Yes, definitely keep your eyes peeled for those stems.
Gather far more than you think you’ll need because once they’re dried out, you can keep them and use them for years.
Happy day to you and thanks for stopping by.
these are beautiful.
Thanks so much, Laura.
Start saving those stems.
Happy day.
These are so beautiful! I love white pumpkins. I have a few real minis lined up on a window frame in my house. If I had any coordination at all, I would try to make a few of these faux pumpkins. And I’m so fascinated that you use real, dried pumpkin stems. I had no idea saving those for craft projects was a thing! Pinned!
Thanks, Jennifer.
I assure you, this project takes absolutely no coordination at all. If you can hold a pencil, you can do this.
I hope you give it a try. You’ll be pleasantly surprised. I promise.
If you get stuck, shoot me an email and I’ll walk you through it.
Don’t forget to save stems this year and stake a claim on your neighbors pumpkin stems too-lol.
Good luck and thanks for popping over.
Thank you Lisa for this post…I have lusted over velvet pumpkins for awhile now but the prices were nutty. I figured making them was an option but I never ventured down the path because I had no idea how to sew the velvet top and fit the stem in the opening…your approach is the way to go…now I need to save the stems. Have a lovely week. 🙂
Jeanne, I agree the store-bought pumpkins I’ve seen are indeed quite pricey. This technique is much cheaper-lol.
You know, I make the similar little acorns with real acorn caps and I saw them at a shop recently priced at $40 for just 6 little velvet acorns.
Wow. Now, that’s unbelievable pricing.
lisa, another great post and truly, i’d surprised how simple these are to make (no sewing machine required – score!).
many thanks for sharing!
Thanks so much, Marsha.
This no-sew technique makes the pumpkins oh-so simple.
You’ll enjoy making them too.
Let me know how yours turn out.
Happy day to you.
Love the gorgeous white velvet pumpkins!….I have a stash of dried pumpkin stems from last year…now I have to get busy and make some…you have inspired me to make them in white and will have to seek out that Penne fabric, as they are so elegant!!
Thanks, Shirley.
Yes, the Panne fabric is far more reasonable price-wise.
Good luck with your and do let me know how they turn out for you.
Don’t forget to stalk your neighbors for their stems before they toss them-lol.
These are beautiful. I love when velvet pumpkins have real stems. It makes a big difference in how lovely they look. Thanks for sharing at Monday Social.
Wow what a lovely pumpkin…..beautifully made
I appreciate that, Puja.
Hope you take some time to make a few this year.
If you don’t get around to it, be sure to save those pumpkin stems and dry them out for next year.
Have a great week.
They are absolutely beautiful…love the velvety white with the rustic stems!
Thanks so much for sharing at AMAZE ME MONDAY!
Blessings,
Cindy
Thanks, Cindy. So glad you like them.
My pleasure to link up to Amaze Me Monday.
See you again soon.
Have a great week.
These are stunning. Absolutely. Stunning. And I’m completely sucked in to your glorious photos. What a gorgeous space you’ve created here. Thanks for the inspiration! #photographygoals ❤️
You’re so sweet, Sarah.
I’m happy to see you’re inspired. Hope you try the pumpkins next year.
Save those stems.
Thanks and have a wonderful weekend.
Your pumpkins and acorns are beautiful! I’m glad I saved this pin from last year. Your instructions are clear and seem easy to follow. Plan to go outside this afternoon to gather acorn caps. This week I’ll make some of both. Glad I remembered to dry the pumpkin stems last year. I found them in my fall decoration box this week! Thanks, Lisa.
Linda, that’s sounds so great. Your comment has reminded me that I should go and look for acorn caps to day too.
It’s such a beautiful, clear and cool day here.
I’m so glad to read are inspired by my previous posts. Please let me know how your projects turn out.
Also, another reader gave me a tip about drying those stems. She put them in the oven at a really low temperature and dried them out the same day.
Isn’t that clever? I never thought of that before but that would be a way to use the stems right away.
Don’t forget to collect stems from your neighbors so you can maintain a nice stash.
Happy day to you.