
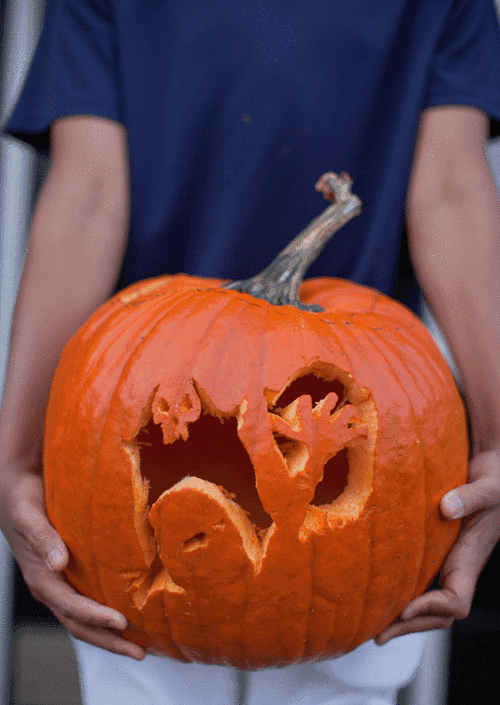
Don’t you just love carved pumpkins? I love to see what designs people come up with. Every year, my kids have a small competition between them to see who can carve the most creative image.
Don’t toss those pumpkin stems because they could be very valuable when it comes to crafting.
Throughout this post, I’ll show you how to dry pumpkin stems which you can use for fun projects.

While the carved images are fun while they last, it isn’t long before great pumpkin carvings turn to a mushy mess… but WAIT!
Before you toss your mushy pumpkins make sure you hang on to one valuable part of it… the STEM.

Regular readers of this blog may recall my easy-to-make velvet pumpkins that I’ve featured here several times.
Don’t you just love these?

The whimsy of these soft pumpkins lies in the authentic stems which add a delightful realism to the harvest.
Real pumpkin stems are a must for this project.

When making velvet pumpkins, it’s important to use DRIED stems because freshly cut stems can decay and cause damage to the fabric.
Throughout this post, I’ll show you how easy it is to dry your stems for use for upcoming projects.
I have to say, super-ripe pumpkins are mushy indeed and can be a bit gross to handle but it’s worth dealing with the mush in order to harvest those great stems.
Keep your eyes peeled for unusually shaped stems like this curved one.
I not only harvest the stems from the pumpkins my kids carve but I also collect stems from my friends and neighbors.
Most people don’t want their stems and they’re more than happy to let you have them.
If you spot a good stem on your neighbor’s step, don’t let it get away from you.
The stems are really easy to remove from the rest of the pumpkin top but handle gently because the tips can break quite easily.
If you’re working on a whole pumpkin that has not been carved, simply cut the top portion of the rest of the pumpkin as close to the stem as possible.
Use a sharp knife to carefully cut the around the outline of the pumpkin stem.
Make lots of little small cuts because the tips of the stems are fragile.

Once the large pumpkin chunks are separated from the stem, carefully scrape the bottom underside of the stem to remove all pumpkin meat.
When the pumpkin stems are completely dry, you can use a piece of fine-grade sandpaper and sand it smooth.
This will also get rid of any small, dried pumpkin pulp that may have been missed.
Once the pulp and pumpkin meat have been removed, the stems can be set aside to dry.
Keep the stems in a dry location for about 8 weeks to completely dry out. I keep mine in a cardboard box in the garage and they dry out just fine.
You’ll know your stems are completely dry when they sound a little hollow when tapped. They’ll also be super light in weight since all the moisture within would have evaporated.
Here’s a look at some stems I purchased on Ebay a while back (I collect stems wherever I can find them).
As you can see, the stems can also be cut straight across the bottom for a flat presentation as opposed to preserving the natural outline of the stem tips.
NOTE: I think either type of stem cut (straight or natural tip outline) will work just fine for the velvet pumpkin project but I think the the outstretched-looking tips look better within the folds of the velvet fabric.

Also, consider visiting your local pumpkin farm where you may be able to collect a bundle of end-of-the-season stems.
NOTE: For those readers who live in snowy regions, a dried pumpkin stem is as good as any carrot when it comes to a snowman’s nose.
So, keep your eyes peeled for great looking and unusual stems, start collecting them and drying them now for next year’s velvet harvest.
Don’t forget to tap your friends and neighbors for their stems too before they toss their pumpkins for the season.♥
I’m glad that you shared this. I remember bookmarking your post on the velvet pumpkins because they were so beautiful. Somehow I need to remember this about next September so I have them made in time for fall.
Where do you usually purchase your velvets? What type of velvet works best for this project? And now that I can save my pumpkin stems diy, I’m ready with several pumpkins on my porch.
Have a great day!
should I seal pumpkins stems after drying.
I AM using them for velvet pumpkins that I want to last year after year
Lynn, you can seal the stems if you like but I have never sealed mine and the stems on the pumpkins I made three years ago have not changed in any way and are still in good shape. As long as your stems are completely dried out, I think it’s probably more important that the pumpkins you make are packed away carefully in tissue paper, not crushed and stored in a dry location. That’s what I do with mine and the stems have been fine. Good luck with your creations and happy holidays.
I wonder if baking the stems would work as some do with pine cones & acorns before using them for crafts?
Hi Alicia, I’m intrigued by your idea about baking stems. I’ve never done that before but as long as it’s really low heat, I don’t see why that wouldn’t work just as well.
I may give that a try this year.
If you make the velvet pumpkins, do let me know how they turn out for you.
Happy day to you.
I tried it last night…. we have a very old gas stove, so the pilot light is always on….I put some stems on a pizza tray & put them in the oven without turning it on (it’s pretty warm in there). This morning, the stems are looking pretty good… the one that’s was pretty damp when I found it, is now almost dry. This would be a good idea if one needs stems this year. I’m now thinking of maybe antique waxing one of them to see how that looks. BTW, anyone looking for stems, check out your grocery store in & around the pumpkin bins… that’s where I found some!
Thanks, Alicia.
That is so good to now. I’m glad you updated me.
I may do another post soon about pumpkin stems and if I do, I’ll definitely mention this quick drying technique
I appreciate you taking the time to let me know that oven-drying works.
Happy fall season to you.
I once read about stems curling inward at the base while drying out. Have you ever experienced this?
Hi Susan, I’ve never had any issues with any of my stems curling.
I imagine that if your stems did end up curling a bit, it wouldn’t be a big problem.
It might actually give your project even more personality-lol.
Good luck and let me know how things turn out for you.
Thanks for posting this. I had been wondering about how to do this.
I have been looking online everywhere and I think you might be the only person that can help answer my two part question. I got poked twice by two different pumpkin stems when I was picking one out for my son to carve and now there are two small callous looking bumps where I got pricked. Now my question to you is has this ever happened to you, if so what did you do about it?
Great site for instructions but wondering if I need to seal the dried pumpkin stem with a clear sealer before make the cloth creation.
I have used real pumpkin stems for 3 years and have not had any problems with my stems which I glued onto cloth pumpkins. Also, I have stuffed mine with plastic bags and they still look new after three years (save money whenever you can).
Can’t wait to use my pumpkin stems from last year!!!
Has anyone every tried using a food dehydrator to dry pumpkin stems? I just “discovered” velvet and chinoiserie pumpkins and don’t have 8 weeks to wait to use them this fall for decorating.
Hi Donna, I don’t know about a dehydrator but I have dried pumpkins in a low heat oven before. I think the temperature was either 150 or 200-degrees for about 45 minutes.
Good luck with your pumpkins.
Also, did you see the chinoiserie pumpkins over at the Stone Gable?
Do NOT dry them in a microwave!! I tried it to remove a bit of fuzzy mold and they caught on fire, burning up our over the range microwave. A stinky and expensive lesson to learn. Oven baking has worked for me in the past. Add a little cinnamon for a nice scent while baking.
Oh, my. That is a good tip to know.
I never tried to dry mine in the microwave… and I definitely won’t try that now.
I love the idea of adding a bit of cinnamon while baking.
Thanks for the headsup.
Happy holidays to you.
Would love to buy stems from you.
Kathy Scism
876 East State Highway T.
Portageville, Mo.
Hi Kathy, I don’t have a stem supply to sell.
You may be able to buy them online via Etsy or even Ebay.
Years ago, I bought a small set on Etsy. That was before it occurred to me to try to save a few every year.
Also, make a note to yourself to ask your all your friends and neighbors to save their stems for you instead of tossing them this year.
That’s always a good way of getting a good collection for future use.
Good luck.
xoxo
I called every pumpkin patch/grower in our area and today went to harvest all the stems I wanted for 50 cents each. Call them it’s the end of the season and they still need and want revenue!
That’s wonderful, Deborah.
I love to hear stories like that.
Good luck putting your new-found stems to great use.
Happy holidays too.
xoxo