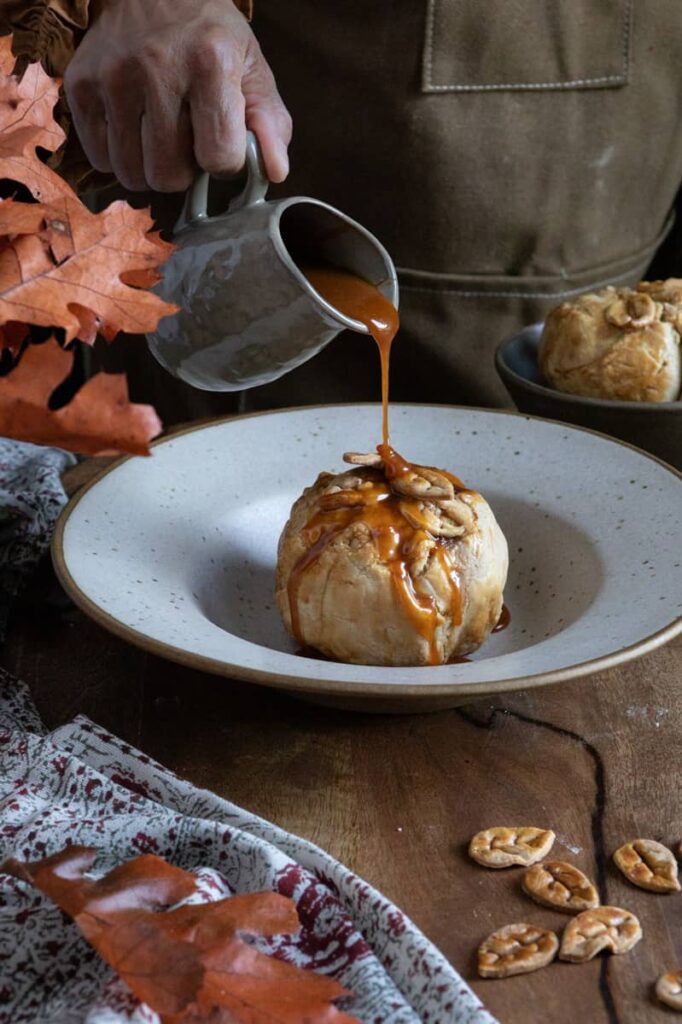
It may still be a bit toasty outside but inside, I’m already baking up delicious Fall treats.
If you love apple pie, you’ll enjoy making these pastry-covered baked apples.
And the delightful combination of textures and rustic flavors turns this into a must-make dessert this Autumn season.

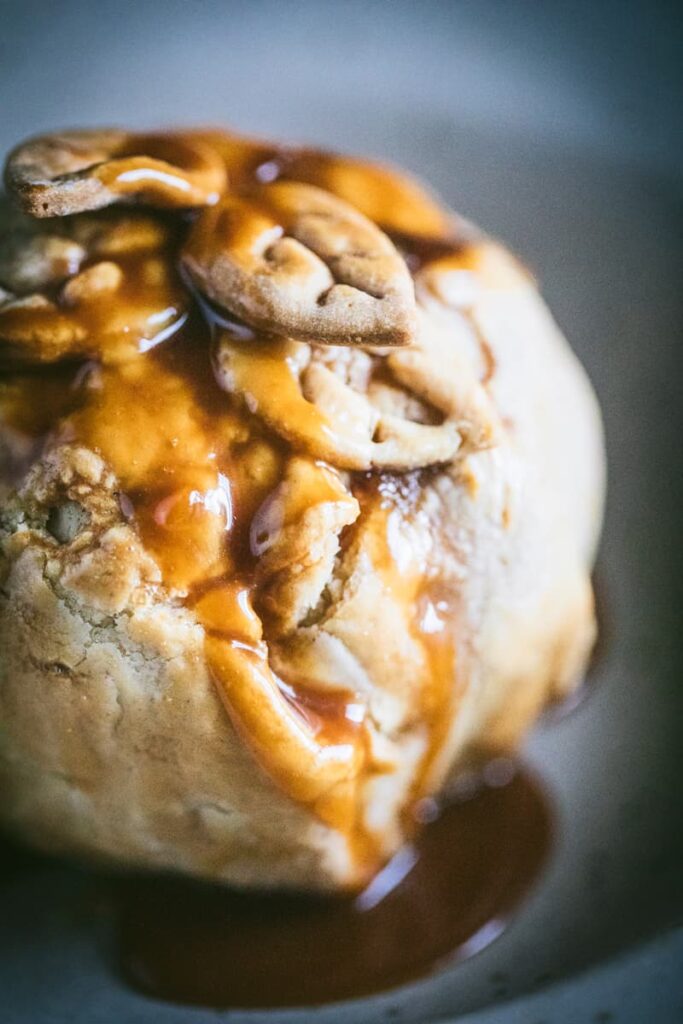
Ah, just look at that caramel drizzle. It’s so pretty and really helps elevate this dessert in more ways than one.
These pastry covered baked apples are more like individual apple pies in every dish.
Dive into this and you’ll get a spoonful of tender apple, with a mixture of sweet, spicy and nutty flavors, all complemented by flaky pastry.
This is definitely the kind of dessert that will make your dinner guests go, “Wow!”.
NOTE: Because this recipe contains walnuts, be sure you know whether or not any of your guests have any nut allergies. The walnuts provide wonderful crunch, but you can skip that ingredient, if necessary.

One of the many things I love about the Fall season, aside from gorgeous desserts, is that it’s also apple season.
My family and I love to visit our favorite apple orchard (Carter’s Orchard in Charlottesville, VA) for a day of harvesting and fresh mountain air. The orchard is situated on the side of a mountain and has the most magnificent views of the valley below it. Planted all along the vast rolling hills are hundreds of rows of lush trees, heavy with a variety of apples including, Gala, Golden Supreme, Honey Crisp and Pink Lady, just to name a few.
I snapped the apple pictures above during a visit a few years ago. Yes, I often pack and haul various props (and milking stools) for on-location shoots like this.
OK, let’s get back to the pastry-covered baked apples at the heart of today’s post.

You’ll need to peel the medium size apples and also core them.
I used a melon baller to scrape out the core. You could also use a small spoon.
It’s important not to core all the way through the bottom of the apple.
You’ll need a base to contain the yummy brown sugar, butter and chopped walnut filling which creates a sweet surprise inside every bite.

After the apples have been filled, they’ll each get wrapped in their own, cozy blanket of pastry dough.
When it comes to the pastry dough, here are a few things I’ll do differently the next time I make these.
- Roll the pastry dough as thin as possible without tearing it. My thicker dough made it a little harder to fold the pastry around the apple as neatly and uniformly as I wanted.
- Place the apple in the center of the dough and measure how much is actually needed to cover the apple up to the core. Then, trim any excess dough and wrap the apple. I didn’t do any trimming and that created even thicker folds.
- Use your hands to gently mold and smooth the pastry dough over the apple for a much rounder, less lumpy presentation.
Now, there’s nothing wrong with thicker dough, the dessert is still going to taste fantastic.
However, from an appearance standpoint (and you know I’m all about the visuals), I think the dessert would have looked even better if I had shaped and smoothed the dough over the apples, just a little bit more. I’ll definitely do that next time.

Time-Saving Dough Tip
I’ve included a recipe for a pastry dough below, but if you don’t have time to make it, here’s a fantastic and easy time saving option.
Just pick up a two packages of frozen, unbaked Double Pie Crusts from the grocery store (that’s 4 crusts total), allow them to thaw, roll each one into a ball and then, roll them flat before cutting your pastry shapes and leaves.
The ready-made pie crust is just as delicious, easy to work with and so much faster than making your own.

When rolling out the dough, be sure set aside some to cut the leaves.
I use small spring-loaded leaf-shaped cookie cutters to create the leaves. There’s a small punch at the top of the cutter that creates the impression of the leaves. You can find the cutter I used HERE, or elsewhere online.
It’s worth having a set of these cutters in your stash, because assorted leaf cutouts also look gorgeous placed around the rim of any Fall pie.
Of course, you can also cut your small leaves, free-hand with a paring knife.

I continue to work on my food-on-the-move videography. And I’ve included my latest Food in Motion video below for your viewing pleasure.
You can watch the video fullscreen within this post, or you can click and watch it over on YouTube.
If you opt to watch this video on YouTube, please consider subscribing to my channel, as I’m trying to grow my audience on that platform too.
Thanks so much for the sweet support and enjoy the video (and the recipe).
FOOD IN MOTION

Pastry-Covered Baked Apples
Ingredients
APPLES AND EASY CRUST
- 4 Apples (small or medium), peeled, partially cored
- 2-4 crust Make your own crust or buy pre-made frozen crusts. 2 crusts for a thinner apple wrap of 4 apples. Buy a second double crust package to cover extra apples, thicker dough wrapping and leaves.
HOMEMADE DOUBLE CRUST
- 2-1/2 cups All-purpose flour
- 2/3 cup Vegetable shorten
- 1 tsp Salt
- 6 tbsp Unsalted butter, chilled and chopped
- 1/2 cup Ice water, add teaspoon at a time, as needed
- 1 egg, for wash
- 1 tbsp milk, for egg wash
FOR THE FILLING
- 1/2 cup brown sugar
- 3 tbsp unsalted butter
- 1/2 cup chopped walnuts
- 1/2 tbsp ground cinnamon
- 1/2 tsp apple pie spice or all-spice
- 1/8 tsp nutmeg
Instructions
- Whisk salt and flour. Use food processor (or pastry cutter), to combine chilled butter and shortening.
- Add ice water one teaspoon at a time, until dough comes together. Pour out onto a flat surface and knead the dough into a soft ball.
- Cut into quarters, flatten each section into an oval shape. Wrap in plastic and chill for at least one hour.
- Lightly spray or grease a baking dish.
- Peel the apples and partially core them. Do not core the apple all the way through. You'll need a base to contain the filling.
- Melt the butter for the filling. Combine butter and brown sugar.
- Add chopped walnuts (or pecans) and mix. Add all spices and mix thoroughly.
- Gently spoon the filling into the center of the cored apple. Press lightly to ensure the cavity is full and tight. Place apples on greased baking dish and refrigerate until ready to wrap in pastry dough.
- Preheat oven to 375 degrees.
- Roll out each pastry section into a circle, as flat as possible without tearing. Place single apple in the center and gently drape it over the apple, making sure to cover the entire fruit.
- Use excess dough to cut out leaf shapes.
- Pinch at the top of the apple to seal the dough. Use hands to gently smooth dough over the apple.
- Whisk egg and milk to create a wash. This will give the dessert a lovely brown bake.
- Gently brush egg wash over the apple. Use the egg wash to attach dough leaves to the top of the apple.
- Bake at 375 degrees for 55-1:05 minutes, or until golden brown. Test the tenderness of the apple with a wooden skewer.
- Serve with vanilla bean ice cream, drizzled with salted caramel sauce (optional).

The brown sugar, butter and chopped walnut filling nestled inside the cored apple is sweet and lightly crunchy with a cinnamon aroma that just feels like Fall.
It all stands on its own, but you can crank the flavor factor even more with a caramel sauce drizzle.
Drizzle just before serving.
Meanwhile, if you love caramel as much as I do, be sure to check out these outrageously-delicious SALTED CARAMEL BITES.
It’s not too early to start thinking about tasty Fall gifts, and you can never go wrong with caramels. I’ve gifted many a box of homemade caramels and they’re always a huge hit.

Salted Caramel Sauce
Ingredients
- 1 cup heavy cream
- 1-1/2 cups sugar
- 2-1/2 tablespoons unsalted butter
- 1-1/4 teaspoons sea salt
- 1/4 cup water
Instructions
- Combine the cream, butter and salt in a saucepan and heat over medium heat.
- Stir continuously until the butter has completed melted. Remove from stove top and set aside on an oven mitt or trivet. Cover pan with tea towel to keep mixture warm.
- In another saucepan, heat the sugar and water on medium-high heat.
- Stir continuously until sugar has dissolved and has the color of dark amber. Watch carefully to prevent sugar from burning. It can happen in an instant.
- Pour the cream that was set aside early into the amber colored mixture.
- Stir to dissolve all contents until thick caramel develops.
- Serve caramel hot or allow to cool.
- Store in refrigerator in an airtight container for 1 week.

If you love apple recipes in the Fall as much as I do, you may enjoy a few other recipes that I’ve featured around here over the years.
Here are just a few of my favorites below.
FEATHER-ADORNED APPLE PIE The dough shaped feathers are as much the star of this pie as the pie itself. Beautifully presented, this pie will look stunning on any dessert table.
DOUBLE-DIPPED CARAMEL APPLES Decadent and gorgeous, these caramel apples feature dips and drizzles in both white and milk chocolate and topped with a generous roll in chopped pecans.
FLORAL APPLE HAND PIES These are the cutest little floral hand pies. Super simple to make and a great size for kids. Although, pie lovers of any age will love them too.
PINK LADY APPLE PIE Sweet apple pie recipe along with a short reflection on the therapeutic value of apple picking.

Oh, don’t forget that scoop of vanilla bean ice-cream.
I hope you’re inspired to give these Pastry-Covered Baked Apples a try.
Happy Fall, y’all, and thanks for popping by.
See you back here next time.

Lisa, we used to visit Carter’s Orchard every time we came to Charlottesville to visit our son at UVA. Being born in Connecticut, but now living in Phoenix, Arizona, I so miss going apple picking. For the 4 years he did his undergrad, Carter’s Orchard was one of our family’s favorite places. Oh how I miss it. The recipe looks delicious and anything with salted caramel is a winner. Can’t wait to try this. Will feature it on my Saturday Meanderings blog post. Thanks for sharing.
Thanks so much, Mary.
Yes, definitely try these apples. I think you’ll love it.
Oh, and be sure to add a scoop of vanilla bean-lol.
Small world, right? We love Carter’s Orchard too. Always good memories.
Enjoy your weekend and happy baking.
xoxo