
I hope everyone is ready for this start of Fall and all the fun recipes associated with this time of the year.
This may seem like an out-of-the-blue question, but have you ever tasted fig leaf syrup? Well, before creating this post, I hadn’t.
Throughout this post, I’m sharing my first-ever foray into syrup making, and how I created what turned out to be a lovely gift idea, especially as we head into the holiday season.
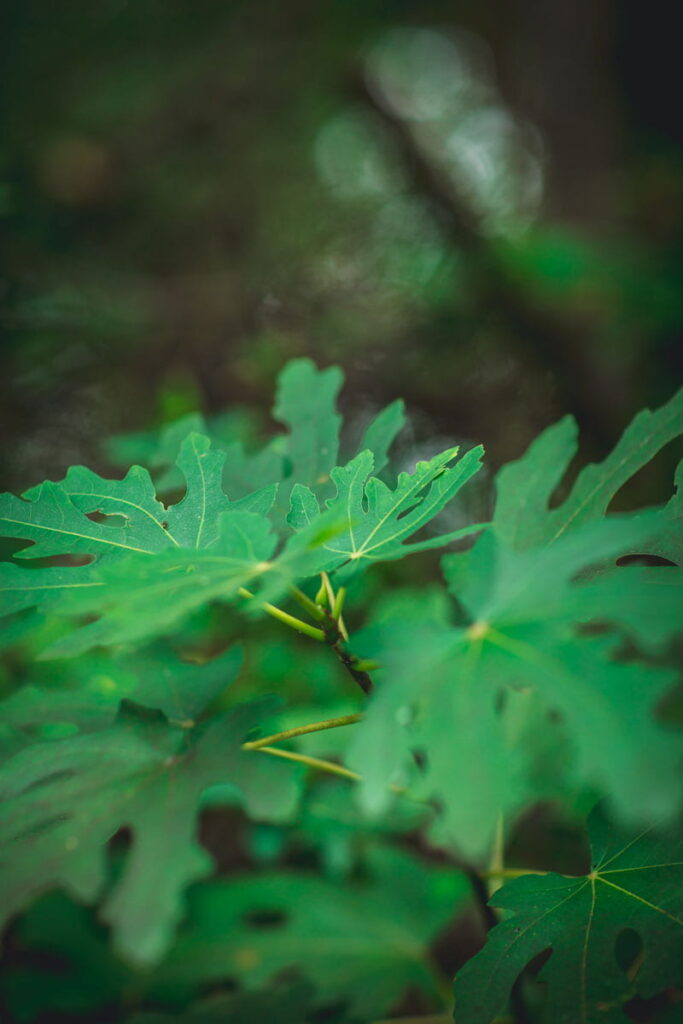
Fig leaves may come across as a minor supporting character to the all-important fig, but it turns out the leaves are hiding a little secret of their own.
Tucked inside those big lush leaves is a surprisingly delicious secret that is easily discovered in a few simple steps. Fig leaf syrup is an easy simple, but flavorful syrup and this recipe creates hints of coconut, toasted almonds and vanilla.
That’s a lot of flavor in one little recipe.

To make fig leaf syrup, of course, you need fig leaves.
I’m lucky that my mum has a beautiful fig tree growing in her backyard. She’s had it for many years and it produces the large, healthy and distinctly-shaped leaves.
Unfortunately, as lovely as these leaves are (and much to my mum’s chagrin), this mature fig tree has yet to produce any actual figs.
We’re still trying to get to the bottom of that. Every year, we say “maybe next year”.
Heads Up Before You Harvest
A word of caution here. When you cut a fig tree stem, a white, milky-like sap will drip from the stem. This white sap is a natural protection for the fig tree, but it can cause skin irritation or burning. Also, avoid ingesting the raw sap, or you could be in for a mild tummy ache.
While researching fig trees and syrup for this post, I read that folks with latex allergies may be especially susceptible to adverse reactions when coming in contact with the white sap from fig trees. So, you may want to consider wearing gloves when harvesting your fig tree leaves.
While I didn’t use gloves for my leaf harvesting, you may want to consider wearing a pair if you’re concerned about the sap.
Also, it’s always important to understand your own allergies (latex or otherwise), along with doing your own research if you have any questions about exposure to fig tree sap.
Once the leaves have been harvested and stems removed, wash them thoroughly in warm water to remove any dirt or residue. Repeat this cleanse a few times before laying the leaves out to slightly dry. Then, spread them out evenly on multiple baking trays.
Preheat your oven to 250 degrees, and bake the leaves for about 10-15 minutes. You’ll know the leaves are ready when the edges start to curl up, (kinda resembling kale).
Use a one to one ratio between water and sugar for this recipe, and use about 6-8 leaves for every cup added. I combined used 3 cups of water here, 3 cups of sugar and 2 cups of honey. The honey adds to the sweetness along with infusing a lovely amber coloring to the mixture.
Bring the water, sugar and honey to a boil. A small amount of foam may appear on the surface and it’s important to scoop off as much as possible to avoid a cloudy syrup.
Once the mixture comes to a boil, add the leaves and allow to simmer for about 30-minutes. Then, remove from heat and allow to cool completely. Refrigerate the syrup with the leaves overnight.
The next day, strain the leaves from the syrup.
Funnel the strained syrup into containers and seal before gifting to friends and loved ones. Keep syrup-filled jars refrigerated for 2-4 weeks.
Yeah, it’s that simple.
Fig Leaf Syrup
Ingredients
- 20 Large, fig tree leaves (@6-8 leaves for every cup of water)
- 3 cups water
- 3 cups sugar
- 2 cups honey
Instructions
- Remove fig stems from leaves.
- Wash the leaves thoroughly, and pat dry with a paper towel.
- Preheat oven to 250-degrees. Spread leaves out on multiple baking trays and bake for about 8-10 minutes, until corners begin to curl up. Remove leaves from oven.
- Add water, sugar and honey to a large saucepan. Bring to a boil.
- Skim off any foam that develops.
- Reduce heat, add the fig leaves to the mixture and simmer for about 20 minutes.
- Remove mixture and leaves from heat and allow to cool completely.
- Refrigerate syrup with leaves and steep overnight.
- The next day, remove mixture from the fridge and use a sieve to strain the leaves from the liquid.
- Funnel the syrup into storage jars.
- Decorate and embellish the jars for gift giving.
- Keep syrup refrigerated for 2-4 weeks. Discard after one month.
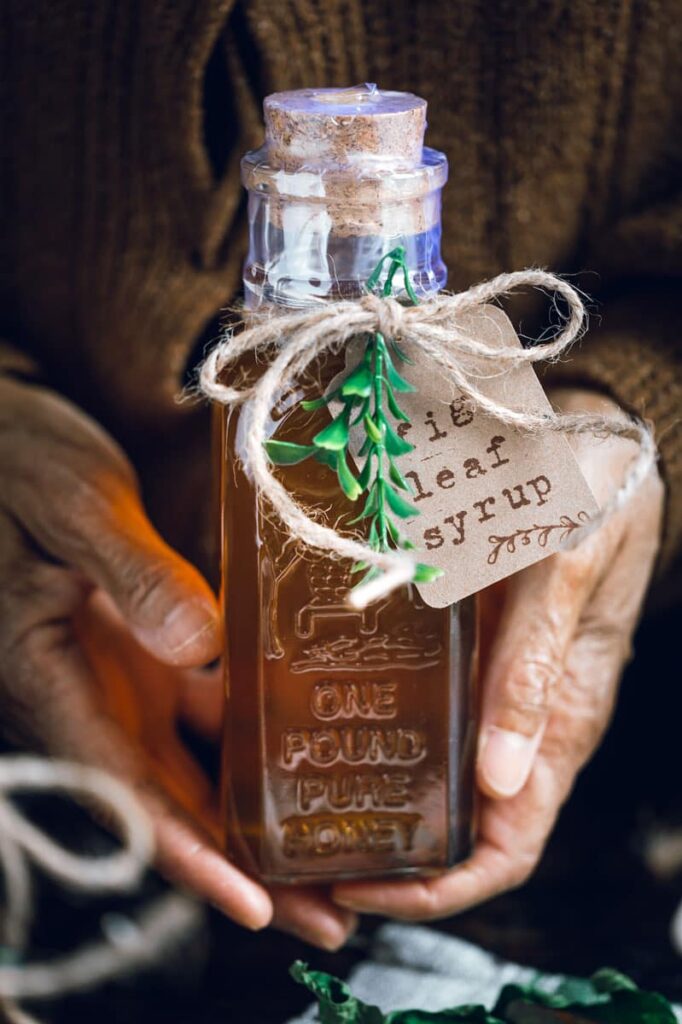
Now, let’s talk about these cute honey jars that I used to store this Fig Leaf Syrup.
You can find them HERE , and at the time of this writing, you can pick up a dozen jars for about sixteen dollars.
I purchased the cork stoppers separately, but you can also buy them via the link I just shared.
There are small plastic sleeves that can also be purchased and used to seal the jars after they’ve been filled.
Simply slip the plastic over the top of the jar and run hot air from a hair dryer over the plastic and it melts right over the jar. A small perforated strip on the side of the plastic makes for easy removal when ready.
I think these seals are a great way to give your gifted syrup an elevated, more professional looking finished touch.
Regular readers of my blog know my affinity and penchant for cute packaging. If gifting, these jars will not be complete with a little tag identifying the contents.
I embellished the tag with a little jute and used typewriter font rubber stamps for the lettering, which you can find HERE.
If gifting to friends, you just have to add a cute little homemade tag.
Meanwhile, I’ve come across a number of interesting ideas for putting fig leaf syrup to tasty use. Here are a few suggestions below:
- Add a tablespoon to sparkling water to create a flavorful soda.
- Use it in place of simple syrup for cocktails and mocktails.
- Drizzle it over an ice cream sundae or banana split to compliment other ingredients.
- Soak fresh peaches in the syrup right before placing the fruit on a grill.
- Add it to coffee, tea or other desserts.
Before closing out this post, allow me a quick departure to discuss jars. Yes. jars. I love gifting edibles and other goodies in assorted jars and I’ve feature quite a few around here over the years and here are a few below.
If you want to give the gift of homemade vanilla for the holidays, now is the time to whip up a batch because it takes a few months to brew. Easy to make and poured into slender jars for lovely gifting. You can find that recipe, HERE
Consider gifting homemade lemon curd in cute little jars too. That recipe is part of a post on lemon cheesecake and you can find it, HERE.
One final goodie in a jar featured on this blog are adorable animal crackers in the cutest mason jars, with a fun twist in my post, HERE.
Meanwhile, I hope you’re inspired to give this simple Fig Leaf Syrup recipe a try too.
Thanks for popping by.
See you back here next time.
xoxo
I had never heard of fig leaf syrup. And actually, for a number of years, this tree did produce edible figs. When the tree ceased to bear fruit, I was not interested enough to look into it. I think some nutrient might be missing in the soil. I will check to see if there is some soil amendment that will restore a fig harvest. Thanks for the recipe, nicely illustrated as always. I am looking forward to sampling it. Love, Mum
Thanks, Mum.
I’ll help you figure out how to get those figs back to growing.
xoxo