
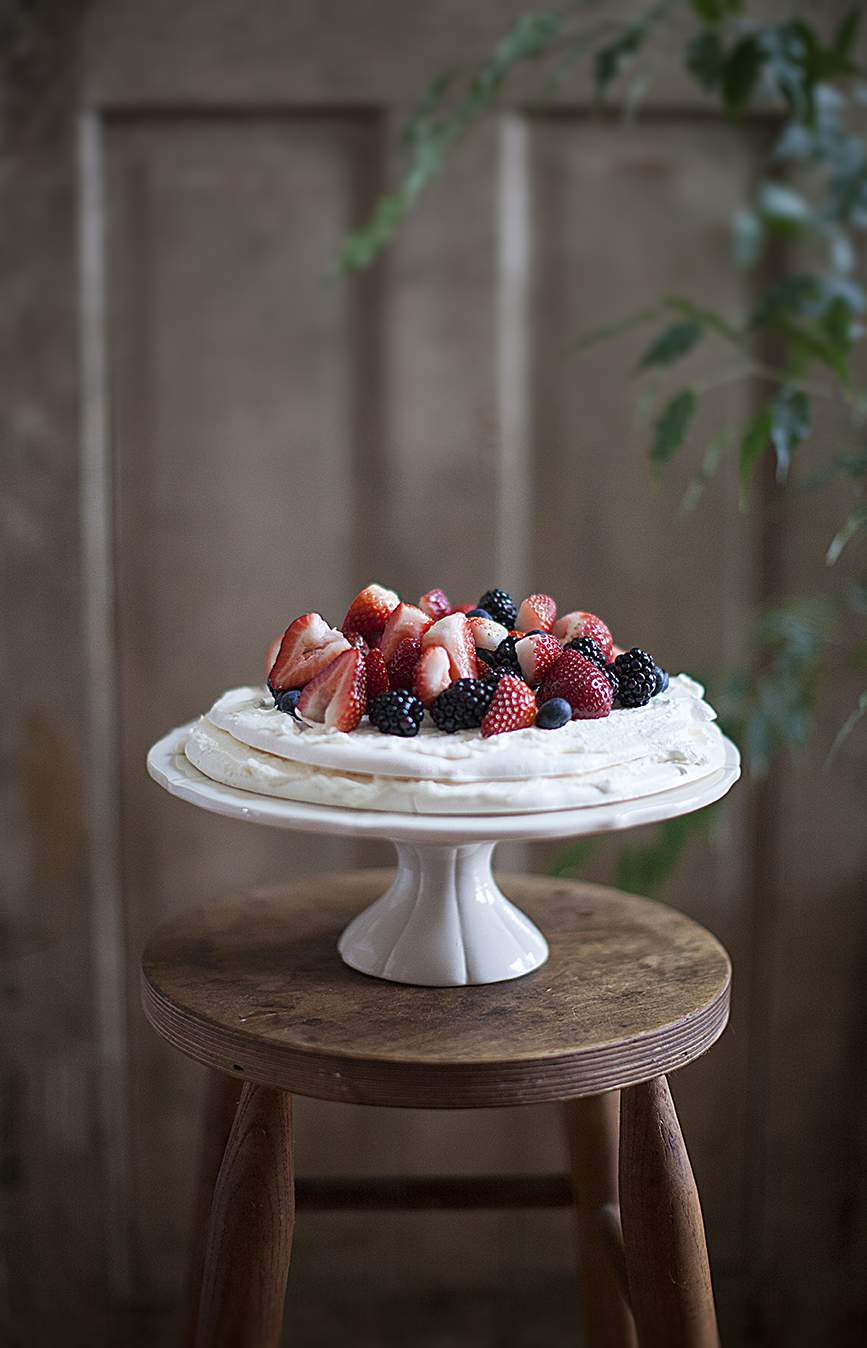
If you missed my Pavlova mini-dessert last week, I hope you check it out. It’s oh-so pretty. I used the same recipe for this Pavlova too but instead of making multiple minis… I made one big one.
As delicious as Pavlova is, it’s also an equally pretty and fun dessert to photograph because just about every shot looks tasty.
Throughout this post, I’ll share a few food styling tips and a behind-the-scenes look at how I pulled together this Pavlova photo shoot.
Even though my kitchen is in the back of the house, the best natural light streams into the front of the house, particularly the foyer.
That makes this area ideal for shooting much of my food photography.
Many a food-filled plate has been carted out to my foyer to pose for pictures.

My formal dining room is just outside the foyer and since we don’t use it that often, most of the time it serves as a temporary staging area for my backdrop boards, assorted linens and other photography props.
No need to let a room sit for the sake of sitting, right?
I’m a big believer in really using all your rooms in whatever way best suits you and your lifestyle.
OK, let’s get back to setting up the foyer for my Pavlova.
I picked up this old door at a vintage shop last year and it has wonderful coloring and texture on both sides.
The ficus tree seemed to be begging to be a part of it all so, I dragged it over just to add a little greenery to the framing.
The large white board in this shot plays a very important role in my setup.
It’s a simple dry erase board (less than $10 at Home Depot) and I use it to help bounce light directly onto my subject.
Keep reading… I have more details on using a white board to bounce light, later in this post.
Many photographers use a tethered method of taking shots where the pictures show up on a laptop as they’re snapped. I don’t have that kind of setup so I often use the LIVE-view feature on my camera.
This allows me to get a larger look at my staging because it shows up on the camera’s LCD screen as opposed to trying to make out everything in the small viewfinder.
You can read more about the type of photo gear I use in my FAQ page.
NOTE: I snapped this picture using my IPHONE.
By the way, I found this old-fashioned peg-leg stool at a vintage shop and I picked to use as a photo prop like this.
Be sure to keep your eyes peeled for similar odds and ends that you can use to enhance your pictures.
Sometimes, all you may see in a shot is a hint of weathered wood (or textured fabric) but they may be all you need to add a touch of unexpected character to the overall presentation.
Let me talk a little more about using white boards. I use white poster boards, foam core boards and the dry erase marker boards I mentioned earlier.
If you set up a white board directly across from your light source, it will bounce that light onto your subject and help illuminate any dark areas of the subject.
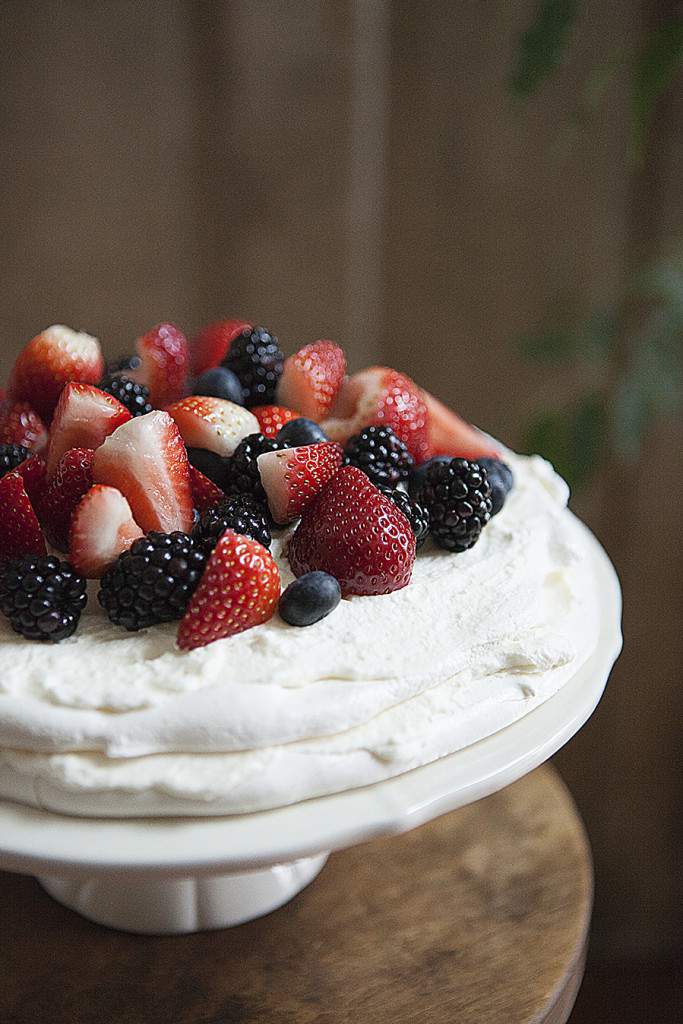
Also, by placing the Pavlova close to the edge of a white marble pastry board, and shooting it close-up, I was able to get a really clean presentation.
The white you see in the background of the Pavlova is just part of the marble board but because I got low and close to the subject, the background has that “infinity” look.
Overhead shots of food are really quite popular these days. Sometimes the best way to get that overhead shot is to just stand on top of your kitchen table as I did for this photo.
When styling food, I often take elements from the main dish and scatter them around the plate.
I think adding a few blueberries and strawberries around the Pavlova makes the final picture look even more appetizing.
I have to say that as important as props, angles and well-placed fruits and crumbs can be… photo editing can be just as valuable.
For a long time, I felt like using photo editing software was somehow cheating but thankfully, I’ve evolved from that viewpoint.
I think the most important thing to keep in mind when editing photos is to try to keep them looking natural, clean and not overly-photo-shopped.
NOTE: If you’re wondering how I tweaked this trio of Pavlova, I edited this shot in Photoshop for brightness, sharpness and vibrancy.
I started shooting the Pavlova a little late in the day and as a result, I began losing my ideal natural light before I was finished.
Well, when the light doesn’t come to you… you go to the light.
I just moved everything closer to the open front door to take advantage of the last remaining light.
Here’s a look at the big difference bouncing light can make.
The photo on the left was snapped with the dry-erase board off to the side of the plate. I think the difference in the light is most noticeable in the regards to the vertical shadows in the door and around the left side of the plate and chair.
I removed the white board before shooting the photo on the right and you can see the difference and how much darker the photo appears.
There may be times where you may want the darker more moody shot but at least this technique gives you more choice.
NOTE: I wrote a technique-post on dark and moody food photography and you can re-visit that post HERE.
Try propping up a white poster board in front of a plate of food across from a well-lit window. Notice the light and then remove the board. I think you’ll see the impact immediately.
Meanwhile, when using background wood boards and doors this large, it may be necessary to actually stand on the backdrop.
Just be sure to tread carefully so you don’t end up cracking your board (or door) it in the process.
I’ve certainly learned that the hard way.
Here’s a look at the final overhead shot.
To look at it, I think you’d never know this was a photo that was shot on top of a door, on the floor in front of an open front door… and that’s precisely the point.
No one needs to know.
I think if you play around and experiment with your food photos around your house (indoor and outdoors, weather permitting), you may be surprised by the great shots you can come up with.
By the way, if you want more photo styling tips, be sure to check out my behind-the-scenes posts for my cone cookie photo shoot and my cookbook cover shoot as well as the photography category on this blog.
Thanks for stopping by.
See you back here next time. ♥
All I can say is that this is totally amazing Lisa….I am saving/bookmarking this post so that I can go back and keep referencing this….Impeccable photography!!!
Thanks so much for your kind words Shirley. I really appreciate it. You’re sweet to give me the FB shout out too. Thanks for the support.
I agree with Shirley. I am also pinning this!! Thanks so much for all this info and inspiration!
Thanks so much, Pinky! Hope you try a few of my photo tips and let me know how they work for you. Thanks for stopping by.
Oh my, I so enjoyed this post. It was wonderful. I need to try some of your techniques, especially with the white board. Thank you!
http://doodlet.me/2016/02/the-ultimate-tip-for-getting-kids-out-the-door-fast/
Jeanne, please do try using the white board. I think you’ll be pleasantly surprised at the difference it can make. Thanks for popping by.
Wonderful post!!!
Thanks Doreen!
So, I am so glad that you stopped by my blog today because it brought me here. You are amazing. Everything looks so yummy. I’ll have to come back here for inspiration.
Thanks so much, Vanessa!
Thanks for all the great tips! Your photography is amazing! I will be on the lookout for more props and a white board!
Thanks Pamela! Yes, do get a white board in your stash when you can. Once you start using it, you won’t look back. It will definitely change your lighting.
Hi, Lisa,
KariAnne from Thistlewood Farms sent me.
I’ve spent the past hour (or so) reading many of your posts.
Dave walked in and I said, “Hey, Lisa says that if you find something you really like but don’t have any idea how you’d use it, BUY IT ANYWAY!” (OK, I may have paraphrased).
Dave: I like her already…that’s what I call “future repurposing’!
Thanks Suzanne! Dave sounds great. I’m going to borrow his line about “future repurposing”. I’ve needed an excuse like that for a long time and now I have one-lol. Tell him thanks from me!
Beautiful post! Even though I don’t have a blog or website and I’m not into food photos I found this post very interesting and fun to read. Only problem – it’s making me want to get a good digital camera. 😉
Love your website Lisa!!
Barbara
Thanks so much for the kind words, Barbara. Enjoy your Sunday!
Lisa,
I, too, found your site today via KariAnne of Thistlewood Farms. Your photography tips are fantastic, easy to understand, and have great examples of what you are saying. I pinned your collage to my Pinterest board about photography.
Judith
Thanks so much, Judith! Be sure to check out my “photography” section for more tips. I popped by your site and love the Bluebonnet fields post. I wish we had similar fields in my neck of the woods. I’m not sure why I was unable to leave a comment about that on your site. Thanks for stopping by.
You are such a sweetie for sharing your knowledge and tips! As I’ve said time and again it is “the great ones” that share and aren’t afraid of teaching. Thank you for all of your tips and I plan on using them once I get home. Have a wonderful day!!
Lisa,
YOU’RE AMAZING. Thank you for the tips, etc.
My pleasure, Elisa.
I’m glad to hear this may be useful to you.
Happy weekend.
first off I love your site and style….thanks for sharing you set-up. So helpful for people who are just getting started.
Oh, thanks so much, Jennifer.
I appreciate that.
Good luck with your photography and I glad to know that you’ve found some useful posts on this blog.
Happy weekend to you.