R egular readers of this blog know all too well, that I have a penchant for handcrafted packaging. It’s just too hard to resist taking ordinary goods and making them a bit more special.
Whenever I have to offer up treats or goodies to a group, I’m always compelled to dress up the offering.
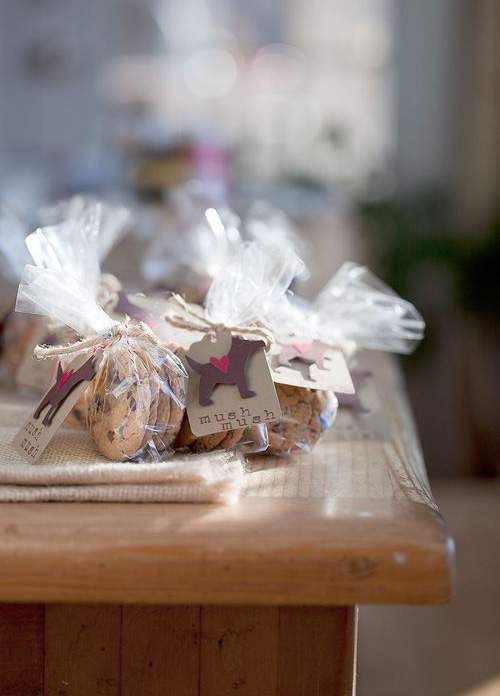
That was the case for these doggie treats.
Such is the case with these cookie treats that look so much better packaged like this than spreading the cookies out on a large platter.
Don’t you agree?
Before I walk you through this packaging project, allow me to share my inspiration behind it.
Seventh graders at my son’s school have been studying the Iditarod Dog Race. Teachers and several parents organized an Iditarod banquet for kids to celebrate the end of the race and hand out awards to the students whose designated mushers placed in the competition.
Parents were asked to donate goodies for the banquet and that’s where my doggie treats come in.
OK, let’s start with the tag construction.
This is always my favorite part of packaging goodies and the tags can be created in no time at all.
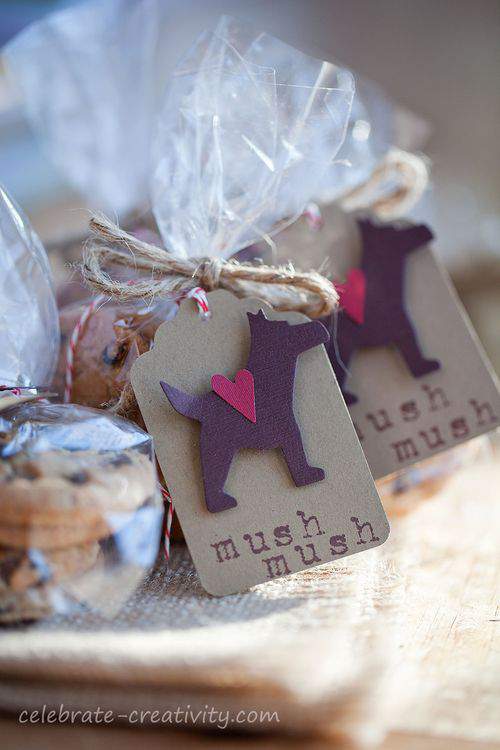
Grab some jute and Baker’s twine (#1-2), a tag punch and cardstock (#3-4), rubber stamp alphabet and ink (#5), heart punch (#6), and a doggie die cut (#7).
I also used small foam lifts (optional) to give the doggie cut out a bit of dimension on the tag. You’ll also need a small hole punch.
NOTE: The alphabet rubber stamps, tag punch and twine are all great tools to keep in your permanent stash. You’ll find a need for these materials over and over again for many projects.
I picked chocolate chip cookies because they really do resemble dog treats (albeit with chocolate added, which you should never feed to a dog).
Simply drop the store-bought cookies in those little baggies you can find in the baking section of most crafts stores.
Chips Ahoy cookies have definitely gotten smaller over the years so I put four cookies in each bag for good measure.
NOTE: Make sure you use the accompanying twist tie so the cookies can stay nice and fresh.
I tied a jute (burlap string) bow to cover the twist tie for a more casual appearance but any ribbon will do.
Use the stamp punch to create the tags.
Then, stamp a message onto the bottom of each one, punch a hole in the top and add a strand of Baker’s twine through the hole.
IDITAROD TRIVIA: The familiar term “mush” was adapted from early French dog sledders who used the word “marchent” which means march or get walking. When pronounced, the French word sounds a bit like mush and so it was soon adapted by English dog sledders who found “mush” much easier to say.
Glue a heart onto the doggie die cut and then use the foam lift to attach the dog to the center of the tag.
I just love adding tags to just about anything I bake up and gift. It’s just so much cuter that way.
Anyway, I ended up making about 100-tags.
Tie the tags around each baggie and VOILA, you’ve got adorable doggie treats for kids.
I ended up packaging more than a hundred baggies, handling more than 400-chocolate chip cookies and only ate two Chips Ahoys myself.
Talk about resisting temptation. Yay, for me.
Meanwhile, I thought it would also be fun to create a simple display for all the treats to add even more fun to the presentation.
If you buy bottle water, it’s a good idea to save a few of the cardboard cartons the water comes in. These are great for transporting treats.
First, I made up a small signs on the computer and added a few doggie die cuts to each one.
I matted each one with sturdy red card stock to give the sign more pop.
Enter my stash and tool box.
Grab a few old paint stirrers, a small hand saw, brown paint and a glue gun.
Cut the paint stirrers into thirds and then cover with paint on both sides.
You may need two coats of paint.
Use the glue gun to adhere the paint stirrers to the back of the cardboard water bottle box.
Allow glue to set completely.

Then, hot glue the bottom of one of the signs to the top of the paint stirrers.
Press gently so the cardstock is as flush to the stirrer as possible.
Use more hot glue (or double sided tape at this point) to attach the second sign to the back of the first sign.
This creates a double-sided display which will look good on any table and clearly identifies the contents of the box coming or going.
Fill the box with the treats and you have one doggone great display.
As you can see, this kind of display is super easy to make.
While these particular “doggie treats” were for human consumption only this time, you can re-visit a few of my previous doggie treat posts designed for the canines you love.
Click the following doggie-related links to see my Canine Catering Cookie Caper or Valentine’s Day is for the Dogs (too)
Meanwhile, consider adapting this Iditarod packaging and display concept and tailor it to suit your next school event, bake sale or fundraiser.
It’s a presentation that will be sure to prompt a smile (and maybe a bark) with every bite.
Woof, Woof. ♥

WANT MORE INSPIRATION?
Pop over to Bonnie And Trish’s Funday Link party over at Uncommon Designs. You’ll love all the creativity featured at Megin’s linky at VMG 206 too.


Lisa, those are fantastic and I always look forward to your packaging ideas. This past Christmas was my first Christmas with an empty nest. My daughter (who will be 24 next week) had moved back to California. Since I was unable to put together her Christmas Stocking I chose to do 25 days of Christmas. Small home baked gifts, gift cards, her nativity set when she was a child, Christmas CD (she loves The Rat Pack) etc, anyway, your packaging inspired me to make each one of those little gifts special and beautiful to look at.
Very cute!
So cute! What a fun little package.
I visiting from Monday Funday. I hope you can stop by my blog and leave a comment and Link Up!
~ Megin of VMG206
http://www.vmg206.blogspot.com
Do you happen to have a link to the dog die cut? I can’t find one anywhere.
Hi Laura, I found the die cut on Ebay and I sent you a link via your email.
Have a lovely day and thanks for popping by for a visit.
xoxo