
April showers, bring May flowers, right? They also bring lovely lavender, and in this case, lavender sugar cookies.
While I featured Bunny and Carrot Sugar Cookies last month, I couldn’t resist sticking with a cookie theme this time around. These edible lavender blooms are just so darn pretty, I had to share them with you.
Throughout this post, I’ll show you how I made these lovely florals, and I’ll also take a deep dive into royal icing tips that will help make your lavender blooms hold and shine.
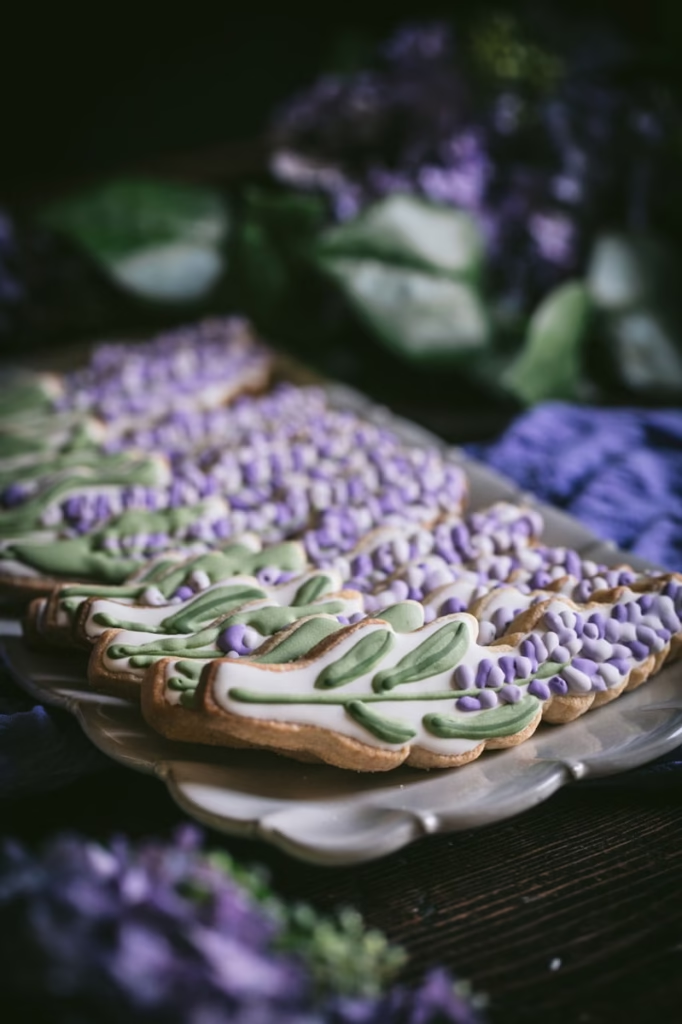
Homemade sugar cookies shaped and decorated like lavender flowers are a true feast for the eyes and the taste buds.
Delicately iced in soft purples and greens, these cookies capture the elegance of spring in every petal.
Almost too pretty to eat, right? Don’t let that stop you.

For years, I used to use metal Wilton piping tips for cookie decorating. But I’ve found using disposable piping bags simplifies the effort and there’s no mess to clean up when done.
Don’t overfill the bag with icing or it might be too difficult to navigate small details. Snip off a very small piece of the disposable piping bag at the tip, and decorate straight from that opening in the bag.
You can find the disposable bags I used online, HERE.
I try to mix up all the icing colors that I’ll need for the cookie at the same time. Remember, a little gel coloring goes a long way. Always add a small amount of gel to your base color first. Then, add more color as needed to build up a darker shade.
If the decorating is going to be spread out over a few days, you can refrigerate the icing-filled bags or even freeze them until ready to use.
You will need to allow frozen icing bags to sit at room temperature for about 45 minutes after removal from the freezer before using, or remixing.
Icing consistency can be a tricky thing and I’ll admit, it took me a bit of practice to finally figure out what works best.
The consistency you create will depend on what part of the cookie you are decorating. If you’re flooding an area with icing, like creating the base coat on a cookie, you’ll want a more fluid consistency.
This post is primarily all about royal icing and you can find the sugar cookie recipe I used, HERE.
Tips for Icing Consistency
To test the fluidy, simply lift the mixing spoon and allow the icing to cascade back into the bowl almost like ribbon.
The faster the ribbon disappears/melts back into the icing, the more fluid the icing will be.
When I flooded these cookies to create the white background base, I knew the icing was ready when the ribbon melted back into the bowl almost immediately.
Remember, only mix the icing enough to blend the desired color. Overmixing can introduce unwanted air bubbles that may impact the stability of the dried icing.
You can see quite a few air bubble in the photo above and I should have popped them. You’ll see further down in this post, why it’s so important to eliminate air bubbles in the icing before piping the cookie.
Meanwhile, for more detail decorating, you’ll want a much thicker consistency. The icing should be more like a soft peanut butter for detailing. This will help ensure your individual fine details (lavender petals in this case), are firm, will stand where they are piped, and won’t melt down and bleed into adjacent petals.
TO THICKEN ICING: When mixing icing, keep a good amount of plain, un-tinted icing on the side to use to thicken the icing, if needed. Instead of adding more confectioner’s sugar, add more original plain icing. This helps prevent creating disproportionate amounts of ingredients that could impact the overall flavor of the icing.
TO THIN ICING: Use a spray bottle to lightly add water to your icing in order to thin it. Spray into the bowl right on top of the icing and then, gently mix to test for consistency, adding more sprays of water, as needed. Using a spray bottle is a great way to add more even distribution of water.
The icing I use dries hard enough to tap without collapsing, but still soft enough to easily bite into.
I decorated these cookies in layers and stages over two days. The first layer was a base coat of plain white icing which served as the background.
Then, I refrigerated these frosted cookies overnight to give the icing a chance to really firm up or crust over before adding the lavender petals, stem and leaves.
A slight difference in shade is all you need to help highlight small details.
For example, I mixed up two shades of green for the leaves. I used the same gel color, but I added a few extra drops to increase the intensity of the green for the detailing.
You can see how the darker veining in the leaves pops against the lighter color of the leaves in the above right photo.
By the way, if you’re interested in this lavender cookie cutter, you can find it via Brighton Cutters, HERE.
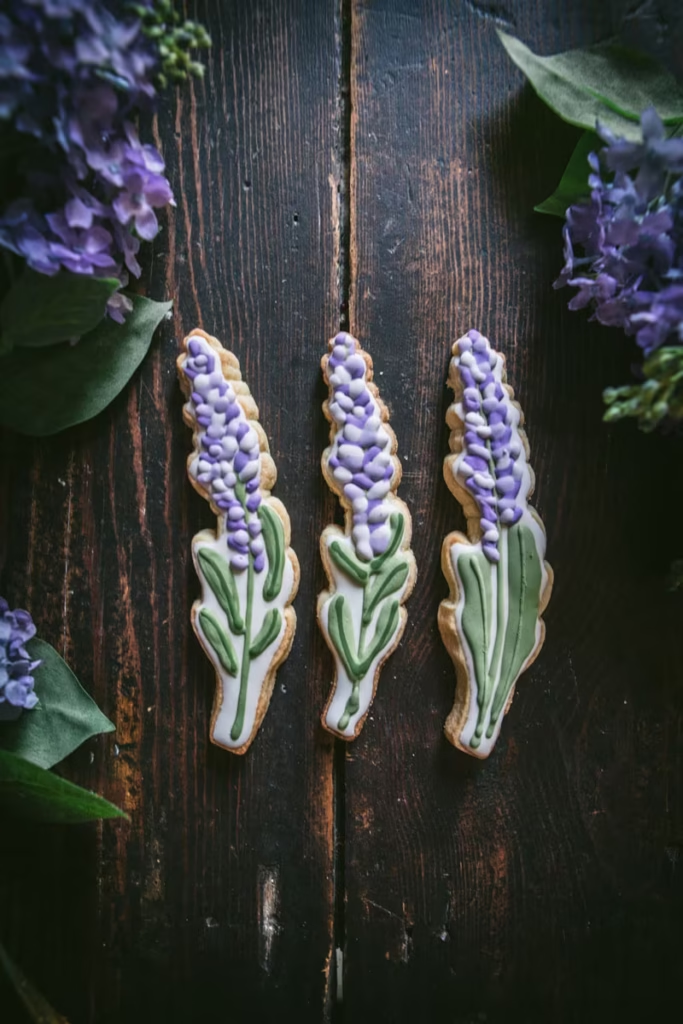
When using this cookie cutter, I suggest piping the stem and leaves first. Then, add the lavender petals. And don’t forget to dip the cutter into flour before pressing into the cookie, to avoid dough sticking to the cutter.
On several of these cookies, I piped the petals first and took them too far down the stem line, which prevented me from piping full leaves (which are outlined by the shape of the cutter). The full leaves (versus a sliver of leaves), look so much better and help ensure these cookies have that distinct lavender look.
ROYAL ICING RECIPE
Ingredients
- 32 ounces confectioner's sugar
- 4 tbsp meringue powder
- 3/4 cup water, room temperature
- 2-1/2 tsp vanilla extract
- 4-1/2 tbsp light corn syrup
Instructions
- Mix the meringue powder and the water until bubbly and frothy in a stand mixer.
- Add all the confectioner's sugar and mix until smooth.
- Add the vanilla extract and corn syrup and mix until you get the desired consistency.
- Reserve some of the icing and set aside to use to thicken other colors later, if necessary.
- Determine what colors you want for your cookies. Separate mixed icing into the same number of bowls.
- Add desired gel coloring to each.
- Test the consistency for the desired decorations.
- Spray water to thin, or add more original icing to thicken.
These cookies are perfect for garden parties, bridal showers, or simply celebrating the beauty of homemade artistry.
They’re fun to make and look so pretty all lined up like this.
Imagine what folks would say if you walked into a room carrying a tray of these lavender colored treats.
Avoiding Sinkholes
Every once in a while, icing fails and you learn a big lesson. Notice the tiny sinkholes in the petals in the photo above? My daughter said the little holes gave her goosebumps and she couldn’t bear to look at them. Yikes!
This is what happens when air bubbles are in the icing. Overmixing traps excessive air in the icing leading to air bubbles that can eventually pop during the drying process, causing sinkholes like this.
The best way to avoid this is to make sure you pop any bubbles in the icing and of course, don’t overmix the icing to begin with.
The small holes don’t impact the taste of the cookie, but it definitely impacts the appearance of the cookie (and in some case, may cause goosebumps-lol).
Gifting Sugar Cookies
You can’t just make these pretty cookies and keep the to yourself. They’re made for sharing and gifting to the cookie lovers in your life (including your neighbor’s kids, who’ll love them).
It doesn’t take much to add a special touch to packaging your cookie gifts.
Simply add a matching ribbon and a handcrafted gift card and you’ve instantly elevated the offering to boutique quality.
You can find the plastic baggies in the baking aisle of your crafts store or online. Because these lavender cookies are so slender, I was able to package two cookies in a narrow pretzel stick baggie. Perfect fit.
Regular readers of this blog, know I’m big into presentation of edible gifts.
These would look just as cute in a gift box or a lovely tin.
There are endless possibilities for adornment.
I think I’ve just about covered what you need to make these Lavender Blooms and perfect royal icing.
I hope you’re inspired to give it all a try.
Thanks so much for popping by.
See you back here next time.
So beautiful! Even the bubbles 😉
Thanks, Candace.
Oh, I appreciate that. Those bubbles caused quite a stir around here-lol.
So nice to hear from you.
Hope you are well. Hi and hugs to Phil.
xoxo