
If you’ve ever admired those large antique, rustic stone vases and vessels (or even small ones), you’re going to love this post.
You may be surprised to learn that you can actually create the look of stone yourself with just a handful of supplies and for a lot less money too. And this could be a perfect gift for upcoming Mother’s Day.
So, with that in mind, let’s get stoned, so to speak.
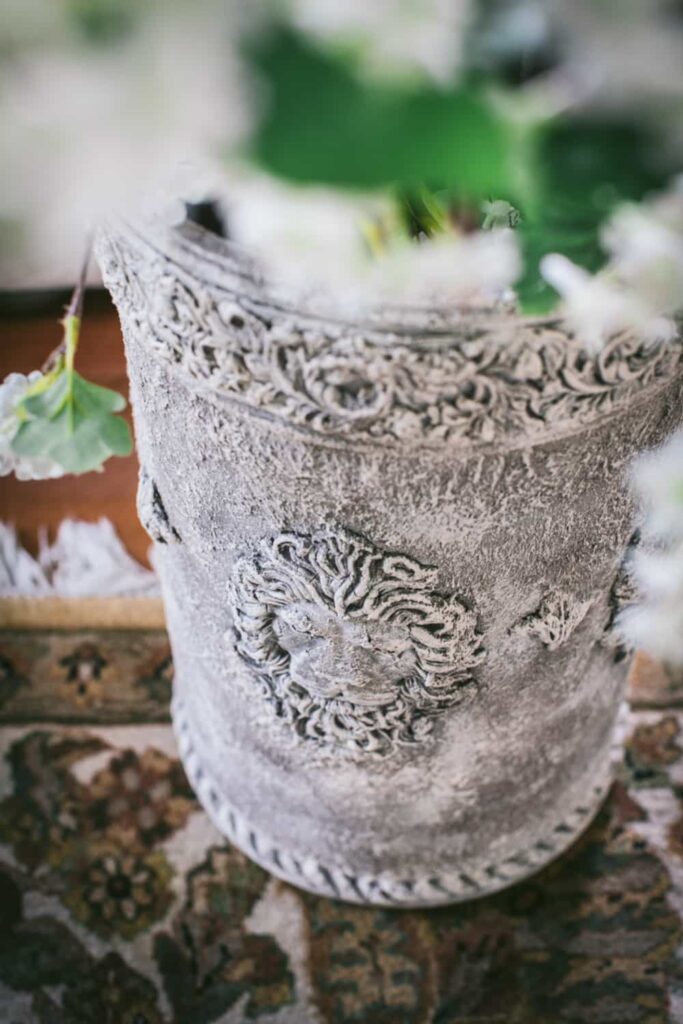
This looks like real stone, right? Fooled ya. It’s definitely not stone, but no one has to know.
Throughout this post, I’ll walk you through how to create this same faux look on just about any surface.
And be sure to check out the video halfway through this post, which features a second faux stone project using small herb pots.
First, take a look at what this old umbrella bucket used to look like before I targeted it for transformation. Big difference, right?

Once you’ve settled on a container, be sure to give it a good coat of primer first on the interior and over the entire exterior.
This will help the paint and clay castings adhere to the surface, basically giving you a blank, clean surface to work with.
For the record, I did love the original delicate design on this container, but I was eager to try out the stone technique and this was what I had on hand. No regrets.
At the heart of this project are the beautiful castings affixed to the container, created using silicone moulds and air dry clay.
There are lots of different types of clay you can use. I like to use air-dry clay because as the name suggests, no need to heat it or run it through any type of special process other than allowing the air to dry it out overnight.
Once the clay has been pressed into all the nooks and crannies of the mould, carefully peel the mould away to reveal the casting.
Apply a small amount of glue to the back of the casting, and gently put it in place onto the primed surface. Give it a soft press around the edges to make sure the casting is attached all the way around.
Now, you will most likely see some cracking in the casting as it dries and that’s OK. Cracks can generally be fixed (sorta) later, or left as-is. I have more on that further down in this post.
On a fun side note, when referring to these silicone designs they’re called moulds and molds interchangeably. The spelling is typically determined by region, with “mold” is standard spelling for American English, and “mould” preferred in British English.
It’s best to brush a small amount of cornstarch into the mould crevices before using it to prevent the clay from sticking to the silicone crevices.
This is especially important when using more fine detailed, intricate designs.
You may need to hold on to the edge of the casting to help release the entire design from the mould. Just take your time.
When working with multiple castings, be sure to mark your container lightly so that all the pieces line up evenly and consistently for a more polished finished look.
By the way, air dry clay dries out fairly quickly so, it’s important to keep any unused clay sealed and wrapped to keep it soft and pliable for future use.
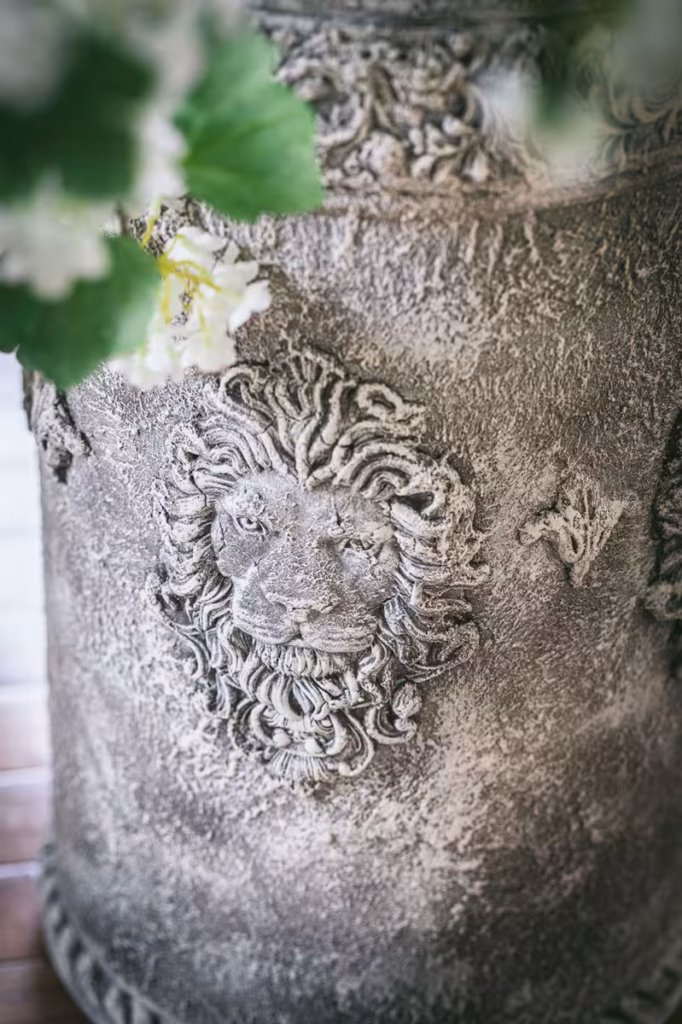
When I first started adding the dark color to the lion’s face, I thought the entire design would get lost in the darker color. Not to worry when you see this happen.
This can look a little scary, but trust me, the image will reappear as you go through the additional steps involved with adding the color and texture.
Trust the process.
The magic happens when you start to add texture to this project.
Texture is created when baking soda is combined with the the paint, which creates a soft chalky thickness that mimics the porous, slightly uneven surface of real stone.
Typically use about 2-1 ratio of paint to baking soda. Just stir the two to until you get a dense, spreadable paste-like substance. I used a stippling brush to dab the paint on, creating small peaks in the process.
The ideal texture won’t fully develop from a single coat. You’ll have to build it up with additional layers, allowing each layer to dry before adding the next. Take your time for a more successful end result.
No need to hurry or worry about perfection because the uneven nature of the technique lends itself for a more natural stone look.
Allow the layers to dry naturally. Don’t place in direct heat or a heat source or you may risk extensive clay cracking. Slower drying gives the materials time to bind properly and reduces the chance of flaking off later.
If you see cracking in the casting after full drying, you can sometimes repair it by pushing small slivers of clay into the cracks. They’ll get covered up as you continue through the paint/baking soda application.
In this case the cracking that occurred across the lion’s face didn’t bother me at all. I think it adds more character and gives the face that much more of an aged, rustic look.
Once the paint/baking soda layers are fully built up, adding another layer of contrasting color brings the stone alive. It’s important that you use a very dry brush for this step. In this case, I lightly brushed a cream color on top of the dark brown texture to make the lion face really pop.
Dip the brush in the color and off-load most of it onto a paper towel so there’s barely any color on the bristles.
Then, gently brush the surface of the project with the dry brush. Again, color is built up over layers. Repeat this dry brush step until the desired coloring is achieved.
I’m sure you’ve seen plenty of stone vases and pots at various stores and online.
Well, the screenshot below is an example of just how pricey these vessels can be.
I think with the right moulds and the right container, you could easily create a similar garden pot for a whole lot less than 12-hundred dollars.
Now, that’s inspiring, right?
Before moving on, allow me a quick departure to share another faux stone project using small terracotta pots.
I created this trio of herb pots (photo below), as a gift to my garden-loving daughter.
All three pots here are primed and ready for the next steps, and you can see the complete project and transformation of these mini pots in the Crafting in Motion video a little further down in this post.
The moulds I used for this herb pot trio project include: Dewdrop Pond by IOD and Fresh Foliage by Imaginarium Moulds.
As you’ll see in the Crafting in Motion video below, the same faux stone technique produces a vintage, aged look that elevates very simple pots.
NOTE: On the project featured in the video below, there is an added technical step that was NOT needed for the umbrella bucket project. After adding the stone-like texture and allowing it to dry, I brushed on a layer of clear wax. Then, I added a layer of darker wax which was easily rubbed off to create the desired amount of vintage-looking color contrast. But you have to add that clear wax first. These waxes are available at most crafts store.
Crafting in Motion
Important Tips When Painting Pots
Now, let’s get back to my umbrella bucket project. Here’s another look below at where we started with this transformation (left photo), and where we ended up (right photo).
One critical note, be sure to apply the same technique to the inside of the vessel and/or any area of the vessel that will be exposed when finished, in order to maintain a full and consistent stone-like finish for the whole container.
I didn’t paint that interior area just inside the rim before snapping these photos, and the color and texture differentiation is very visible and a dead giveaway that this container isn’t true stone. It’s important to also cover these upper interior areas with the same paint and texture application.
Also, it’s a good idea to seal your vessels with a matte spray for greater durability and longevity. This is especially important if you plan to place any of your pots outside where they might be exposed to moisture or natural elements.
Moulds Used For This Project
All of the designs I used for this container project are from a company called Iron Orchid Designs. Their website doesn’t sell the moulds directly, but you can buy them via various stockists, particularly on Etsy.
Click a few of the links below to get a closer look at the intricacy of these beautiful designs.
Leonidas: This is the lion head that I think is the real hero of the entire project.
Acanthus: I used this mold for the small fleur de lis pieces that sit between each lion head.
Trimmings-2: This mould includes several trims, including the rope design used on the bottom edge.
Trimmings-4: This is the 2-inch scrolled border that is attached to the upper part of the container.
Other Uses For These Moulds
Regular readers of this blog may recall I used similar moulds to craft Ornate Ornaments, and you can see that previous project, HERE along with a step by step video tutorial.
Over the last year, I’ve been slowly building a small collection of beautiful silicone moulds and it’s been fun finding new, creative ways to put them to good use.
Trust me, you won’t be able to stop at just one mould.
That’s similar to the way I feel about collecting Springerle moulds, for Springerle cookie making, but that’s a different story.
Interestingly enough, these particular IOD moulds are also advertised as food safe.
While I imagine they could make for some fanciful sugar cookie designs, I have yet to try using any of these moulds for anything edible.
I’ll definitely add decorative cookies using these moulds to my list of things to try soon.
Allow me to share one final project using this same technique and a glass vase.
I wanted to let you know that this same kind of project can be applied to glass, as in this new vase below.
Be sure to prime the glass and then, run through the same steps to turn glass into faux stone.
Hard to believe this started out as a glass vase, right?
So, are you ready to start looking around your home for pots, glass and other containers to transform into faux stone vessels?
I hope you’re inspired to give this easy technique a try.
Thanks so much for popping by.
See you back here next time.
xoxo
Leave a Reply