
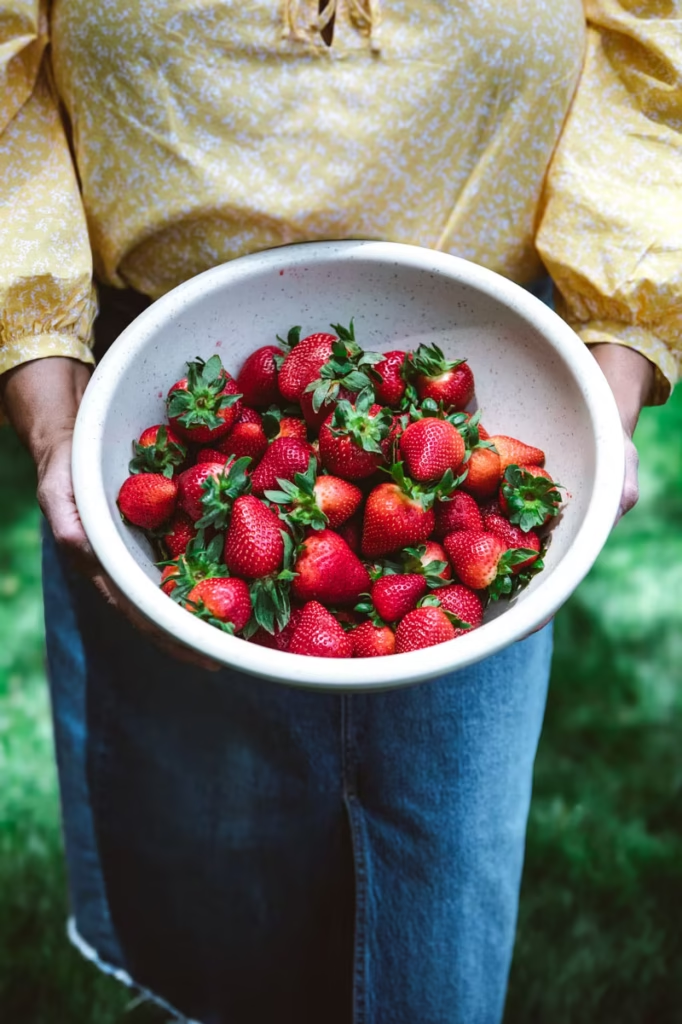
I think strawberries are the very essence of summer. They’re plump, vibrant and bursting with seasonal flavor. And they give you a look that practically begs you to transform them into something just as delicious.
That’s where strawberry jam comes in. Throughout this post, I’m sharing my latest foray into jam making and I dare say, I’m already a little hooked.
You may be too, after reading on.
I’ve decided. Jam is going to be my jam all summer long.
I’ve already started eyeing other fruits while in the produce aisle with thoughts of ,“That peach looks jam-able” and “fig jam sounds good”, not to mention, “is green grape jam even a thing?”.
I’ve made multiple batches in the last few weeks and the joy has me wondering if I’m not too far away from starting my own little jam empire.

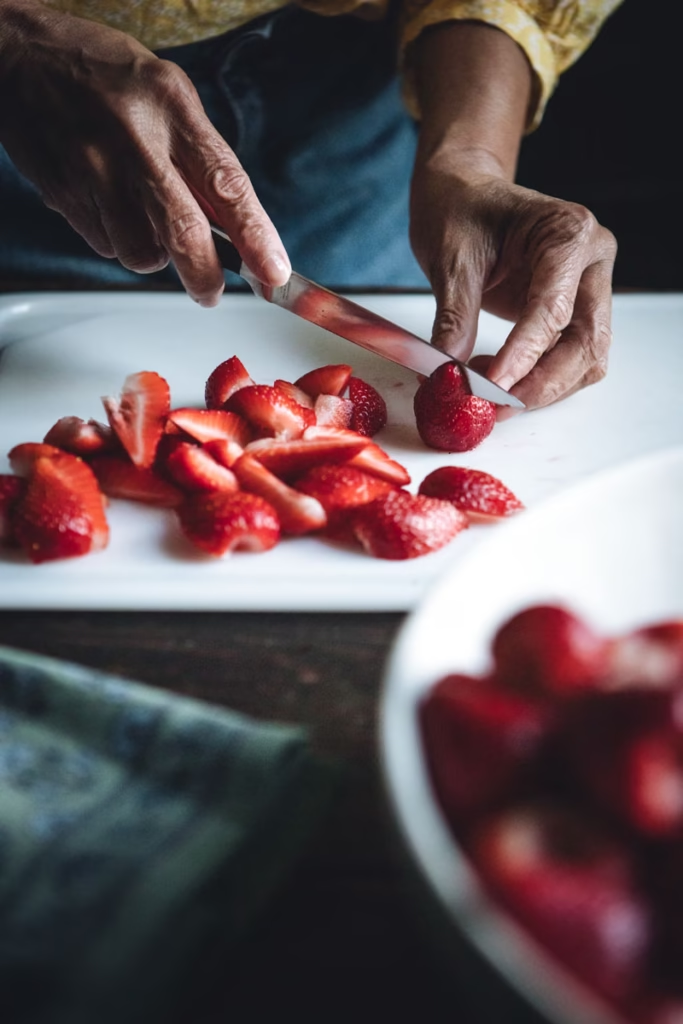
Anyway, before any of that, I started with clean, topped and sliced strawberries, and a comfortable potato masher.
Whether you’re making jam for the first time or it’s a beloved seasonal tradition, there’s no denying its charm.
It’s not only a celebration of summer, but also, a nod to simpler times, and a sweet reminder that a little bit of sunshine can be tucked into a jar, with your own hands.
The recipe and a full video are just a few steps further in this post.
By the way, Granny Smith apples are used in place of store-bought pectin and I also used quite a bit of granulated sugar.
There are tons of recipes online that feature low-sugar measurements if you prefer.
You’ll need a large, wide-mouth pot to cook the strawberries down, and if you have a copper jam pot… even better.
Now, let’s take a moment to extoll the virtues of copper pots. Oh, the glory!
Sure, copper pots conduct heat beautifully and helps to reduce scorching.
Somehow, once that copper pot is on my stovetop, I’m suddenly no longer making just jam… I’m starring in my own cooking show. Of course, I get bonus points for donning a perfectly crisp linen apron too.
Making strawberry jam is the one time in life when standing over a bubbling cauldron feels wholesome and not at all suspicious. The mixture slowly transforms from simple fruit into a shimmering ruby concoction, thick and glossy
And when it does, if you let out a little cackle of joy, well, that’s totally normal. Encouraged, even.
Food in Motion
Meanwhile, I continue to work on my food-on-the-move videography series, and I’ve included my latest Food in Motion video above featuring this Strawberry Jam for your viewing pleasure.
You can watch the video fullscreen within this post, or you can click over and watch it full screen over on YouTube.
If you opt to watch this video on YouTube, please consider subscribing to my channel, as I’m trying to grow my audience on that platform too.
Strawberry Jam
Ingredients
- 6 lbs topped and chopped strawberries
- 6 cups granulated sugar
- 2 medium Granny Smith apples, peeled and grated
- 4 tbsp lemon juice
Instructions
- Place clean mason jars and caps into a large canning pot and bring to a boil. Turn down the heat and allow to simmer for about 10 minutes.
- This step also insures that hot jam is ultimately poured into hot jars.
- Thoroughly wash, top and cut strawberries.
- Use a potato masher to mash and mush the strawberries.
- Peel and core apples. Grate them and add to the mashed strawberries.
- Place a small saucer in the freezer for a set test.
- Add lemon juice. Mix well and cook on stovetop on medium, continuously stirring.
- Allow the strawberry mixture to develop a rolling boil and continue to stir.
- Crank up the heat a bit and allow the strawberry mixture to boil for about 25-30 minutes.
- During the boil process, the jam will rise bubble up in the pot and a pink foam will develop. Keep stirring to bring the bubble down.
- Use a thermometer to determine the temperature of the mixture. Once it gets to 217-degrees, perform a set test.
- Scoop a small amount of the jam onto the frozen saucer, and run your finger through it to create a small path. Place the saucer back into the freezer for 5 minutes. If the jam path is still clear, the jam is set and you can remove the saucepan from the stove.
- If the jam is runny on the plate, boil the jam for another 5-6 minutes on high and repeat the set test.
- Skim off as much of the pink foam as possible, or you'll end up with a very foamy jam.
- Remove jars from hot water and place on a tea towel next to the jam pot.
- Use the wide-mouth funnel to add the strawberry jam into the jar, leaving about a 1/4-inch clearing on top.
- Once the jars have been filled, use a skewer or the air popper to run through the side of the jam to remove any air bubbles.
- Place the mason jar caps on top of the jam-filled jars and barely screw on the rim with a very light touch.
- Use the tongs to gently lower the jam back into the hot water and boil for about 10 minutes. Then, allow the jars to sit in the water for another 10 minutes before removing them from the water.
- Set the jars on a tea towel and allow to cool. The jar rims will be very loose and once cooled, go ahead and screw the rims on firmly.
- This batch will yield about a dozen jars but you can also cut it in half for a small batch.
- Label jars to identify the contents and the date created.
- Adorn and gift to the jam lovers in your life.
Canning jam is its own reward.
Pouring the hot mixture into gleaming jars, wiping the rims, and twisting on the lids feels like bottling up a little piece of the summer season that will last long after the last strawberries are plucked from the vine.
Seeing rows of freshly sealed jars lined up on the counter is enough to make any heart happy. It works for me.
Favorite Jam Books
If you’re like me, you have a ton of cookbooks already. But there’s always room for just one more (or two, or…). Here’s a small list of a few of my favorite jam books that have great tips, recipes and techniques for preserving, but also, boasts gorgeous, inspiring photographs (a must for me).
Basic Canning Tools
One of the great things about many canning tools, is that aside from the jars, you’ll likely only need to buy them a single time. Once you have these supplies in your canning toolbox, you’ll always have them.
Copper Pot. A large pot with a wide mouth is preferrable, while a copper pot is ideal. You already know how I feel about copper pots. Copper has a superior ability to distribute the heat evenly and quickly and that helps to prevent scorching and flavor loss. It also cools down very quickly too. This helps prevent hot spots and ensures that the jam or preserve cooks uniformly.
Jar Lifter This tool allows you to lift the hot canning jars out of hot water safely. They have a rubber grip that helps provide a secure grip to handle the hot jars, preventing slips and burns.
Wide Mouth Funnel Looks just like it sounds. Super wide mouth helps to get the goods into the jar without spillage.
Bubble Popper Long slender, flat plastic tool to help pop bubbles once the jam is inside the jars. You can also use a wooden skewer to do the same thing.
Mason Jars. These come in all shapes and sizes these days. I used 8 oz jars with a quilted pattern in the glass.
Magnetic Lifter Plastic stick with a magnetic tip to lift the circular top inserts out of boiling water.
Canning Tongs No way you’re getting those hot jars out of the boilng water without tongs.
I’ve listed my supplies out with individual links, but you can also find these simple tools as part of a full kit, HERE.
Gifting Jam
Regular readers of this blog, know that I’m a sucker for gift presentations.
I found this red gingham fabric in my fabric stash and it works perfectly for an added pop of color for gifting.
Use pinking shears (if you have them) to cut a circle out of the fabric, drape over the jar, add a rubber band to hold in place and then, add some rope, jute or ribbon.
As cute as little tops of red gingham look, your jam (or preserves), don’t have to look like they came from a fancy store or culinary boutique. It’s just nice if they do.
Meanwhile, whether your jam is spread on warm toast, swirled into yogurt, or used as a topping for ice cream, homemade strawberry jam delivers a burst of summery flavor that store-bought just can’t match.
It’s sweet, slightly tangy, and full of fruit—you can taste the love and effort in every spoonful.
Now this is some tasty strawberry jam.
Hope you’re inspired to make your own Strawberry Jam for eating, and gifting.
Thanks for stopping by.
See you back here next time.
xoxo
I did not know there was even such a thing as a cooper jam pot!!!!
I’m so impressed…….thanks for such amazing food porn
you never cease to amaze me with your creative posts.
My pleasure, Joyce.
I admired these copper pots for many years from afar.
And I finally got one for Xmas a few years ago. I do love it.
It’s a lifetime kind of piece too, that will last forever.
And it’s ooooh-so purty-lol.
Have a safe and fun 4th.
xoxo