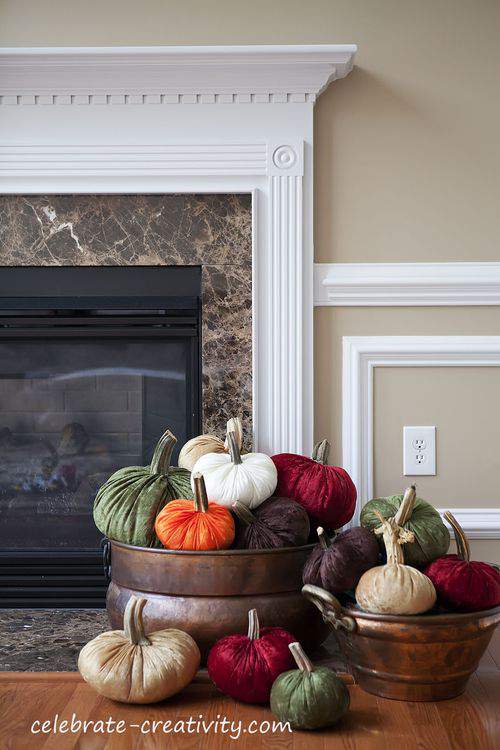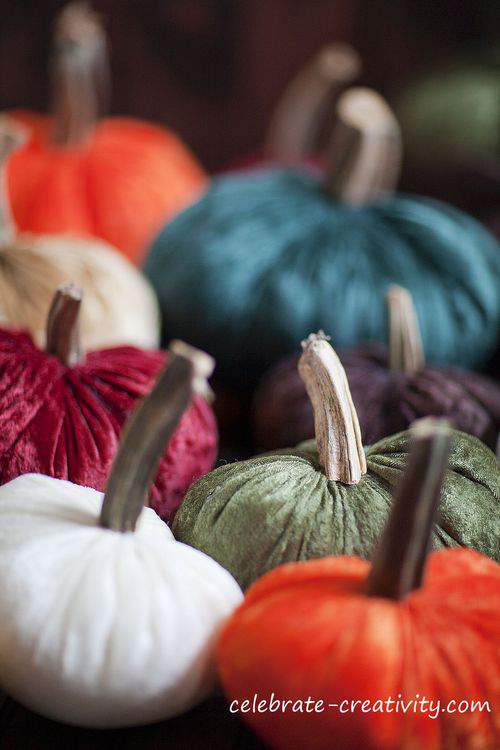
T ypically when your Fall pumpkins turn soft, it’s time to toss them. Well, that’s certainly not the case with these pumpkins.
They almost look like they were plucked right from a pumpkin patch and this is one harvest you definitely won’t want to throw away at the end of the season.
I’ve been seeing velvet pumpkins popping up all over the place.
I love the fun, colorful look combined with the perfect element of realism created with the use of real pumpkin stems.
After a recent close-up inspection of a soft pumpkin at a local home show, construction was immediately and pleasantly de-mystified for me.
I had one of my “I can make that” moments.
Throughout this post, I’ll share how to make these adorable soft pumpkins in Part 2 of my series on Creating a Velvet Harvest.
(I hope you had time to check out Part 1 of this series which featured my tutorial on making soft acorns).
First, I went to local fabric shop to buy some velvet.
Oh-la-la. This is gorgeous.

OK. Double take here. Is that the price of velvet?
You’ve got to be kidding.
Well, I’m not in favor of spending nearly $30 a yard for velet no matter how soft and luxurious it is.
So, I went in search of other options.
I decided to go with a different fabric called Crushed Panne (pronounced: pa-nay).
No, it isn’t as decadently luxurious and scrumptious as true velvet but I think it’s the next best thing.
Panne is more like Velvet’s cheaper, country cousin.
At $3 a yard (on sale, regular price $6)) the decision to go with Crushed Panne was a no-brainer.
You can walk away with a stack of multiple colors for a much more reasonable price that certainly won’t break your budget.
For my first pumpkin, I used a large wooden circular frame to mark the size of the fabric I wanted to cut.
After this first cutting, I realized you really don’t need a guide to cut the fabric.
You really can just eyeball your circle and cut it freehand it because the nature of the project doesn’t require precision.
I used a long dollmaking needle to gather the edges of the circle all the way around as you can see in the photo below.
Knot the end of the thread which I suggest you double for added strength.
Once the hand stitching is in place, gently pull the thread so that the fabric gathers into a small opening.
Keep the needle on the thread.
Stuff the pouch with the cotton filling or fiberfill.
The gathers will loosen during this step but just keep pulling the thread to narrow the hole opening after each handful of stuffing is inserted.
Once the pumpkin pouch is nice and firm with stuffing, gently pull the threads once again to close the opening as much as possible.
With one hand, hold the thread taut to keep the opening narrow. Use the other hand to carefully stitch the the area closed and pull all edges in together and closer to the center of the pumpkin.
This is what you’ll end up with.
The center is closed and the pumpkin is full and nice and fat.
Now it’s time to attach the pumpkin stem.
This may be the toughest part of the project because you’ll have to get your hands on dried pumpkin stems because it’s not a good idea to use fresh stems.
Fresh stems will decay over time and ruin your fabric.
I was able to find these stems on EBAY.
Yes, EBAY. Which means it’s official, that you can now find just about anything on EBAY.
NOTE: I plan to visit my local pumpkin patch toward the end of the season to collect stems that I can dry and save for future use. If you do the same, I suggest you cut the stem close to the vine if possible so the dried stems will look more freshly cut with the attached vine curls.
I’ve also asked my neighbors to save their stems for me from their carved pumpkins.
Put a small amount of hot glue on the bottom of the dried stem and then attach to the fabric.
Don’t use too much glue or it could seep out from under the stem and possibly show on top of the fabric.
Here’s a look at one of my finished pumpkins.
Once the stem is in place and the glue is dry, carefully tug around the base to increase the pleats and also help conceal the edges of the dried stem.
This project is very much like my soft acorn project only on a slightly larger scale.
As in the acorn project, I like the idea of working in assembly line fashion.
Make multiple pumpkins and then add the stems all together.
A few of my pumpkin stems didn’t quite adhere perfectly flush with the fabric and as a result revealed a slight lift of the stem on the backside.
It’s a minor issue that I suspect I’ll be able to resolve with practice and the more pumpkins I make.
Still, I thought I’d experiment a bit to try to conceal this small amount of separation.
I had several artificial leaves left over from another project including a few velvet-looking ones that I thought would go perfectly with the velvet-like fabric on the pumpkins.
NOTE: Look for these artifical leaves again in an upcoming Fall decor project that I’ll share next week.

Simply apply a small amount of hot glue to the back of the leaf.
Fold the leaf slightly and then attach to the back of the pumpkin.
I personally, wouldn’t add leaves to every single stem but a few leaf-bearing pumpkins mixed in with stem-only pumpkins look nice.

By the way, once you’re finished with your pumpkins, you can always plump them up a bit and adjust the shape with a few well-placed squeezes.
Once you’ve completed a small harvest you can now use them all over the house for added color and seasonal decoration.
Arrange them with gourds to add a bit of color to your outdoor porch.
Or you can layer a group of these soft pumpkins in a nice basket and create a great looking Fall centerpiece for your dining room table.
Consider using your fireplace mantel to display a row of smaller pumpkins in various colors.
I think the little pumpkins look so cute all lined up together.
Consider piling your soft pumpkins into beautiful copper pots for display at the base of your fireplace.
These pumpkins runneth over and I love the look.

Fill your pots to the brim with velvet pumpkins.
I think the more jewel-toned, soft creations you make and pile together, the better they look.

So this year, don’t just carve your pumpkins with knives and tools.
Consider making them and add a collection of colorful, handcrafted creations to your decor that you (and others) can admire all season long. ♥
WANT MORE INSPIRATION FOR FALL?
If you want even more seasonal ideas, I’m participating in several Fall Linky parties filled with inspiration. Stop by my blogging friend Melissa’s blog at The Inspired Room to see how she and other bloggers are decorating for Autumn. You’ll also find tons of great ideas and Fall craft projects at Linda’s Fall Frenzy Linky party at Craftaholics Anonymous. There’s even more amazing inspiration over at Lucy’s Linky event at Craftberry Bush. Take the time to visit these linky soirees for seasonal DIY projects, recipes and inspiration galore.


These are gorgeous, gorgeous, gorgeous…I love those ‘I can make that’ moments! I’m sharing on my fb page…xo
Lu
Thanks I love them. Kind of like a big yo-yo stuffed.
I heart this project! Thank you so much for sharing. Love love love it!
Dear Lisa! I admire your creativity, and that you share your projects with us. Absolutely lovely pumpkins! Maria
Wow! Your soft, velvet pumpkins are absolutely gorgeous!
And your photography is magnificent, too!
Looking forward to following your blog and learning more lovely crafts!
Wishing you all the best,
Mary (from BYW Bootcamp)
So cute! I too have been seeing these pop up everywhere and am not quite willing to pay the already-made price. Thanks for the informative How-To! I’ll check in when I make my own 🙂
The green & red ones are my favorites! You can also look in those huge boxes at Walmart near the end of the season and find some stems, that is, if you shop there. ;o)