I
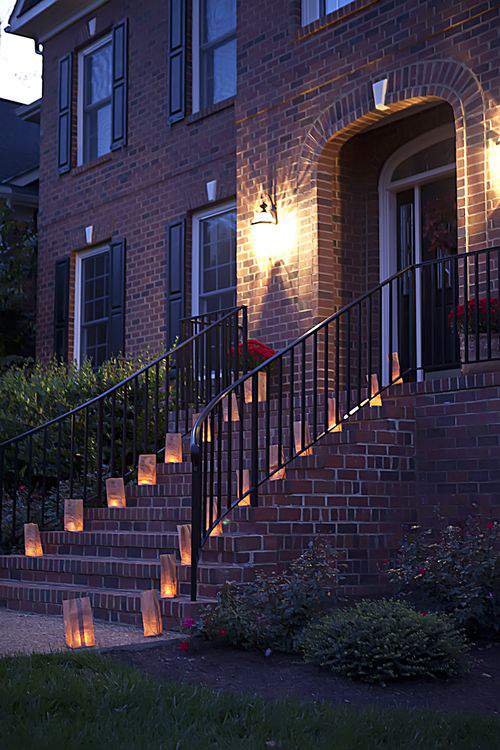
‘ve always loved the look of luminaries and the way they create a beautiful, lighted pathway for footsteps to follow along walks, driveways and steps.
Luminaries are a long-held tradition that add a lovely, unexpected glow wherever they are placed.
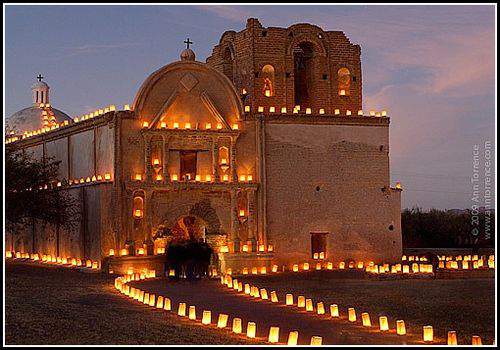
The origins of the luminary tradition can be traced to 16th century Spain when small, controlled bonfires were lit along the routes to churches so that worshippers could easily find their way to midnight mass.
Over time, the luminary practice evolved from using fires to paper bags with candles and today this form of luminary is used all over the world for any occasion or special event.

There is such a creative variety of luminaries available.
Here are a few photos I found on-line featuring a fun mix of this pretty custom.

Allow me to share the inspiration behind this luminary post.
Recently, while flipping through a Pottery Barn catalog, (don’t you love that store?) I spotted some Halloween-themed luminaries and I had one of my “I can make that” moments.
Not a bad idea to make my own, considering the PB luminaries costs $40 dollars for a set of six paper/plastic bags and corded lighting.
Throughout this post I’ll share how I made 70 luminaries for a comparable look and for a fraction of the cost (about $16 because I had all of the craft tools and stamps already on hand).
It doesn’t get any easier than this project and you can totally customize the look of your bags.
In addition to rubber stamps and decorative edge scissors you’ll also need candles.
Pebbles and sand will also be needed to give the bag some weight.
A decorative edge is always so much nicer than a straight edge.
You can enlist the help of young volunteers in your house to help add a scalloped edge across the top of the paper bags. Thanks Jordy.
See what I mean about a scalloped edge? I not only love scallops on quilts, I love them on bags too.
These bags look so much more attractive with a decorative edge.

Once you’ve trimmed the edge of all the bags, start building up your stamped images. I started with this simple stamp that lists different types of popular birds.
The the rubber stamp company which makes this birds of a feather stamp does not have a website which shows the entire collection but you can click here to reach the company for details on the stamp set.
When stamping phrases like this, it’s a good idea to find a reference point so all the bags will be stamped uniformly and in the same location. I used the fold and bottom edge of the bag to line up the stamp.
The second stamp I used is one of my favorites. This Crillon medallion is an acyclic stamp.
The advantage of using a clear stamp on a clear mount, is that you can actually see where the image is being positioned which makes image placement that much more accurate.
My daughter wanted to know why I didn’t use stamps that were more in keeping with the spirit of Halloween.
Of course, pumpkin or skeleton stamps would work just as well but I wanted a more generic presentation for this project.
I think once the luminaries are lit and in place, it will still look festive and seasonal regardless of what image is on the side of the bag.

To top off the stamped medallion image, I used this little bird stamp from the Birds and Nests collection by Cavallini. I love these stamps because the 11-member set has a sweet vintage look and the images really do look great on just about everything. I’ve used them for many other projects.
Click here to see how I used the same little bird stamp to decorate tags for an embroidered towel set.
Here’s a look at the finished, stamped bag. While it’s not as “seasonal” as my daughter would like, I still love how this combination of stamps look together.
By the way, using non-seasonal stamps also makes the bags more versatile if you decide to use them for something other than luminaries.
If you have really young children nearby, you may want to consider using small, battery operated candles as an added safety precaution.
Since my kids are old enough to know not to tamper with lit candles, I decided to use tealight candles.
Tealight candles are small, flat and require a live flame. You should be able to buy as many as 100 tealight candles for $6-10 dollars depending on the crafts store that you purchase them from.
Enlist your young volunteers to add a small amount of sand pebbles to each bag to add a bit of weight to the luminary in case of windy weather. We used aquarium pebbles here.
My husband, Boris always teases me about putting the kids to work for my blog but Cameron and Jordy really enjoy helping out (especially on those occasions when they get to eat the props).
The sand or pebbles should be evenly spread around the bottom of the bag.
Make sure the candle wick is positioned vertically after placed in the bag to ensure easier lighting. Then, place the tea light candle in the center of the pebbles.
Place one bag on each step and then arrange them so that they’re evenly spaced along the walkway or driveway.
If using luminaries for an outdoor event, keep in mind that the wax in tealight candles will typically last about four hours.
You may want to consider votive or battery operated candles if you need the glow of the light for an extended period of time.
Once the candles are in the bottom of the bag, it’s much easier and safer to light each one if you use a long nosed lighter.

Luminaries can also be used to create a subtle, nighttime border in a backyard area, porch or patio for outdoor events and celebrations.

Consider using luminaries to add a festive flair to your entry for that next dinner party or special event.
I’m hosting an evening event at my house in November and I plan to use these luminaries again to add a more festive entry to my walkway.

Of course, this month luminaries may help trick-or-treaters find your front door that much easier.
SAFETY NOTE: If using live candles in luminaries during Halloween, make sure to check their status regularly to make sure candy hunters have not disturbed the bags or candles.

As you can see, the darker it gets outside the prettier and more dramatic the presentation becomes.
Clearly, luminaries light the way. ♥

I always love your projects! This one is great too! Your yard glowing with the luminaries in the evening is beautiful! I want to use this for a project for our Children’s Church craft, but don’t want to hand out candles to be lit, nor do I want to have the expense of a huge purchase of the battery light….still thinking about what to do! Thanks for sharing all the other photos, too! ~Heidi
What a neat interpretation of the luminaria. We moved to New Mexico when I was in high school and almost every home would have luminarias lining their walkways and driveways at Christmas. With the desert, mountains, and adobe homes it truly was magical. Thanks for sharing this.
Adorable… sadly not for Texas – at least not this year with our horrible drought.
$40.00 – really .. and I’ll bet a lot of people would actually pay that to PB too!!
Wow! these look Beautiful!!!
This is really beautiful. Especially with the longer nights, the luminaries makes the house sparkle even more.
I just saw these 5 minutes ago when flipping my sisters PB catalogs- you did a fantastic job with yours and your post about them. I am always a little paranoid that the bag will catch fire so I might opt for battery tealights.
http://www.mel-designs.tyepapd.com
Wow I am a first time reader of your blog and surely NOT disappointed at all!!!! I simply loved your interpretation of the luminaries based on the picture you had. Very creative 😉 I am just going to have to try that myself. Thank you for sharing.
The luminaries are beautiful! What a wonderful idea. Thank you for sharing. Hugs, Bobbi Jo
I simply loved your interpretation of the luminaries based on the picture you had. Very creative 😉 I am just going to have to try that myself. Thank you for sharing.
BEEE U TI FUL!!!! A creative way to work with a timeless tradition.
Love the luminaires!! And your front entry is perfect for them with the walkway and stairs! I have seen luminaries in catalogs before and am shocked at the prices for “paper bags” 🙂
Simply Beautiful!!!! I think I am going to try this for Christmas Eve. It seems like it would be fun for the arrival of Santa:)
lISA