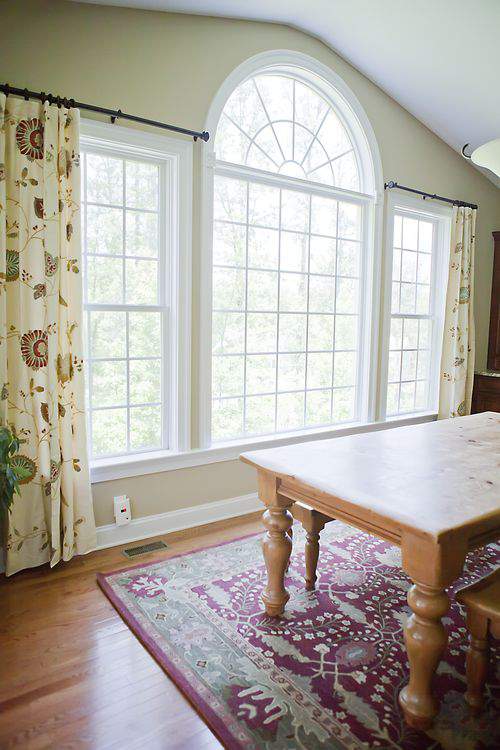
L ast week, I left you with a look at a few changes I made to my kitchen eating area. New drapes and a new area rug have made a big difference but this space still needed a little bit more.
This week, I turned my attention to my large, farm-style table which was in sore need of a little pick-me-up.

In an ideal world, I’d refinish the surface of this table and and erase all the scratches and dings that prove there are definitely kids in the house.
However, that kind of overhaul seemed a bit daunting to an inexperienced re-finisher like me. I’ll consider tackling that after I do a bit more research on the process.
Instead of re-finishing the table, I decided to make a table runner to cover some of the signs of constant, heavy use.
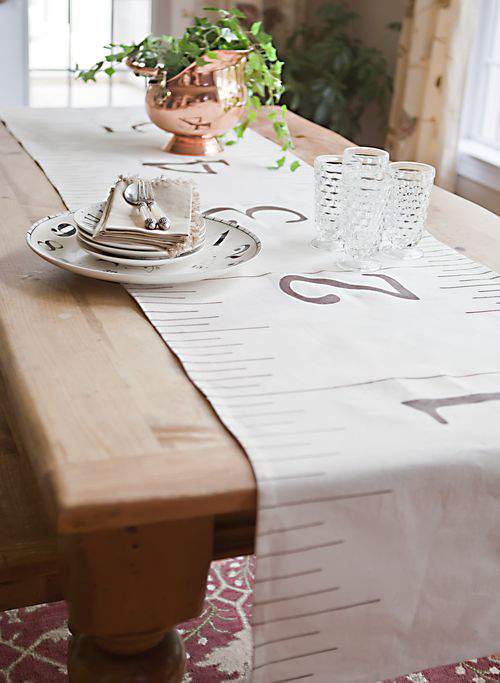
Check out this table runner I spotted in the June 2012 issue of Country Living magazine.
This ruler runner is so clever and I couldn’t resist trying to make one myself.
 Project source: Country Living magazine
Start with a few simple supplies, including a canvas drop cloth (large and wonderfully durable), fabric marker (ink won’t bleed through the fabric surface), acrylic paint, clear quilter’s ruler and a set of numerical stencils.
You’ll also need some painter’s tape and stencil adhesive.

Measure the length of the table and include the desired amount of overhang in the calculation
At 9′ X 11′ this dropcloth was much larger than I needed for this project but I picked it up because it was the only one I could find in the color I wanted (ivory).
The benefit of buying a larger dropcloth means I can actually get multiple ruler runners or other projects out of this one purchase.

First, I cut the dropcoth into the desired measurement. There was plenty of canvas to spare.
Dropcloth canvas is pretty thick, so you’ll need a good steam iron to thoroughly iron out the wrinkles.

Turn the raw edges over just under 1/4-inch, iron and then turn another 1/4-inch and iron again.
Then, stitch along the inside edge all the way around to finish off the edges.

The ruler measurements will be drawn using the marker and the numbers will be created with paint.
You’ll definitely want to get a sense for the placement of the numbers and line-spacing so I suggest you do a small practice version on a scrap piece of the canvas before applying any lines and numbers to the dropcloth.
The photo below was just practice.
During my test run, I didn’t use any stencil adhesive and a small amount of paint did seep under the stencil leaving an uneven edge along the number. As you can see this is not a good look.
As much as I hate adhesive residue on a stencil, I ended up using a small amount to firmly hold the stencil in place and ensure a clean paint application.
Drawing so many lines can get a little confusing when you begin marking the fabric.
I suggest you use the backside of your practice canvas to figure out the various line lengths and placements
My scrap canvas guide represents the line lengths in inches (3, 4, 5 and 6) and this method definitely helped me stay on track as I added the various lines.
Keep the scrap canvas guide in front of you as you make your final line markings on the canvas.
Trust me, you’ll be glad you created this guide once you get going.

Every 16th line should be drawn from one end of the canvas to the other and you’ll use this longest line as a reference point in the placement of each painted number.
Mark the placement of each number so that it will sit the the left of the longest line. Make sure each number is marked the same distance from each long line drawn.
I painted each number @1/2-inch to the left of each of my longest lines.
After stencilling the number, carefully lift up the mylar stencil to reveal.
TIP: Don’t overload your stencil brush with paint or you risk paint spreading into areas you don’t want it to go. It’s best to use an “almost” dry brush and build up the color slowly with additional layers of paint.
OK, here’s a look at the finished runner.
I like it and it also covers up most of those scratches and dings I mentioned earlier.
What was a pretty un-civilized looking space is really shaping up.
Here’s one more look at how this kitchen area looked before my intervention.

Here’s a look at the space now.
When I asked my daughter what she thought of the makeover she said, “Well, Mom-I really like the runner but those curtains don’t make any sense.”
I was only slightly crushed by the response. I love the window treatments and she’s 13. No debate.
By the way, it’s a good idea to seal the paint on the runner before actually using it.
To seal acrylic paint on fabric or canvas, just place an ironing sheet or thin dish towel over the painted area and use a dry iron to press. The heat from the iron will help lock in the color.
POSSIBLE FUTURE PROJECT: Consider how cute this ruler-replica-on-canvas would look on a handcrafted bolster pillow for a child’s room or play area.
I’m thrilled with how the introduction of just three new elements (an area rug, window treatments and a simple table runner) made such a big difference in kitchen eating area.
Makeovers aren’t necessarily about quantity of elements, rather it’s more about a few, well-placed elements that all work together to the homeowner’s eye.
So, are you working on any space makeovers right now?
COMING SOON IN AN UPCOMING POST
I’ll share another transformation of a space just off my kitchen eating area.
For some time, I’ve been trying to find ways to make this screened-in porch and my kitchen space look more like extensions of one another rather than two separate rooms.
Coming soon, I’ll show you how I brought these two spaces together in a way that makes these areas really shine.
COMING UP THIS FRIDAY
If you have a sweet tooth, you’re going to love what I have in store for you coming up on Friday (8/10).
Later this week, I’m back in the kitchen with Nana Banana (my mom) who showed me how to make the most decadent and delicious cinnamon buns.
It’s a simple recipe you can make from a box or from scratch but either way, you’re going to love the outcome.
Pop by this blog later this week for this treat in my bi-weekly column, THE FRIDAY FOODIE.
See you then. ♥

It looks terrific! you did a great job! Love the sneak peaks too.
Lisa the table runner looks beautiful!! I totally applaud you for tackling such a job.
Totally fabulous!! That is incredible. What a beautiful table.
Great job. Wasn’t too sure I would like the runner but the end result looks really nice.
Superb as always!!!
Very Cool Lisa — your new runner looks wonderful!!!
Great job Lisa.
I love the transformation! I have also a vintage sofa from my late granny and it has the same look in your photo. I really need to bring it to upholstery shop.
Can’t wait for the new look that I picked.
You really did a great job!
Looks great!! Do you by chance sell your monogrammed napkins/linen bag online? Would LOVE to order!
Love your drapes! Where did you get them?
loved the table more than anything else 🙂
What a transformation. Your kitchen looks really nice. 🙂
I love this table runner. Now, if only I could sew. I have the same rug that you feature under your table. I love it!
I absolutely love this! I was wondering if you knew the measurements?
Thanks so much, Jennifer.
I think my runner measures about 102-inches long by 2-feed wide.
If you’re going to make one, measure the table you’ll be using it on and then decide how large you want it based on how you want it to drape across the table.
My kitchen table is like a picnic table and I wanted the runner to be the length of the table with a bit of an overhang on each end.
You could always make a shorter one too. It just depends on your own personal preference.
Good luck with it. Let me know how it turns out for you.
Happy day!