I
‘ve got a thing about throw pillows and if you’re a regular reader of this blog, you may already be aware of that. I’ve made so many of them over the years, I’ve practically lost count.
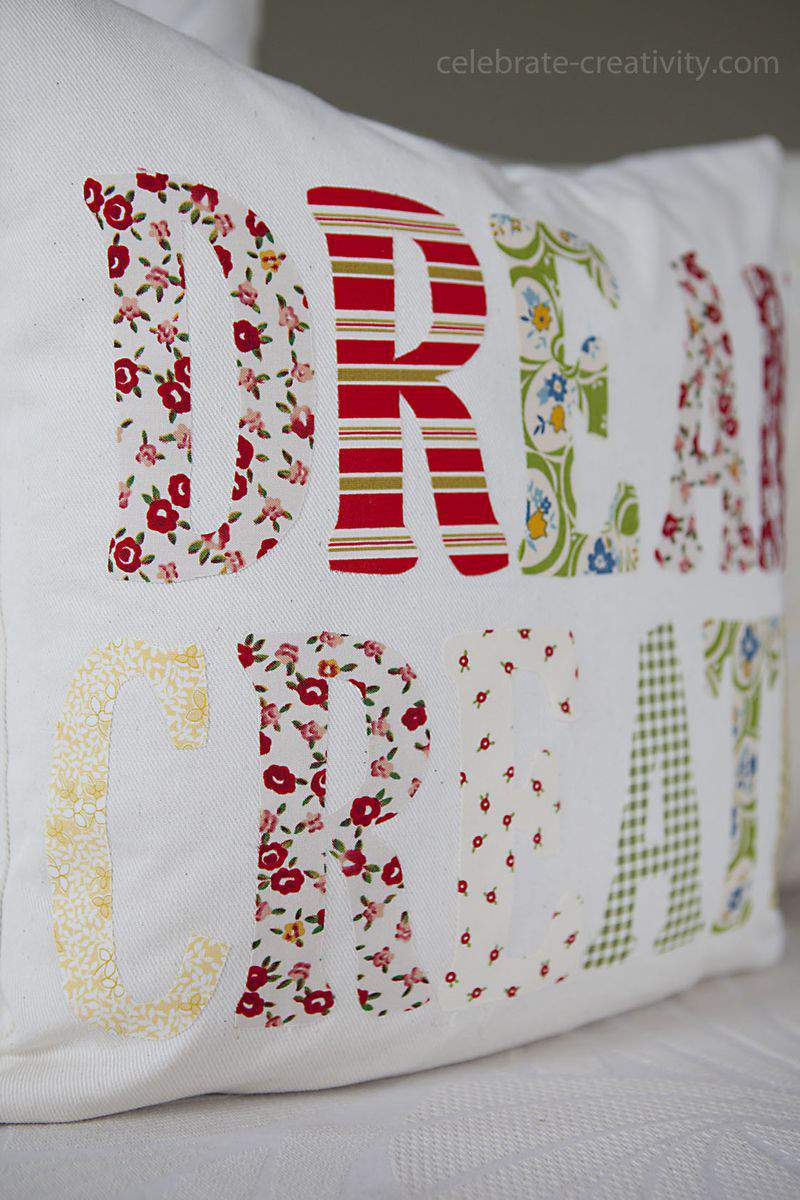
DREAM and CREATE are two words that are very much a part of what goes on around this blog so this alphabet applique throw pillow was especially fun to make.
If you’ve never done any applique work before, I hope this inspires you to give it a try.
It’s a pretty simple process and you can use applique to personalize a ton of other projects including tote bags, jackets and backpacks just to name a few.
Appliques like this don’t require much fabric at all.
In fact, if you’re a quilter (like me) you may already have a stack of “fat quarters” on hand and you can also use scrap fabric you have laying around your sewing room.
Pick a handful of coordinating colors and you’ll be good to get started.
You’ll also need some alphabets to trace. I typically use these chipboard letters for my scrapbooking efforts but they’re perfect as an outline for the lettering.
Alphabet stencils will also do the trick and you can find those at most crafts stores.
If you do any home sewing, you may already be familiar with double sided applique paper. You can buy it by the yard in the interfacing section of most fabric stores.
Applique paper has a heat-activated adhesive on both sides with one side protected by a thin paper sheet.
As you can see below, I cut a small piece of the applique (the size of the letter chipboard or stencil) paper and ironed it onto the WRONG (or back) side of the fabric.
The heat causes a think layer of adhesive to be deposited onto the back of the fabric.
Position the chipboard/stencil over the applique paper to make sure it will fit.
Then, turn the stencil over so that you will end up cutting the alphabet in reverse-image.
This ensures that the cut letter will be facing the correct direction on the RIGHT side of the fabric.
Use a pen or pencil to trace the outline of the letter directly onto the applique paper.
Remember, at this point, you’ll be looking at the letter in reverse position.
Once the letter has been cut out of the fabric, peel away the protective paper and you’ll see there’s a sheen on the back of the letter.
Here’s a closer look at the back of the fabric so you can see the sheen a little better.
If you see any stray threads, just carefully clip them using a fine-tip pair of scissors.
Plan out your words and repeat the same steps to create the desired letters.
Use a water soluble marker to mark the center of the fabric so your letters will be positioned evenly and in the middle of the pillow.
Line up your letters on the pillowcase fabric.
It may help to also draw water soluble guide lines to indicate the height of the letters for even more precise placement.
Lay the arrangement flat on the ironing board and iron the letters in place.
NOTE: I like the raw edge of the ironed-on letters but if you want to make the letters a little fancier, sew a zig-zag or satin stitch around the outside edge of all the letters.
Stitching around the edges adds extra security, especially for heavy-use items.
Whatever the size of your pillowcase, make sure you add about 1/4-inch on all sides for adequate seam allowance.
Don’t forget, you’ll need two pieces of fabric. One for the front where the letter will be placed and one for the backside.
Once all letters are securely in place, place the right sides of the pillowcase fabric together and stitch 1/4-inch seam all the way around to create the pillowcase.
Make sure you leave an opening along the bottom edge that’s large enough for your pillow form to fit inside.
Turn the pillowcase inside-out and hand- stitch the small opening closed.
No one will ever see the hand-stitched closure because it will be hidden along the bottom of the pillow.
If I had to do this project over again, I’d probably use fabrics that popped a bit more against the white fabric so the appliqued letters would really stand out.
It’s that simple.
I’ll be you can think of quite a few items around your house that you could add applique to.
Applique pillows also make lovely gifts.
Consider appliqueing a bolster size pillow with a child’s name on it. How cute would that be?
You can see a few more of my handmade pillows HERE and HERE and HERE and HERE. ♥
Thanks for stopping by.
See you back here next week.
I wrote a similar version of this applique pillow project which first appeared on Ella Claire Inspired on March 6, 2015.


Thank you for the tutorial ! The throw pillows are great. I too have an obsession for throw pillows ????
That’s adorable!!
I love them!! Not only for a dream/create pillow but for holidays. How about making a personal pillow and putting a person’s name on it. Boy, I can certainly come up with lots of ideas. Thank you for the heads up on the double sided appliqué tape. I don’t go into the craft stores like I used to so I know there are many things out on the market. Have a great day!!
They are so cute…and I can just imagine the alphabet stencils being used in so many other ways. You always do such a wonderful job of creating truly beautiful things!
Wow… Pillows looks really beautiful with amazing color full text. This is such a wonderful idea Lisa. To give a amazing look of Pillows & it will surely attract to peoples & guest in home 🙂
Thanks so much, Alina!