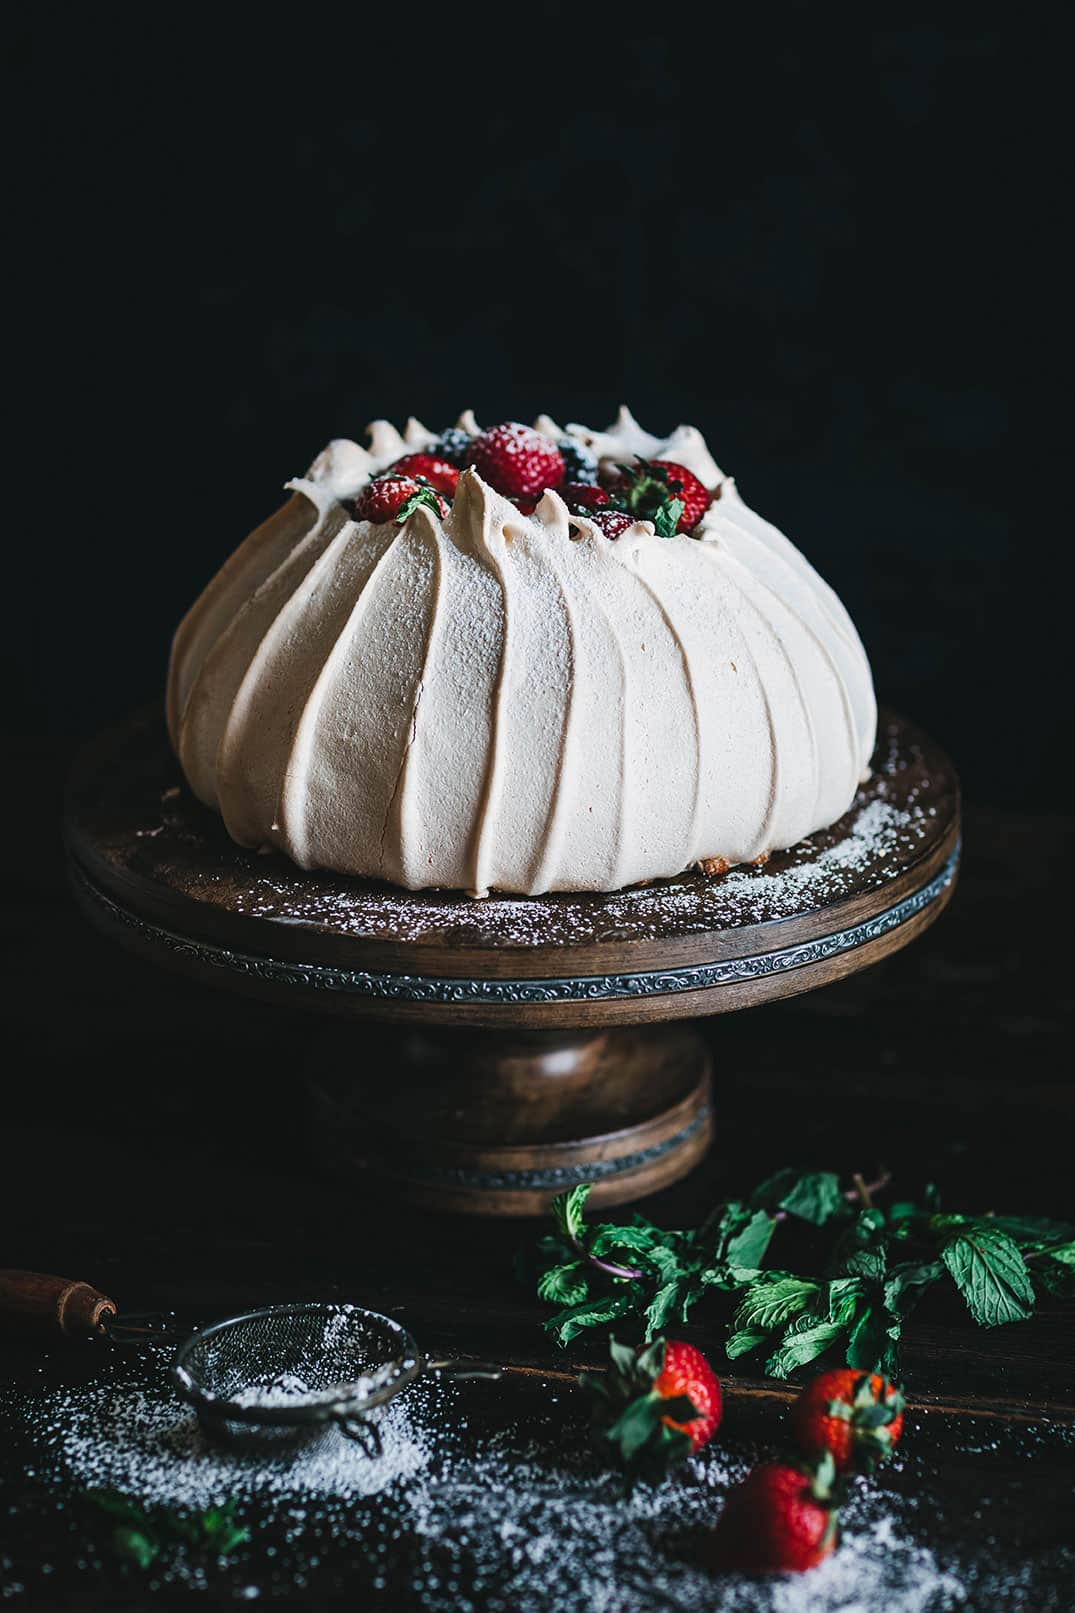
I’ve made Pavlova a number of times, but I’ve never made Pavlova like this.
In all modesty, I think this is the prettiest dessert I’ve ever made.
And you know what?
This Regal Fruit Pavlova (fit for a queen) is as delicious as it is lovely.

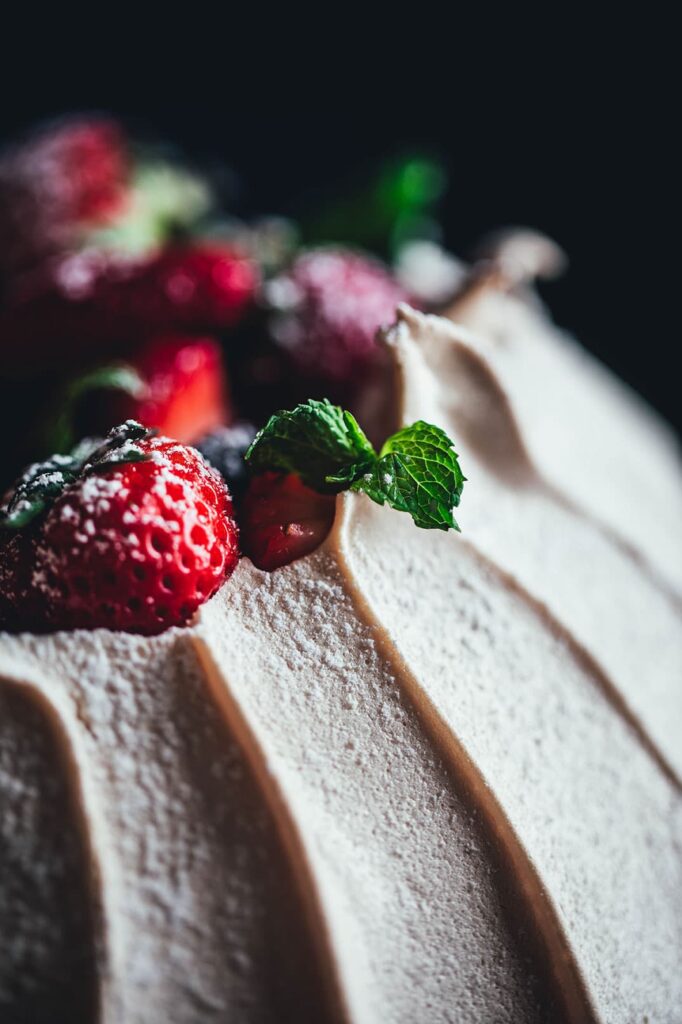
The soft swirls in the baked meringue are like delicate creases.
This has the kind of elegance that may look like it’s difficult to reproduce but throughout this post, I’m going to show you just how easy this Pavlova is to shape.
It’s important to shape the meringue and throughout this post, you’ll see just how easy that is.

Once you’ve created the meringue and it’s nice and smooth and fluffy, spoon it onto a piece of parchment paper .
Try to pile it high into one big mound.
Smoothing will come in the next step.

Use an offset spatula to smooth out the meringue.
I liken this to smoothing the icing on a cake. Use the same technique as if you were frosting a cake.
Try to get the meringue smooth and as upright as possible.

Once the meringue is smooth and sitting tall, use the spatula to create the swirls.
Then, scrape the side of the meringue starting from the bottom and moving upward.
Only scrape about a 1-inch section and a time and repeat all the way around the meringue.
If you angle the scraping just a get, you’ll get more distinct swirls.

If you’re not too happy with your swirls, no need to worry.
Just use the offset spatula to smooth the meringue out and just start all over.
It might take at least a pass or two to get your swirls or creases just right.
I like to keep the scraped sections pretty close for a more detailed looking finished design.

On another note, if you lift your spatula quickly and away from the meringue on the upsweep, you’ll get these irregular-shaped edges.
That’s actually a good thing and will give the baked Pavlova a little extra interest and character.
Scroll further down to see a closer look at the baked, edgy rim.
I’ve made quite a few Pavlovas over the years but this is the first plump-bellied style I’ve ever attempted. If you want to see the full recipe I used for this particular Pavlova, pop over to Zoë’s at ZoëBakes, HERE.
And if you want something smaller, be sure to check out my post on making the more traditional, flatter, (but still super cute), mini-pavlova desserts, HERE.
Of course, there are tons of filling choices for pavlovas, but I love homemade whipped cream and assorted berries.
One tip: I always refrigerate the bowl of my stand mixer for about 30 minutes, so the bowl is a cold as the cream, for a lighter fluffier whip.

Whipped Cream Filling
Ingredients
- 1-1/2 cups heavy whipping cream
- 1/4 cup confectioner's sugar, add more as needed
- 1 tsp vanilla extract
Instructions
- Use a whisk attachment on mixer to whip whipping cream.
- After peaks start to form, slowly add sugar while continuing to whisk.
- Add vanilla.
- Whisk until firm peaks have formed.
- Set aside to refrigerate until ready to use in the Pavlova. Make this the same day.

When you take this Pavlova out of the oven, it’s going to have developed a more rounded, plump tummy.
The shell is super fragile at this point and you really need to handle it with care.
Now, you may also see a few small hairline cracks here and there in the meringue crust. Honestly, as many times as I’ve made this, I’ve never been able to avoid a few small cracks.
During this baking, the top of my Pavlova sunk and dropped down inside the cavity a bit. That was no big deal either. Sometimes the top will stay put and you’ll have to carefully and very gently saw it out with a sharp knife.
Add the whipped cream and then, gently drop the assorted fresh fruit into the cavity and on top.
Finish off the look with a light dusting of powdered sugar.

Arggg! See what I said about cracks. Spot that one? Oh well.
Carefully, slide the Pavlova onto a pretty cake dish and serve to the delight of your friends and family.
Imagine how everyone will feel when you bring this out after dinner.
Or, next time you have to bring dessert to a dinner party…. show up with this.
I took one of these to a dinner party and it was all gone almost before I set it down. I felt like folks were standing in line for it-lol. Now, that’s a good feeling.

Oh, before I forget, remember remember when I mentioned the rim of the meringue?
Here’s a closer look at the crown that I created.
I suppose there are a number of ways you can shape the rim before baking, but I love how the irregular tips point in, while other points tip outward.
You just have to swoop it swiftly (at the end of the meringue shaping scrape), with a quick turn of the wrist one way or the other to create these points of interest.
The tips remind me a bit of a jester’s hat. Hey, but I did call this dessert regal, right?

Each slice has a ton of texture from the light, exterior crisp of the baked meringue… to the fluffy, marshmallow-like interior.
The assortment of fresh fruit delivers another tasty element that blends beautifully with tall the other flavors.
It’s all very light and airy and a perfect summertime dessert.

Before I wrap, allow me to share a quick styling decision I made on this photo.
When I initially set up this Pavlova for shooting, I included a few sprigs of mint and a silver sugar duster in the shot (left photo).
As I was putting everything back into the kitchen, I walked passed a container with a few leftover strawberries and it occurred to me that adding a few berries to the shot might look nice.
I dragged the Pavlova back into my shooting area and reshot it with the added berries. I also switched out the silver duster with a rustic strainer I had in my stash (right photo).
Both shots work, but the added pop of red and the new/old strainer, gives the image a little more personality in my eyes. But what do you think?

And as you can see, a Pavlova photographed outside is even prettier and delicious looking.
Thanks for popping by.
See you back here next time.
Stay safe and be well.♥

That is a masterpiece! I would add that to my “company worthy” dessert files. I have two questions..when baking, the recipe says lower the temp to 27°. Do you mean 270°? Also, when it has baked, do you have to hollow out the inside a little to allow for the curd and fruit, or does it drop a little while baking or is there enough room with the points left at the top?
Thanks so much Colleen.
Oooops. That should be, drop the temperature to 275 degrees,
I appreciate the heads-up on the typo.
Sometimes the top will stay in place during baking and you will have to carefully hollow it out.
When adding the filling, you must do so very carefully. I actually broke a few of the points.
You could also put the fillings in a piping bag and add them that way if the cavity is too tight to spoon it in.
Sounds like you’re going to make this. You’ll love it. Let me know how it turns out.
xoxo
Oh! My! Heavens! That is gorgeous and I give it a 100 drool points! I have to have a bib just looking at it. And your photos are magnificent. Was this a special occasion for your family? You probably have all of your little ducklings at home now. Have you planted any herbs and flowers yet? I’m anxious to get started. I have to share your pavlova on my Facebook page. Have a wonderful day — huge hugs!
Thanks so much, Marisa.
No special occasion for this, other than the need to make something pretty and take some pictures of it-lol.
I’m overdue on getting my little herb garden together too.
Hopefully, that’s something I can attempt to get off the ground this weekend.
Kids and hubby are well and we’re all doing are part to keep it that way.
Stay safe on your end and good luck with your spring gardening.
xoxo
OK..Lisa…I definitely need to be your next door neighbor and taste tester!!!! It is truly one of the prettiest desserts I have seen! You are beyond amazing!!!!! When this CV mess is all over, we need to arrange a visit!
Have a fabulous day!
Oh, thanks so much, Shirley.
I remember that open invitation and when this CV madness is over, I’ll take you up on it.
Give this dessert a try. It’s easier than it looks.
I’d love to see how you style it with one of your amazing floral arrangements.
Stay safe and well in your neck of the woods.
xoxo
Did you hear that? The loud THUD was my jaw dropping to my desk. OMG!!! That is stunning and your photography of the finished piece is also. Beautifully done!! Hello from across the county (Wa State).
Don’t hurt yourself, Nancy-lol.
I’m glad you love it.
The next dinner party invite (after Covid) is going to include this on the dessert menu.
Hope you are doing well on your end.
xoxo
That is the prettiest dessert ever. I can not wait to make that for my family and friends; when this is all over. Do you have a cookbook? Your photography is lovely. Keep up the great work.
Cathy, I think you will really enjoy making this.
Try to make the lemon curd the night before if you can.
I’d love to know how it turns out for you.
As for a cookbook? Nope. Maybe one day.
Thanks and stay safe.
So absolutely gorgeous!
I loved seeing the photos side-by-side and comparing your styling tricks and differences. Both photos are gorgeous, but I agree. The strainer and red berries somehow add an eye-catching feature.
Thanks, Deborah.
I’m glad I included that comparison.
Sometimes, it’s the little things that can make a big difference.
Hope you are safe and well on your end.
xoxo
I usually don’t send comments to people I don’t know, but I have to let you know, that this is absolutely gorgeous and looks so yummy. Congratulations on your beautiful work of art. Now I have to find someone skilled enough to make me this. ❤️
Well, nice to meet you Marly.
Now that we’ve met (virtually), I hope you pop by again for more recipes and maybe even crafts projects.
Thanks for your kind words. I appreciate that.
As for this pavlova, please, please don’t be afraid to give this a try yourself.
I know it may look a bit intimidating but if you take your time, read over the recipe a few times first, I’m sure you can produce the same result.
I was a bit scared of it too when I first saw how it was mad-lol.
Go for it.
Stay safe and well and thanks again for stopping by.
xoxo
Absolutely love this. I am going to recreate it as my wedding cake. May I be cheeky and ask where your beautiful cake stand is from and are they available for sale waomehere? With thanks Jo from Australia.
Hi Jo,
Congrats on your upcoming wedding.
Thanks for popping by and I’m so glad you love the Pavlova.
I just sent you a personal email with some extra information for you.
xoxo
Wonderful Lisa. Appreciated your generous personal response x