For the last several weeks, I’ve been kinda obsessed with making gingerbread cookies.
I love holiday baking but I can’t remember a year when gingerbread has taken such center stage in my kitchen.
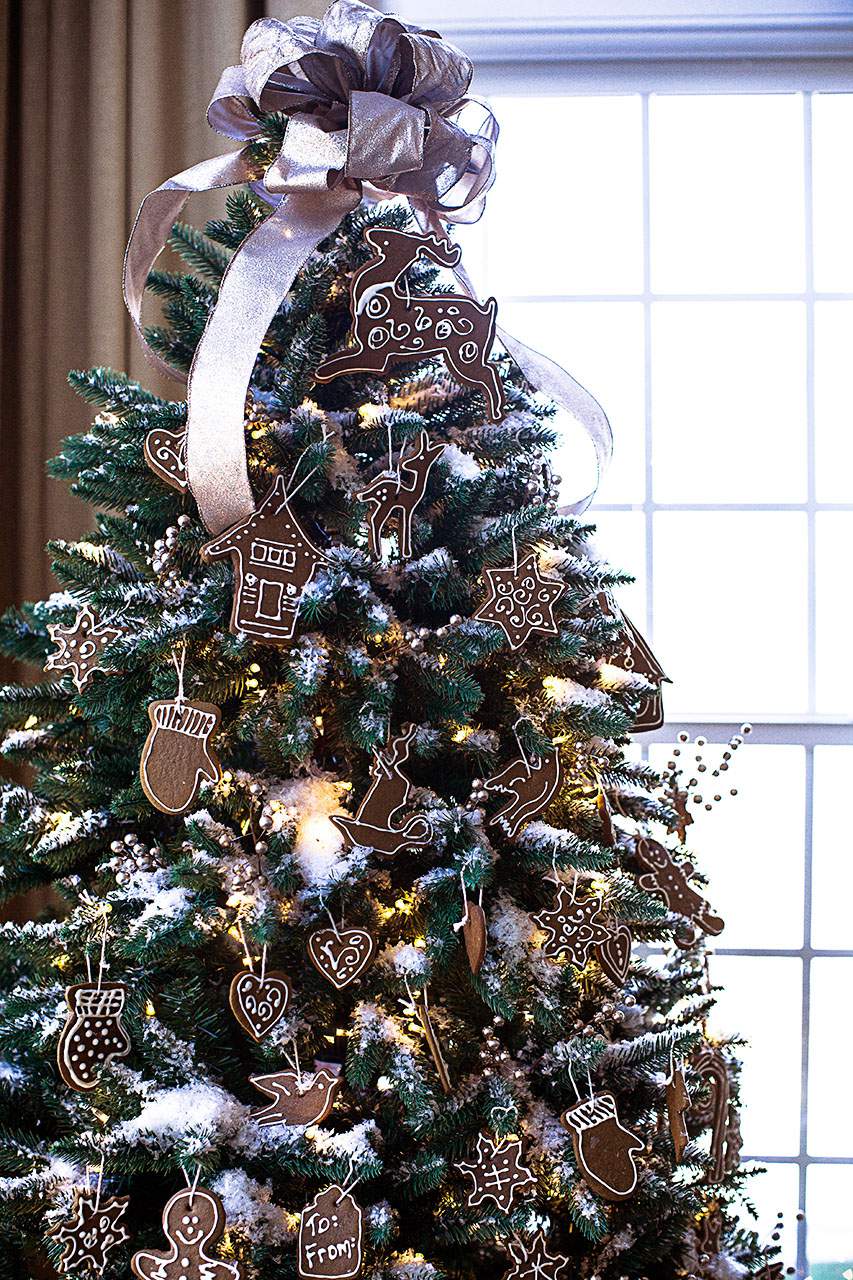
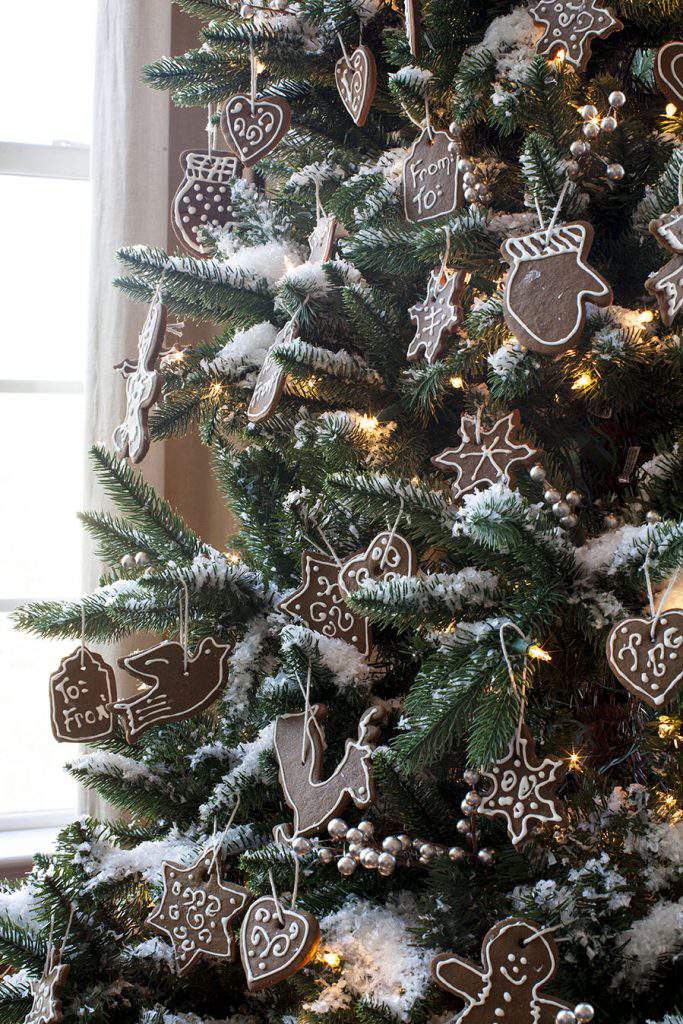
Now, I’ve taken gingerbread cookies to a whole new level of holiday prominence with this gingerbread cookie Christmas tree.

Even if you’ve already decorated your tree, you still have time to add a few more ornaments.
And when they’re edible, they’re that much more adorable.
If you need something to keep little ones busy while you decorate presents… bake a batch and have the kids decorate them.

Before I walk you through my easy gingerbread ornaments, let me tell you more about how I got to this point.
Last week, Tree Classics, which is known for realistic artificial trees, wreaths and garlands contacted me to see if I would be interested in reviewing one of their trees.
When I opened the box, I was surprised to see there were only three pieces in the box including a stand, and two tree sections.
That’s a far cry from the tree I put up in my foyer every year which has about 40 branches, all different sizes that have to be matched up and inserted into the right slots. That does take a while to put together.

I have to admit, this Hyde Park Pine Snap tree is…. well, it’s a snap to put together.
The upper part of the tree sits down inside this outlet which is also fitted with a wired connection for the lights.
All you have to do is put the top piece down on top of the bottom piece and the tree is put together.

The pieces are super light, easy to manage and they are not prickly at all.
Since I couldn’t very well take pictures and put it together at the same time, my trusty assistant, Jordy pitched in
He’s always an eager helping hand with whatever I need for this blog. I may have to start putting him on a payroll.
OK, lift top section of the tree… drop it down into the center pole opening and voila… almost done.

Like any artificial tree, you do have to spread and bend the branches a bit to get the perfect shape. As you can see, I still have a little more shaping to do here.
The tree stand also has wheels on one side of the base which is a pretty cool feature.
It made it much easier for me to move the tree out into the room to decorate and then just roll it back into a corner position when done.

Considering the fact that I struggle with tangled Christmas tree lights every year, I also appreciated that this tree came with pre-strung lights.
They’re already built into the branches throughout with no hanging or tethered wire between the top and bottom half of the tree.

One final mention about this tree before moving on to my gingerbread cookies. It includes this convenient, 2-bag space saving storage solution too.
When I’m ready to put the tree away, all I’ll have to do is separate the two pieces.
One bag simply drops right over the lower part of the tree and the other one (with a handle) contains the upper half of the tree.
Then, just roll it neatly into the corner of my storage room until next year.

OK, let’s get back to my gingerbread ornaments.
I initially planned to put plain gingerbread cookies on the tree but I’m so glad my daughter talked me into adding royal icing.
The crisp white icing against that brown gingerbread is a lovely contrast and really helps make the cookies pop.
This is a great way to put every neglected cookie cutter you have to good use.


- 3/4 cup softened butter
- 1 cup packed brown sugar
- 1 egg
- 3/4 cup molasses
- 4 cups all-purpose flour
- 2 teaspoons ground ginger
- 1-1/2 teaspoons ground cinnamon
- 3/4 teaspoon ground cloves
- 1/4 teaspoon salt
- Royal icing and assorted gel coloring.
- Combine butter and brown sugar in a stand mixer. Don't over mix.
- Add egg and mix then, add molasses. Whisk all other dry ingredients together in a separate bowl.
- Slowly add dry ingredients to the mixer and combine.
- Once large gingerbread dough ball is created remove and cut into 4 sections.
- Roll out each section between two pieces of parchment paper, lightly flour base paper.
- Lay each piece of rolled out gingerbread flat on a baking tray.
- Refrigerate for at least one hour.
- Preheat oven to 350 degrees.
- Remove chilled gingerbread one at a time and cut with cookie cutters.
- Use a straw to pierce the dough and create a hole in the top of the cookie for hanging.
- Bake for 6-8 minutes until lightly brown.
- String loops through cookie holes and hang on tree.
- Mix assorted royal icing colors and decorate as desired.

You know that kitchen twine that you have in your pantry that’s used to tie the ends of a turkey or maybe Cornish hens?
That’s what I used for my loop hangers.
I opted against using my typical red and white striped baker’s twine after I realized I had 80 gingerbread cookies to string.
Trust me the kitchen twine is a more economical way to go for so many cookies.

There’s now a wonderful aroma of gingerbread cookie that fills the air in the family room. It smells so good.
Hmmm, I may have just started a new baking and decorating tradition in my house with these edible Christmas tree ornaments.
Happy baking and happy holidays.

I partnered with Tree Classics for this holiday post. All opinions about their tree are my own… along with all these delicious gingerbread ornaments. OK, OK… I’ll share.
Happy holidays and thanks for stopping by.
See you back here next time. ♥


Lisa – Such a lovely post – Merry Christmas! I look forward to following you in the New Year!
I appreciate all your support this year, Jeanne.
Hope you have a wonderful holiday too.
Such beautiful cookies! Recipe pinned. 🙂
We always cut down our own tree but I’m impressed with how nice that artificial tree looks!
Thanks so much, Jennifer.
Happy holidays to you.
Lisa,
Thanks for the gingerbread cookie recipe. Pinned for future reference. Your tree looks wonderful. What kind of artificial snow did you use? It really looks like drifts of snow on an outdoor tree.
Merry Christmas and Joyeux Noël,
Judith
Hi Judith, I like the texture of this artificial snow too.
I picked it up from JoAnnes. It comes in a clear bag with purple labeling.
It’s called the “Original Buffalo Snow”. I love it because it doesn’t look like shredded plastic and it’s not iridescent. It’s very white and flat and does look just like snow drifts.
Happy holidays to you.
Lisa…the tree is beautiful…now I wonder if your ornaments are going to make it to Christmas!!…and the tree is gorgeous!…I have a Tree Classics Snap Tree and LOVE it!…A snap to put together!!
Your tree is beautiful and the cookies are wonderful. Thank you for sharing all this information. We make gingerbread cookies from a recipe my grandmother brought from Austria – they have always been a tradition in our house. I’m looking for a new tree and will keep my eye out for this one – I love all the features. Merry Christma Lisa.
Lisa, the tree is beautiful and I bet it smells great too. I love that the entire tree is decorated with handmade ornaments. Nice that you have such a cute, willing helper!
Happy holidays and thanks for all the inspiring posts this year!
After seeing your lovely tree and beautiful, creative ornaments, I am inspired. I’m doing my 50th year tree and my Aunt Elsie’s Ginger Cookies would be the perfect addition. Thank you and Happy Holidays.
Thank you so much for your kind words.
I’m always thrilled to be the source of inspiration and appreciate you letting me know.
Happy baking and have a wonderful holiday season.
Thanks for popping by for a visit too.
xoxo