For the last month or so, I’ve been playing around with piping tips.
If you don’t know already, piping tips can be extremely addictive.
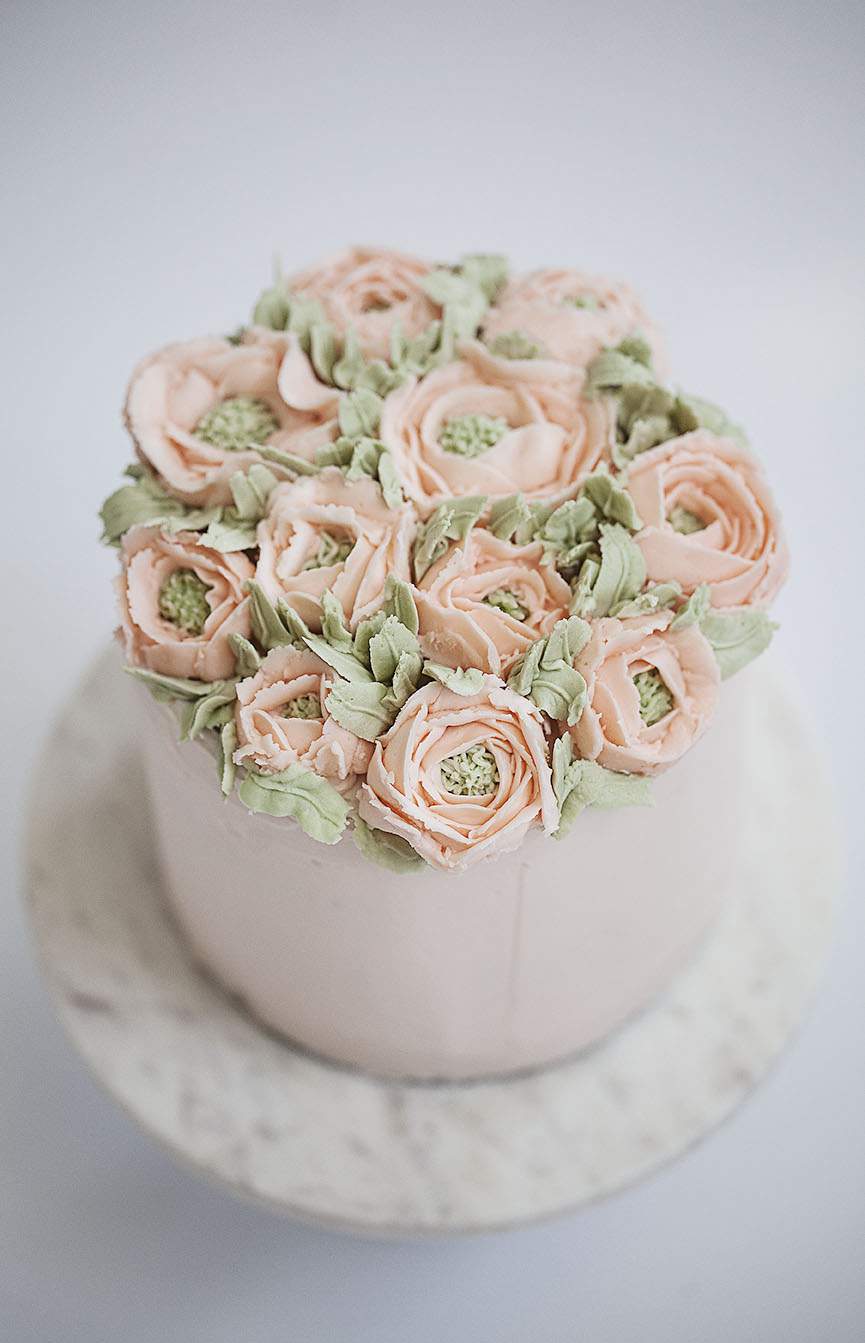
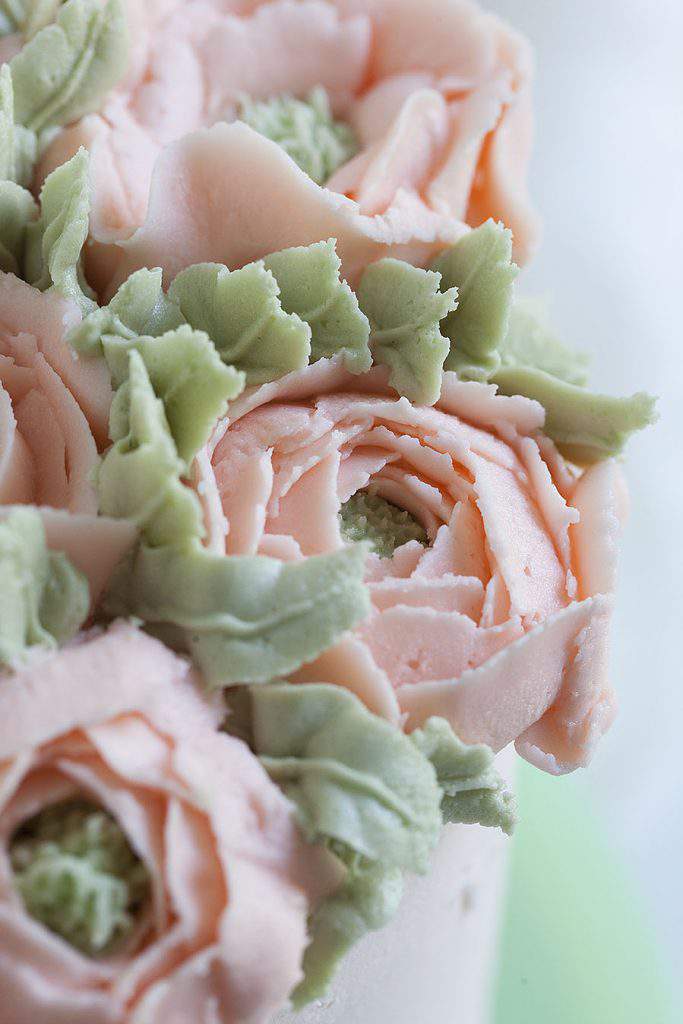
But the results are worth being hooked as you can see with these buttercream peonies.

I will say, this does take a little practice and I’m still working on my technique.
Despite the learning curve, I’m definitely getting the hang of it.
Piping tips are actually pretty addictive once you start using them.

Here’s a look at the tips I used for my peonies.
You’ll also need what’s called a flower-nail which is a nail attached to a 2-inch circular base.
The base is used as a platform for the peony to sit on as it’s created.
All the tools I used are available at most crafts stores in the baking aisle.

Put a dab of icing on the top of the flower-nail and place a small square of parchment paper on top.
The icing will temporarily secure the paper so you can make the peony. The flower-nail will help you swirl the paper around as you create the flower.
Use the #233 tip to pipe a small amount of grass-like icing onto the paper.
This is the center of the peony.

Use #104 Petal tip to slowly pipe a layer around the center of the peony.
As you squeeze the frosting out of the piping tip, twirl the nail at the same time.
The flower-nail acts like a mini turntable.
Twirling the flower-nail will give you the rotation needed to layer the frosting more easily.

When I first started making mine, you should have seen what a mess I made.
I twirled too fast or too slow or I tilted my creation too far forward.
Many of my early peonies slid right off the parchment paper and into my lap.
You have to keep the parchment paper and platform level as you frost to ensure the flower stays put.

You can see how the layers slowly build up with each twirl of the nail.
Depending on how you hold and move the Petal piping tip, the icing will fall either inward or outward.
If you pipe with an outward slant, the petals will look more like a rose.
Pipe with an inward motion to create a more closed petal which looks like a peony.

Once the flower has been created, simply lift the parchment paper off the nail head and place on a baking sheet.
Then, refrigerate the flowers overnight.
The buttercream flowers will harden in the refrigerator and make them easier to apply to the cake.

When it comes to cake, I’ve also been practicing my cake frosting technique.
This time I used two, six-inch circular cardboard which you can find in the baking aisle of your local crafts store.
Place one cardboard on the bottom and the other on top of the cake.
Use an off-set spatula to add the icing onto the layers between the two pieces of cardboard. Use the spatula or a scraper to smooth the icing and then remove the top cardboard and frost the top of the cake.
I wrote a post on How to Frost a Cake earlier this year, which features a similar technique. You can revisit that post HERE.

After refrigeration, the hardened flowers will lift right off the parchment paper.
Put a dab of frosting on the bottom of the flowers and then, stick them onto the cake.
Arrange the flowers as desired across the top of the cake.
Don’t worry about any gaps between the flowers… you’ll fill those in with the leaf-shaped piping.

Use piping tip #66 to create the leaf shapes to fill in the gaps where you need them.
The leaves are pretty easy to make and don’t take any practice at all.
This is the first time I’ve ever used a leaf tip and you can see how nicely they turned out.


Crusted Buttercream Frosting
Ingredients
- 1 cup butter
- 1/2 cup vegetable shortening
- 2 teaspoons vanilla
- 1/2 teaspoon salt
- 1/2 cup cream or milk
- 8 cups of confectioner’s sugar
Instructions
- Blend butter in mixer, add vanilla and salt.
- Slowly add the confectioner’s sugar.
- Add the vegetable shortening (thick white substance in a can).
- Add cream or milk.
- You’ll need to add vegetable oil to stiffen the buttercream. The more shortening you add, the stiffer the buttercream will be. However, be careful. When I first made this crusted buttercream frosting, I used equal parts butter to shortening. Gotta tell you, the frosting tasted too much like oil. So, I cut the original shortening requirement back by half.
- I found that 1 cup butter to 1/2 cup shortening produced crusted buttercream that was perfectly stiff enough to work with and I could not taste the shortening.

Frosting and piping techniques have the potential to really transform a cake.
You can start with a $1.50 box of cake mix (like I did) and turn it into a beautiful creation.
I think this looks like this could have come from an upscale boutique… instead of my own kitchen.

I thought you’d enjoy seeing what my photo shoot setup looked like for this.
Hopefully, this behind the scenes peek helps to demystify my styling process a bit.
The front of my house always has the best natural light… so, that’s where I generally take my food to shoot.
The large white, circular object on the right helps diffuse and soften the harsh, window light.

To get this overhead shot of the cake, I put everything on the floor and stood directly over my subject.
I used large white poster board (from any crafts store, $4) and large white dry erase boards (from most home improvement stores, $8).
Both boards help reflect light and also provide that white, infinity-like background.
You can check out my PHOTOGRAPHY drop-down category in my navigation bar for more tips and techniques.

I think this cake is almost too pretty to cut… almost.
After snapping these photos, I bagged up all the slices and popped them into the freezer.
I ended up serving them over the recent 4th of July holiday to the delight of visiting family members.

The slices thawed beautifully and the peonies held up perfectly.
Everything tasted just as good as it did as the day I made the cake.
So, don’t be afraid to make a whole cake to practice piping buttercream peonies.
You can always make it now… and serve the slices later.

Thanks for stopping by.
See you back here next time. ♥


Lisa!!!!! Your cake is absolutely gorgeous!! I know I’m adding exclamation points out the wazoo but that is how I feel. I simply love that color and peonies are one of my favorite flowers. You are so talented!!!!!! Your photo setup is just about as sophisticated as mine. The only problem I have is how to keep my diffuser to stand up. It’s about the size of yours. I got some A-clamps but they don’t work. I usually end up calling in hubby to hold it for me. WOW! Both the cake and photos are beautiful. Have a wonderful day.
Thanks so much, Marisa. You are such a sweet blogging-buddy.
By the way, I just lean the diffuser up against the window.
Usually, I tuck one corner up under the window treatment and that holds it in place for me.
I’m watching for the day you try this piping technique. I know you’d enjoy using the tips. Ahem, they are highly addictive though.
Happy weekend!
Your cake is just beautiful! I love all your tutorials, and this is another that I’m adding to my ” revisits”!
Thanks Lois. Happy that you plan to revisit. I’d really love for you to try the piping tip too and let me know how yours turns out.
It’s a fun afternoon project. You’ll enjoy it.
Have a great weekend.
Lisa – I have no words…this is awe-inspiring to the max. Truly. And I love how you break all this loveliness down to simple steps.Thank you. 🙂
Thanks Jeanne. I really appreciate your sweet words.
I’ll bet your girls would enjoy playing around with the petal piping tip too.
Enjoy your weekend.
Oh, my, at first glance I thought they were real blooms in a vase! You have simply outdone yourself! Incredible.
Thanks so much Jae.
I really appreciate that.
Buy yourself a #104 petal piping tip this weekend and give it a try (smile).
Let me know how it works for you.
This is so gorgeous!!!….Makes me want to take a cake decorating class!!! Too bad you are too far way, as I would definitely talk you into making me your student!
Happy instructor here-lol. Give it a try, Shirley.
I think you could do it without me standing there-lol.
Keep me posted.
Lisa, I love seeing all your creations, this one is off-the-charts gorgeous! Way too pretty to cut but glad it froze well and delighted family members. I really enjoy your blog!
Thanks so much Barbara. I really appreciate the visit.
Please do try the piping technique. I think you’ll be really impressed with how easy it is to turn plain into gorgeous.
Also, I mean it when I say the various tips can be a addictive-lol.
Happy weekend!
Beautiful! I would feel so special if I were presented with a slice of that cake! But I would hate to take a bite, and destroy such perfection! I think I may’ve said this before, but it’s worth saying again, that I appreciate how you share your photography tips and set-up. You are training us in more ways than one. Thank you!
That is absolutely gorgeous! I love your photography and your creativity! You always share with so much detail. Is there anything you don’t make beautiful? Pinning for a day I am really brave.
Thanks so much, Peggy.
Be Brave. I think you’ll be surprised to see how easy this is once you get started.
Happy weekend!
I see this was from last summer so I don’t know if you are still responding, but do you mean a literal nail? And how do you turn your creation if you are holding the bag in one hand and squeezing with the other…or are you supposed to do both with one hand? They are gorgeous, by the way!
Hi Teddee,
The piping flowernail is a special nail with a circular metal plate attached. It’s designed especially for creating buttercream flowers. You can find the flowernail tool in the baking aisle of your crafts store.
You hold the flowernail in one hand and slowly twirl it while adding the piping with the other hand.
It takes a little practice but you’ll get the hang of it in no time at all.
I’ll should probably go back and add a photo of the tool but if you Google “flowernail”, the image will pop up and you can see how it looks.
Such a stunning cake! You are so talented! Would you mind sharing what icing colouring you used to get those gorgeous pastel green and peach colors?Do you remember roughly how much of the colouring you used per frosting batch? Thanks so much!
Thanks so much, Nessie.
So glad you love the buttercream peonies. Once you start making these, it’s pretty hard to stop.
You’ll be hooked in now time.
I used Americolor Gel coloring which I picked up at a local baking shop. The gel is much thicker than regular food coloring that you can get at the grocery store (and use to dye Easter eggs).
Most craft stores (like Joanne’s and Michael’s) carry gel coloring in the baking section but I think they’re made by Wilton (which is still a good coloring).
I used Americolor Peach and Americolor Avacado for the peonies in this cake.
I think I probably used very little coloring and I used a toothpick to scrape a little out of the container and then added it to the frosting.
A little gel coloring goes a very long way so, use a little at first, mix it and see if it’s the desired coloring before adding more.
Good luck and let me know how it turns out for you.