T hanks to Old Man Winter and his accompanying snow and blustery days, many folks are now longing for warmer days and an early Spring.
While you may not be able to do anything about the temps outside, you can certainly make the inside look warmer with a flowery Winter garden.
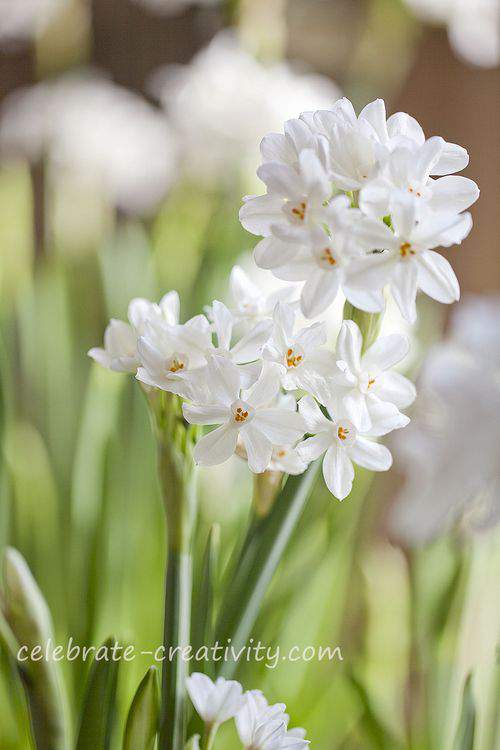
You've probably seen Paperwhites before but perhaps you didn't know what they were called.
Did you know that you can actually grow them yourself indoors even if you don't have a green thumb?
These dainty flowers are fragrant, elegant and amazingly easy to grow.
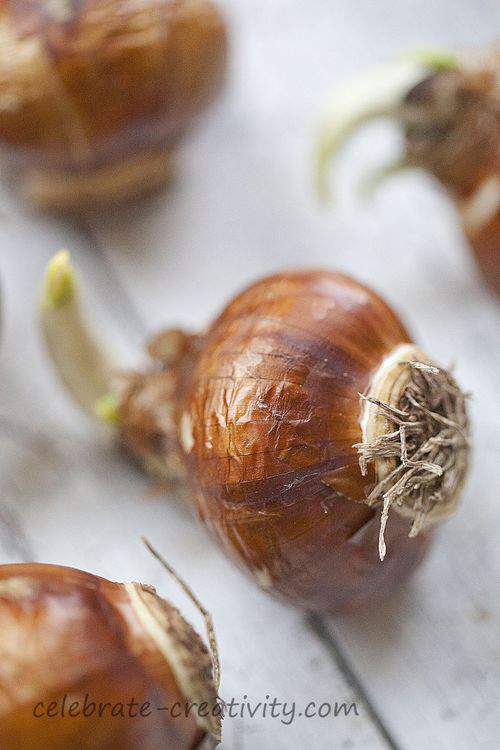
Your indoor garden begins with bulbs like this.
OK, so they look a bit like an onion's country cousin.
You can find Paperwhite bulbs just about anywhere. I've even seen them in the grocery store.
Many home improvement stores sell Papewhitesr bulbs by the bag but I think you may find a better price if you can find them individually at your local nursery.

I originally spotted a bag of 8-bulbs at Home Depot for nearly $10 but then I found these bins of Paperwhite bulbs for sale individually at my local nursery for 69-cents each.
That's not only a better deal but by purchasing them individually, you also get to pick exactly which bulbs you like (although, in this case they all the bulbs pretty much look the same to me).

You can buy more bulbs than you intend to use right away because they'll last several weeks without planting provided you place them in a dark, dry location for temporary storage.
Just keep your extra bulbs in a brown lunch bag until you're ready to put them into containers.

It's also not a bad idea to stagger your plantings so you have blooms at different times throughout the next few months giving you a continuous display of flowers this Winter.
Next step, find a few pretty pots or containers.
You can actually plant Papewhite bulbs in just about anything including mason jars, deep coffee mugs, vases or even a salad bowl just to name a few possibilities.
The paperwhite bulbs don't require any special preparation at all before planting.
Just plant them as is and add water.
I'm including this closeup photo of the bottom of the bulb to give you a visual reference to the Paperwhite root system which explodes in growth.
You'll see what I mean about super root growth a little further down in this post.
You can grow Papewhites in soil or pebbles.
I decided to plant mine in mini-pebbles and I used ordinary aquarium pebbles that I picked up at the pet store.
If using pebbles, you'll need to make sure the container is at least 3-4 inches deep and has NO drainage holes.

When planting, it's OK to place the Paperwhites close together in the container.
Once these stems really start to grow tall, their proximity to each other will help provide support for all the other stems collectively.
Please remember to give your papewhite bulbs a drink of water every other day or so.
Use your finger to regularly test the moisture of the pebbles. The pebbles should stay moist but don't flood the container or your bulbs may rot.
Once the Paperwhites begin to show early signs of sprouting, you can place the containers in front of a window so they can get plenty of sunshine. Paperwhites love sunshine.
While Paperwhites will grow in lower light conditions, the stems will be much stronger when exposed to lots of sun.
NOTE: Once the stems have reached maturity, it's a good idea to remove them from direct sunlight and display them in indirect or diffused so they don't grow too long and leggy.

Don't blink because it won't be long before the stems lose that original curve and begin to grow straight up and tall.
You'll likely begin to see some growth in as little as 6-7 days.
I don't advise you pull the bulbs out of the pebbles once they start growing but I couldn't resist a quick peek at what it looked like underneath.
Here's the root system after about a week and a half.
With water, sunshine and a maybe even a few kind words, your Paperwhites will begin to bloom big.
It's really amazing the way the flowers just appear in no time at all.
Each morning, I checked in on my garden first thing and discovered new growth. They seemed to gain a 1/2-inch a night.
After just about three weeks, here's a look at how my Paperwhite garden began to shape up.
Amazing, isn't it?
As you can see, it's all pretty simple.
With a handful of paperwhites, some pebbles and a few containers you may already have around the house, you can easily and quickly put a dent in the Winter doldrums with a little bit of Spring.
I've seen some major growth since these pictures were taken. I can't wait to show you what my Paperwhites look like now.
Stay tuned. ♥
WANT MORE MORE CREATIVE INSPIRATION?
I'm continuing to participate in various linky parties around blogland in the new year. Stop by Lucy's happy hour linky event over at Craftberry Bush for loads of lovely ideas. Take some to time to pop over to Kim's linky at Saavy Southern Style for great projects and fun.
COMING UP ON MONDAY
Coming up next week, I'll have more on growing a Paperwhite Garden with more details as part of my winter gardening series.
On Monday (1/7), I'll give you a much closer look at these wonderful, fast-growing plants and also show you some examples of how I've incorporated my home-grown Paperwhites into my own home decor.
Hope you pop by this blog again next week for Part 2 of Spring in Winter.
See you then.


Amazing collection of pics! What a marvelous looking view!
How beautiful!!! You have piqued my interest in bulbs, I have never planted one before. Maybe I’ll have to try it out! PS- great photos!!
What a wonderful tutorial. Your images are beautiful. I am sharing on my weekly wow’s on Saturday.
I love your blog, it is just lovely. You have wonderful pictures and subjects. I have some Paper whites I got for Christmas, so I will get under way to getting them started. Thanks for the beautiful tutorial.
Many Blessings,
Pam
Excellent blog many thanks for spending the time to write and upload. What a beautiful flower.
Great pictures. I love the idea of the aquarium pebbles, nicely done!
I have never planted one before. Maybe I’ll have to try it out! PS- great photos.
Ac Repair New Orleans
I’ve been reading your blog for many years and have used several ideas – I love to sew and bake. Your photos are great “eye candy”. Finally, since we won’t be traveling, I am going to plant some paperwhites. Thank you Lisa for such great directions and of course, your AWESOME photos!
Thanks so much, Corky.
I appreciate your long-running support of my creative efforts and I’m so glad you’ve found a few projects you like.
Good luck with the paperwhites. They’re so pretty to grow and I think you’ll really enjoy watching them spring up seemingly out of nowhere.
They’re beautiful when in full bloom (fair warning, when that bloom fades, they do stink).
Happy fall to you.