Y ou may think I’m a tad bit obsessed with herb gardening considering I posted an update on my budding, small-scale garden just a few short months ago.
Actually, I’m not as obsessed as I am thrilled about how great my garden has been growing.
Even though I’ve started a new batch of herbs, today’s post is less about herbs and more about the pots you can put them into.
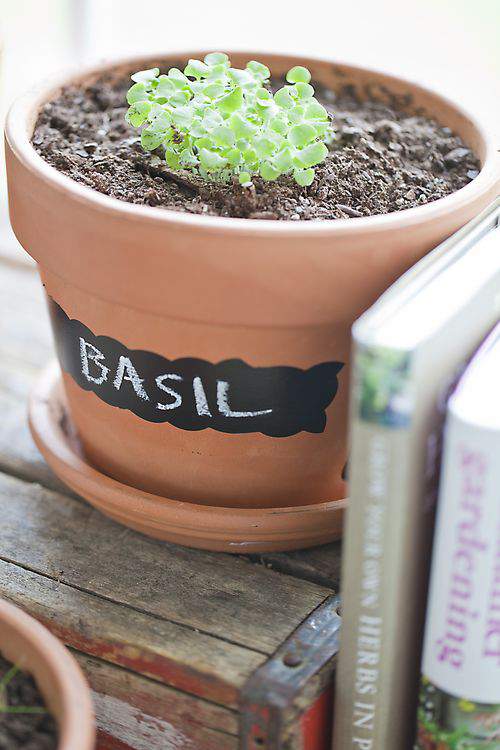
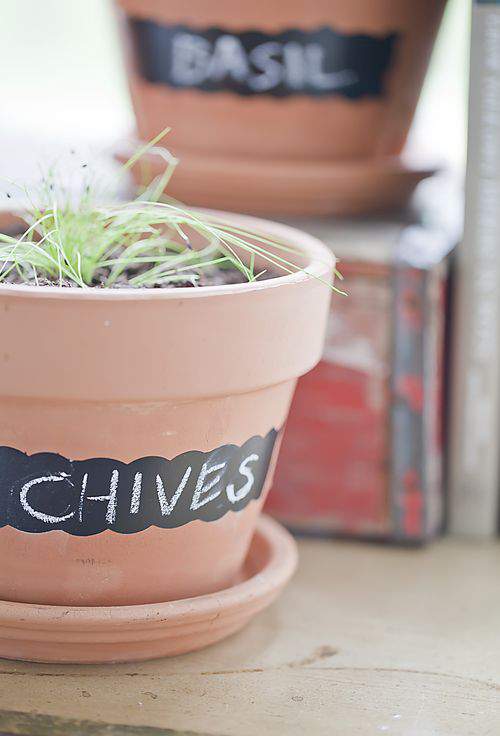
If you’re inspired to start your own herb garden, consider personalizing the pots with chalkboard labeling.
This is a great look, they’re fun to make and the technique is so simple that kids can make them too.
Start with plain, inexpensive pots.
I picked up these terra cotta pots and matching trays at my local hardware store for under $3 each.
You only need a few other supplies for this project including masking tape, a foam paint brush, decorative scissors (scallop edge) and a small jar of chalkboard paint.
NOTE: There are so many fun projects you can create with chalkboard paint. Stay tuned for more chalkboard paint projects later in upcoming posts.

Use the decorative scissors to cut along the edge of the painter’s tape.
You’ll need several strips of about 6-inches each.

Tape off the middle section of the pot to create the shape of a label.
Because the throat of these pots is so narrow, I positioned the tape in a rectangular shape. If using a much larger pot, a square shape would look nice too.
If labeling multiple pots, it’s a good idea to create the shapes all together.
This way you can match up the widths and tape positioning so all the labels are the same size.
Carefully paint the area between the taped area. You’ll probably need to paint several layers. Allow each layer to dry before applying the next.
Also, try not to overload the brush with paint or it may seep under the tape and give you a less-than-desirable result.

Wait until the paint dries completely before removing the tape or you may get some minor smudging along the scalloped edge.

As you can see this outline created a rather narrow label but the size is entirely up to you depending on how wide and long you position your tape outline.
OK, pots are ready and these herbs are ready for a new home.
Time to transplant.
You can easily tear these peat pots apart but it can get a little messy.
I opted to use a pair of scissors for a cleaner separation of the squares.
No need to remove the sprouts from the peat pots. They’re designed to be placed right inside the dirt as-is.
Build up a small dirt bed in the pot, place the peat pot on top the dirt and then fill in the area around the peat.

If the throat area of the pot allows for it, consider a jumbo label.
Here’s an example of a larger, more square-shaped label on a taller pot I’m using to grow Nasturtium.
NOTE: Stay tuned for details on how you can use Nasturtium in the kitchen. I’ll share more on that in THE FRIDAY FOODIE column coming up later this week.

Meanwhile, I’m definitely still a beginner when it comes to herb gardening but I enjoy finding new ways to house my budding sprouts. I’m also determined to turn my brown thumb, green.
By the way, I think a set of these chalkboard pots (filled with herbs or without) would make a nice summer gift for friends, loved ones and other budding, small scale gardeners.

So, have you started an herb garden yet?
If so, how do you store your fast growing plants? If not, what are you waiting for?
COMING UP ON FRIDAY
The colorful flowers in this salad almost steal the show in this tasty looking salad featuring Nasturtium.
Yes, some flowers are absolutely edible and vibrant Nasturtium is one of them.
Coming up on Friday (8/24) stop by for the latest edition of my bi-weekly column, THE FRIDAY FOODIE.
I’ll take you all the way from Nasturtium seeds, to Nasturtium plants to pretty Nasturtium on a plate.
Hope you pop by this blog again for a closer look at my “Nasturtium Salad”.
See you then. ♥


I’ve seen that salad many times and have always been tempted to try it but then shy away. Hmm… you may make me rethink that. Great job on the pots – they are charming!
I love this idea. This makes great for gift giving too.
Such an easy but really cute project. I would love to grow herbs in my condo but no windows are summy enough. 🙁 I may do this for my herbs next year tho. Thanks for sharing.
Thank for the idea. I just bought a starter cilantro and was trying to come up with a pretty pot idea. I will defintely try this one.
That is so super cute! Very clever in your approach too. I may actually have to try it hehe.
What a lovely idea! It is looking very easy,simple and fantastic to construct. Really very unique. Surely, I will try this and tell to my pots loving friends. Thanks for sharing!
This is a great idea to decorate your pots and at the same time it serves the purpose of identifying the plants growing in those pots. Especially at when seeds are planted, we tend to forget what we planted in each pot when the seeds eventually sprout. This helps eliminate this problem. As shown in the picture, they also look great in the garden or on your balcony. If you change your mind and decide to plant something different in the pot, you can always paint over it and label it again.
Such an easy but really cute project. I would love to grow herbs in my condo but no windows are summy enough. 🙁 I may do this for my herbs next year tho. Thanks for sharing.
Thanks so much Gen. The garden pots are fun to make and I love being able to change the labels with the stroke of a piece of chalk.