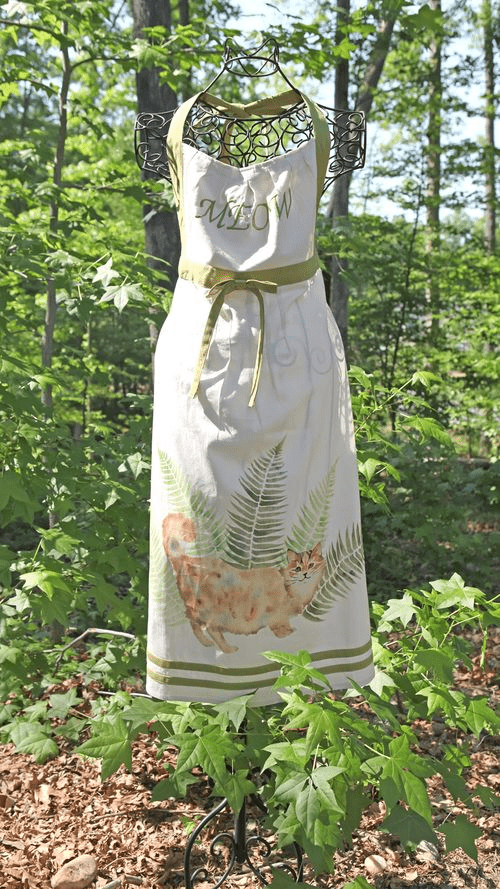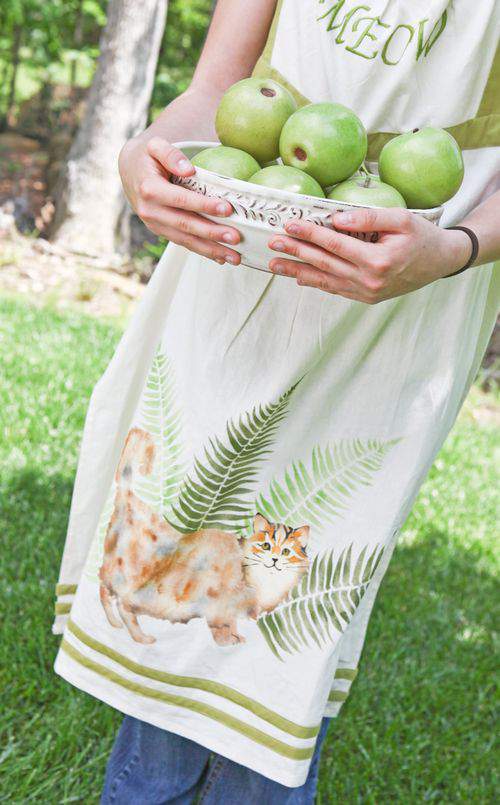
After my last post on the discovery of five kittens in our backyard tree, I thought I’d stay with the kitty theme with an embellished, apple green apron project fit for any fan of felines.
If you’ve never tried stenciling an image onto fabric before you’ll love seeing how easy it is.

Before I show you how to stencil this beautiful kitty apron… allow me to share the following kitten update.
KITTEN UPDATE: The mama cat moved her entire litter to a hidden location shortly after I snapped all those photos of the kittens. Also, the recent attention focused on the hollow portion of the tree highlighted just how rotten the Chestnut Oak really was. We called in tree experts who warned that the tree could be toppled by a strong wind at any time. Not good, considering the angle would have brought it down through the center of our house. We had the tree removed three days later.
Click here to see how it came down.
Throughout this post, I’ll show you how to add this great looking kitty stencil to an apron.
I’ll also walk you through the masking technique used to create the illusion that these ferns are behind the main subject.
 I used an Amy Butler pattern called Domestic Goddess for this project. There are two apron styles in the packet which includes a waist length and the full body one used in this post.
I skipped the pockets and added a few other decorative elements instead.
I needed a model in a hurry to help showcase this apron and my teenage neighbor was so sweet to help me out on a moment’s notice.
She is definitely a cat lover. In fact, she wanted to keep one of the hollow-tree kittens featured in my last post but that got nixed by mom.
She already has two beautiful cats at home including one you’ll met at the end of this post.

Here’s another version of the same Domestic Goddess apron pattern.
I made this seafoam-trimmed, linen apron for Cameron a while back along with a matching chef hat.
You can click here to get a look at my chef hat tutorial.

FUN NOTE: This photo of Cameron appeared in a Texas area parks and recreation brochure last year after the rec director spotted the photo on my blog and asked permission to use it to promote a summer cooking class for kids.
Too cute. 
This particular pattern is one of my all time favorite apron patterns.
You won’t be able to stop at making just one. I’ve made several for myself, friends and for gift giving over the years.
Of course, no matter how much you love a particular pattern there’s always room to tweak it to change things up just a bit (especially if you use it a lot).
In this case, just a few simple additions helped me personalize this apron including the addition of an embroidered bodice in keeping with my kitty theme.
I also made a bow tie out of the same green trim fabric trim and attached it to the waistband.
Leaf green trim across the bottom of the apron help to anchor the stenciled image.
Before I show you how to stencil the kitty and ferns, let me share a great stenciling resource with you.
Stenciling on a Grand Scale not only features this kitty stencil (showcased on a wall) but also includes detailed step by step instructions for many other stencil ideas and techniques.

There are endless stencils available at crafts stores and on-line and you can click here to find the mama cat and fern stencils used for this project.
In addition to the stencils, you’ll need a few good stencil brushes, assorted acrylic paint colors as well as a small amount of painter’s tape to hold the stencil in place while painting.

Most detailed, multi-layer stencils are laser-cut from mylar which adds great durability.
The stenciled image is created in steps by painting a portion of the image first and then layering additional portions of the image one stencil layer at a time until the image is finally revealed.

The first stencil layer for this project is the cat’s face and paws.
It’s important to use as little paint as possible on the stencil brush. If too much paint is on the brush it may seep under the stencil and bleed into the final image.
Add a slightly darker color around the edges of the stencil to add shaded detail.

After dipping the brush in paint, you’ll need to blot off most of the color onto a paper towel. This is called off-loading.
Off-loading creates a brush that seems almost dry to the touch. That’s what you want.
Stenciling requires that the color for the image be built-up slowly, one layer of paint after another.
As you can see, each subsequent stencil layer provides another feature of the cat’s face.
Multi-layer stencils will always have registration marks which are located in the same location on each stencil sheet to help guide the proper placement of each sheet. This ensures that the image and outlines line up precisely.
As you can see, the mama cat is slowly starting to appear on the fabric with each new layer.
Various shading techniques can be used to help distinguish areas of the image even more.
Of course, the more you practice the better you’ll become at perfecting various techniques to make the image as realistic as possible.
The final third stencil layer gives the kitty more defined facial features.
She’s really starting to come alive now.
Now let’s add the ferns behind the cat image.
Most professionally cut stencils also include mylar pieces of the image which allow you to use masking techniques. Masking involves covering one image in order to add another image behind it.
First, completely cover the body and face of the cat using the masking elements that are included with the stencil.
TIP: If your stencil does not include masking elements you can create your own. Simply stencil the image onto mylar and cut it out using fine craft scissors or manicure scissors.
Masks can also be created and used with rubber stamp projects to achieve the same “background” effect for cardmaking and other paper craft projects.
Once the mask is in place, simply place the background stencil over the mask and begin applying the new image.
I didn’t use any tape for this demonstration but it is a good idea to use painter’s tape on the corner of each stencil to keep it in place as the paint is being applied to keep the stencil from shifting.
Continue to add the background stencil in various positions and the overall image will soon take shape right before your eyes.
Plan your background elements carefully because where and how you begin will make a difference in the finished presentation.
For a more translucent effect, I used a lighter shade of green to create a few ferns about 7-inches apart. The, I used a much darker shade of green on a third fern in the middle to give the appearance that the third fern is in the foreground.
NOTE: Shading and placement techniques like this are also detailed in the stencilling book I mentioned earlier.

Whether you apply this stencil to a wall or fabric, always stencil a practice version (or two) first.
This will give you an opportunity to work out any kinks on a scrap paper or fabric before you actually stencil it onto your finished project.
Remember, this is especially important if you plan to stencil onto a finished apron.

Once you’ve finished stenciling your image onto your apron you’ll need to set the paint.
Cover the image with a pressing cloth (or other thin fabric for protection) and then run a very warm iron over the image several times.
If set properly you should be able to gently wash the garment without risk of losing the paint.
By the way, don’t throw away that piece of scrap fabric you practiced on.
If it’s large enough you can put it to good use by converting it into a pretty, decorative pillow.
Click here to see my tutorial on the flower pillow in this photo.

Meanwhile, as promised, allow me to introduce you to my neighbor’s cat, Wafer.
That’s short for Vanilla Wafer and what a beautiful kitty she is. Look at those gorgeous green eyes.
Isn’t this the sweetest picture? There is definitely some real communication going on here between these two.
Special thanks to both of my models for helping me with this photo shoot.
Finally, here’s another view of my finished kitty apron.
The apple green color throughout the apron is one of my favorite shades.
I love how the trim, embroidery and stenciled elements came together for a “purr-fectly” adorable presentation.

I think you can see how stenciling can add a creative and lively detail to any garment and I hope you can see the possibilities in using the masking technique to enhance your main stenciled image.
Try this easy stenciling idea and you’ll be sure to turn your next apron project into the cat’s meow.

Thanks for stopping by.

As always, another fun and adorable project Lisa! I’m sorry to hear about your pretty, bit tree — we’re losing lots of them to the Ash borer this year. I wish we had the fun of kitties to take away the sting of removing the trees. Love your aprons — thanks for the link to the pattern!
This is just lovely, Lisa – perfect for a cat lover! Cameron’s picture is so darling I’m not surprised someone wanted to use it.
I love this project, thank you for creating another wonderful tutorial!
You do such beautiful sewing and crafts. What I like is that your instructions show the process so well that I get the feeling I can do it too. Your designs are so sweet and always look fun! Thank you for sharing the apron projects! I am going to buy that pattern to make as gifts!
Amazing stencil apron! I love it, and it’s so inspiring to see how it’s actually done! Thanks!!
Pei Li
Lisa, your apron is purrfection. You are so talented.
I must say that overall I am really impressed with this blog.It is easy to see that you are passionate about your writing. I wish I had your ability to write. I look forward to more updates and I will be returning.
This is so cute and very creative. Looks like it wasn’t made by hand.
The photos are awesome, what kind of camera are you using?
I am very interested in making the raggedy ann dolls you have pictured but don’t see any instructions or pattern on your site. Could you please tell me where I could get the instructions for these. They are adorable and I know 2 little girls who would love them.
Thanks.
I’m so glad you sent out links to all your past posts! They are so wonderful. Thank you, and I can’t wait to get busy trying this one and several more. ~ Lynda