
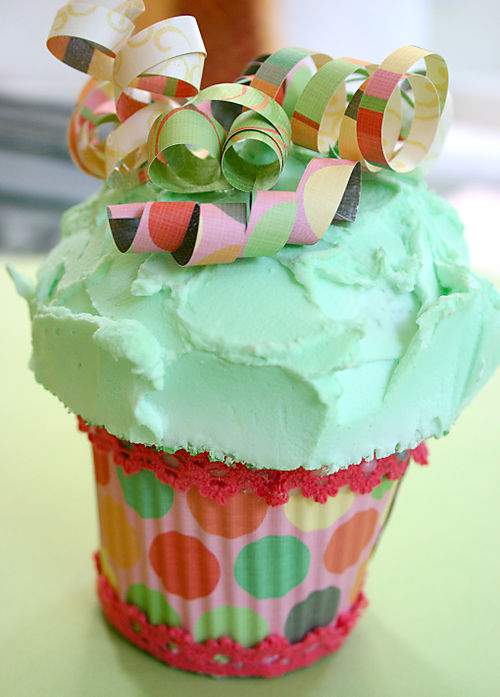
I think just about everyone has a sweet tooth when it comes to cupcakes. This colorful dessert is the perfect recipe. These cupcakes are fun, super easy to make and they look delicious.
However, this is one batch of sweet treats that I don't recommend you actually take a bite into.
These confections are actually for fun display only, and are made out of easy-to-find materials in addition to a few colorful scrapbooking supplies.
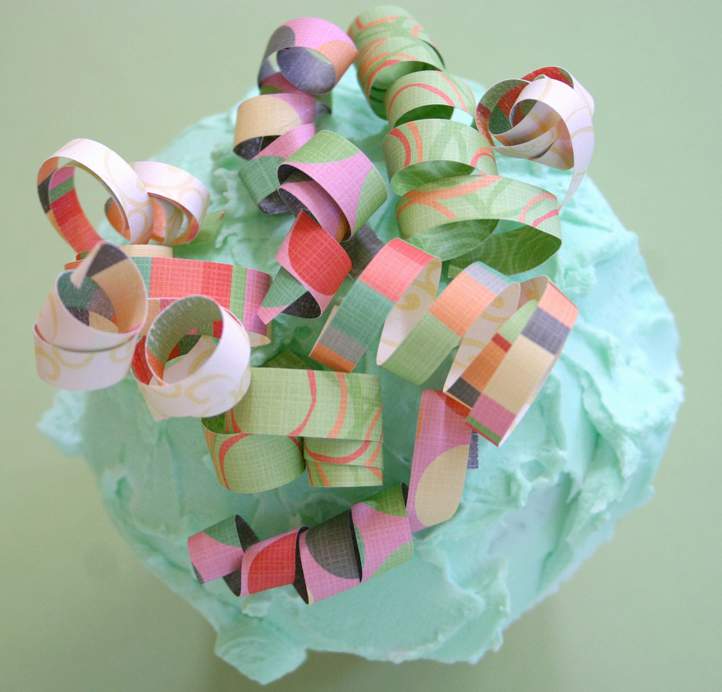
It's so much fun to see just how creative you can get with the decorations as you can see in the fun photo below. These curly-cues were made from small strips of patterned paper and curled the old fashioned way-with a pencil edge.
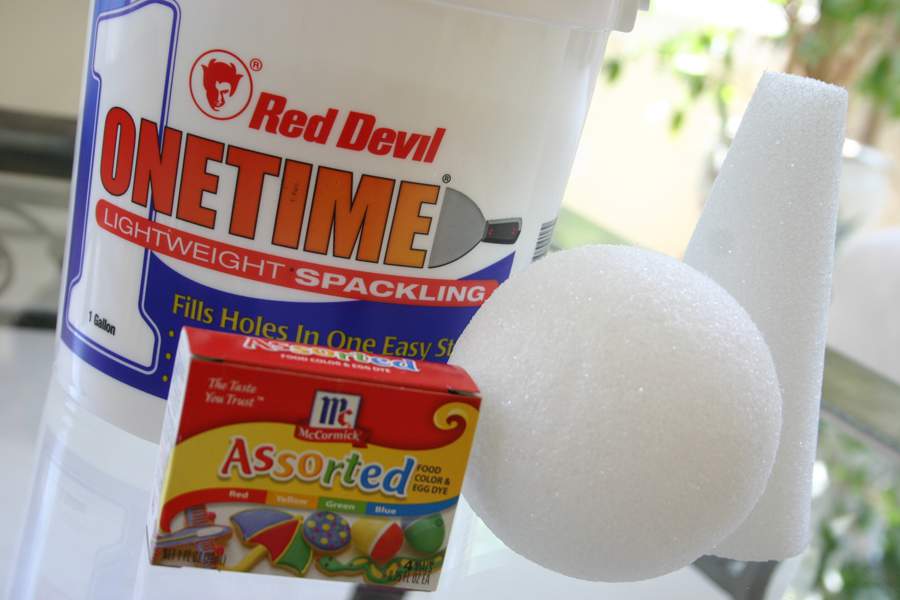
This is another project that requires minimal supplies. You'll need some Styrofoam balls and cones, some assorted food coloring, assorted acrylic craft paint, a putty knife and one gallon of lightweight spackling which can be picked up from any hardware store.
Start by creating the cupcake shapes. Cut the Styrofoam ball in half using a large kitchen knife. Also cut the lower portion of the Styrofoam cone to desired size to form the base of the cupcake.
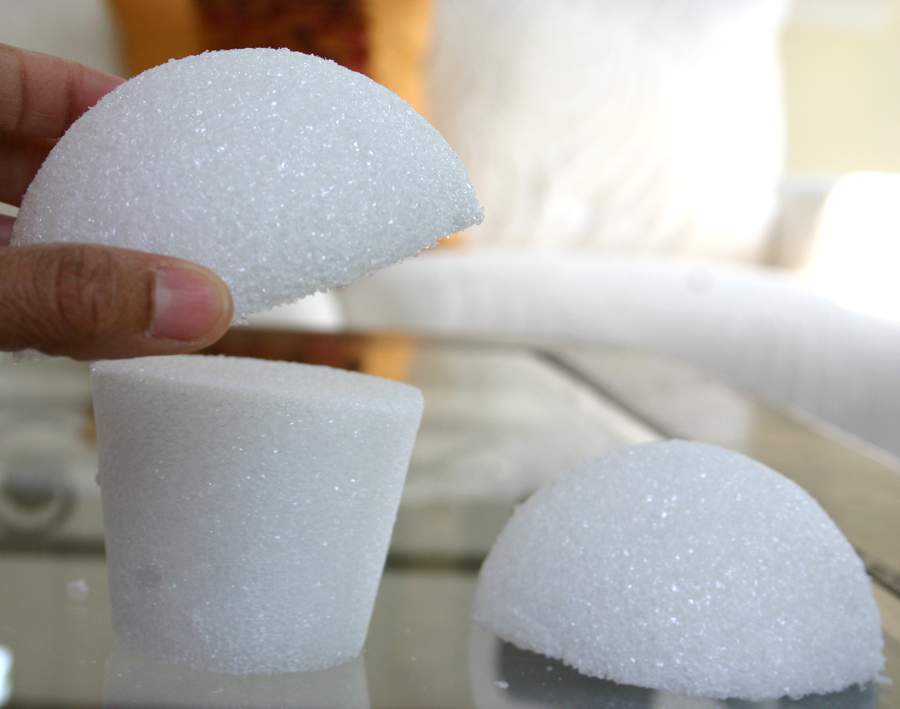
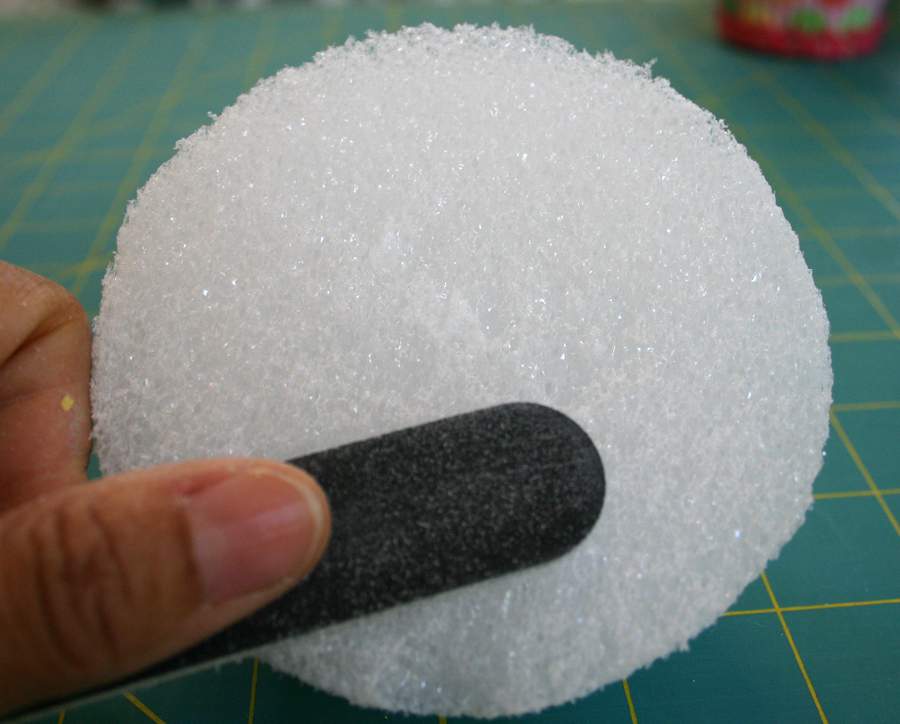
Don't worry if you have difficulty cutting a perfectly flat slice in the Styrofoam. Use sandpaper or a crafter's file to shave the excess Styrofoam so that the surfaces are even and fit flat together.
Now for the frosting. This is where the drywall spackling comes in. Spackling is generally used to fill in holes for drywall repair. It dries very hard and can be sanded down on just about any surface.
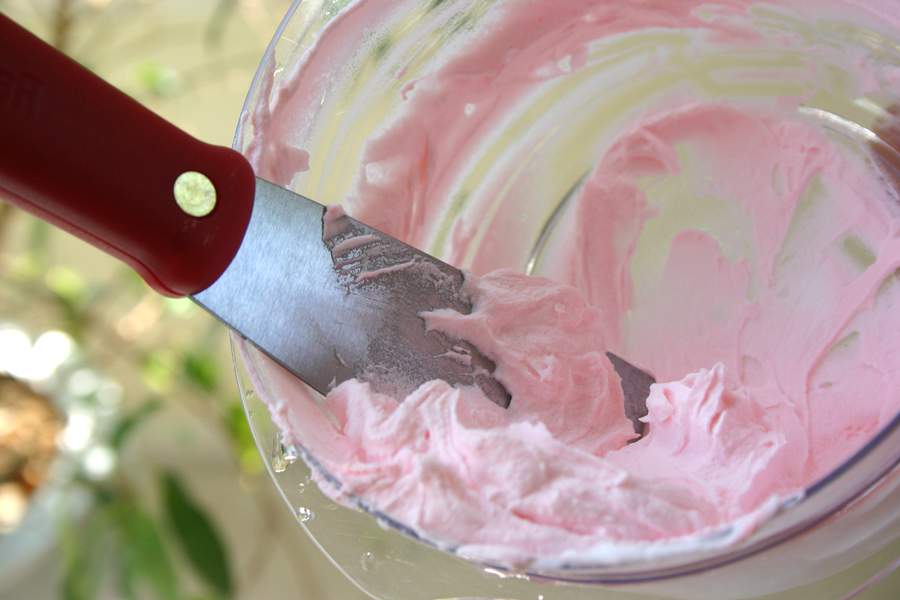
It's also perfect for this project because spackling has a smooth, creamy texture as you can see in the photo below. Spackling is easy to work with and has the same consistency as frosting. It's also water soluble so it's a breeze to clean up.

To make the frosting, transfer between 1-2 cups of spackling to a smaller container. Add one tiny drop of food coloring for color and then mix well. The more food coloring you use the darker the end result, so start off with the tiniest possible drop first.
If the color is still darker than you want, just add more plain spackling to lighten it up. Hmmm, looks good enough to taste, doesn't it?
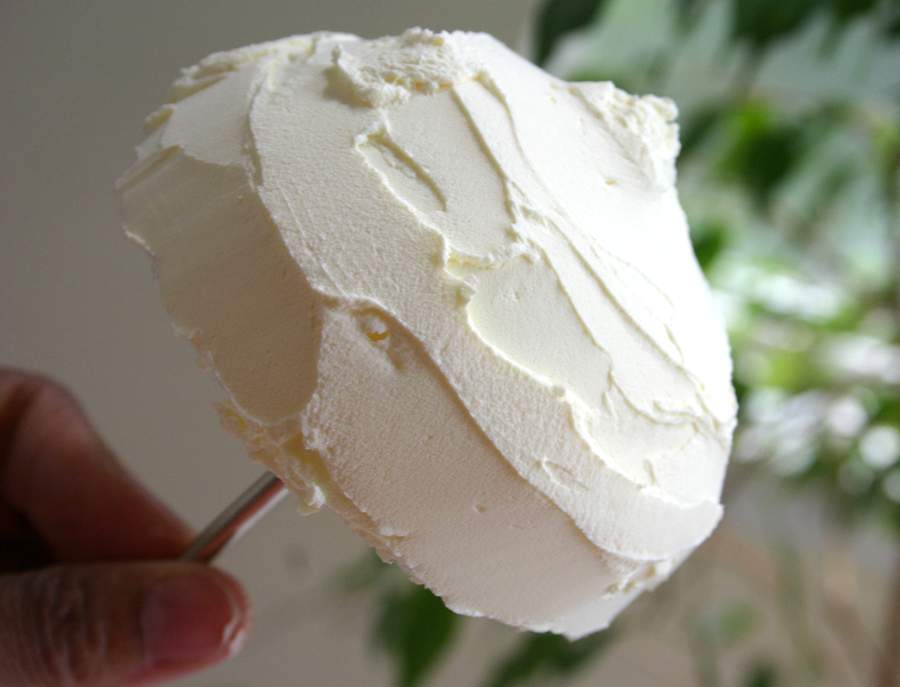
Use a putty knife to apply the spackling directly onto the Styrofoam. I initially used a screwdriver in the bottom of the Styrofoam to hold it firm while applying the frosting, but the cupcake kept twisting around with every dollop of frosting.
I found a dinner fork stuck through the bottom works best, because the prongs in the fork hold the ball firmly in place and prevents shifting during the application of the frosting.
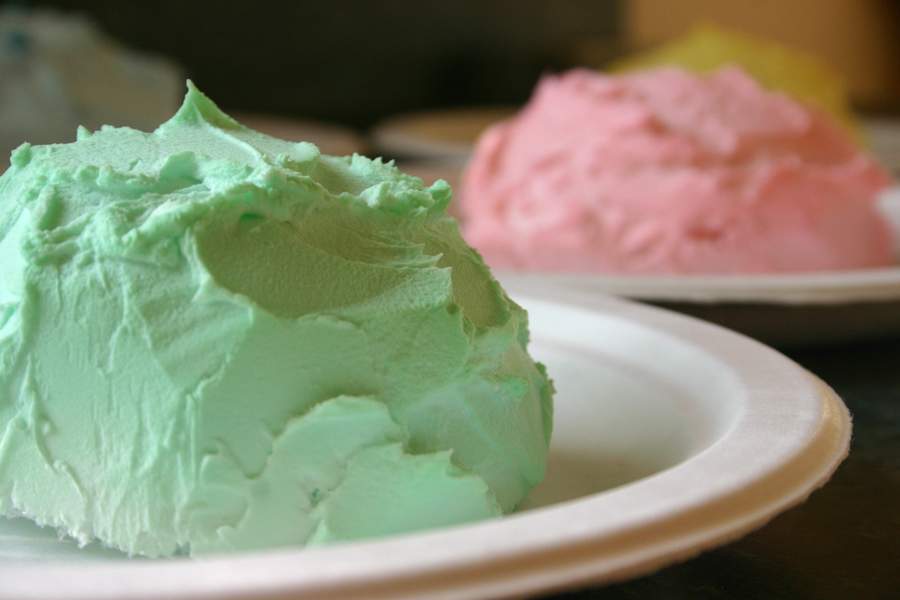
Set your frosted half-balls on a paper plate to dry completely overnight. The colored spackling will typically darken a tad during the drying and hardening period. Keep that in mind if you're trying to achieve a particular shade.
Warning: Please keep these out of the reach of small children who may be tempted to taste them because of the realistic looking appearance.
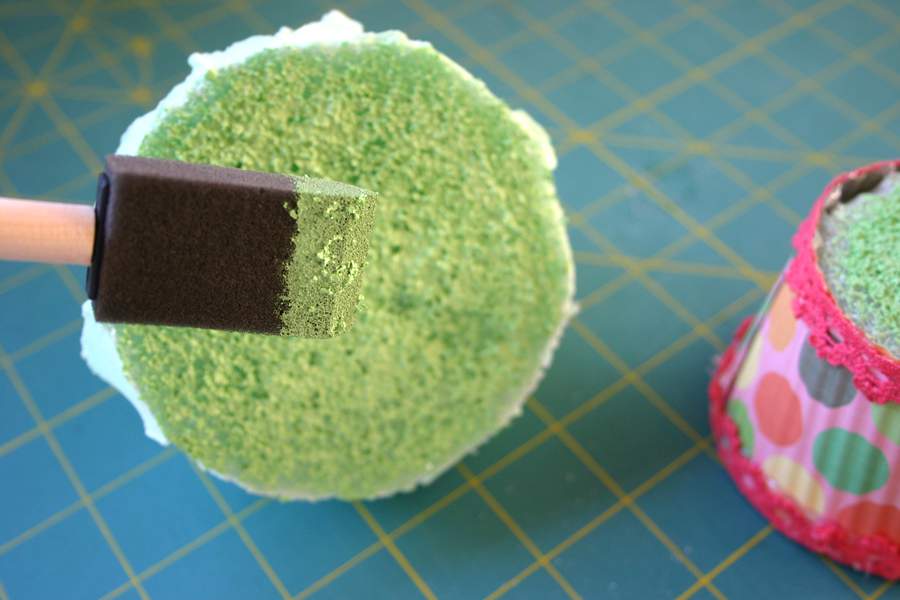
After the spackling has completely dried and hardened (at least 24 hours), paint the bottom of the half-ball and the bottom of the cupcake base a matching color. Acrylic craft paint is fine for this step.
The matching paint will help conceal the exposed white Styrofoam and help everything blend in.
Now it's time to decorate your cupcake base which is made up of the Styrofoam cone that was cut. Measure the height of your Styrofoam cone and cut a strip of patterned paper slightly wider than that measurement.
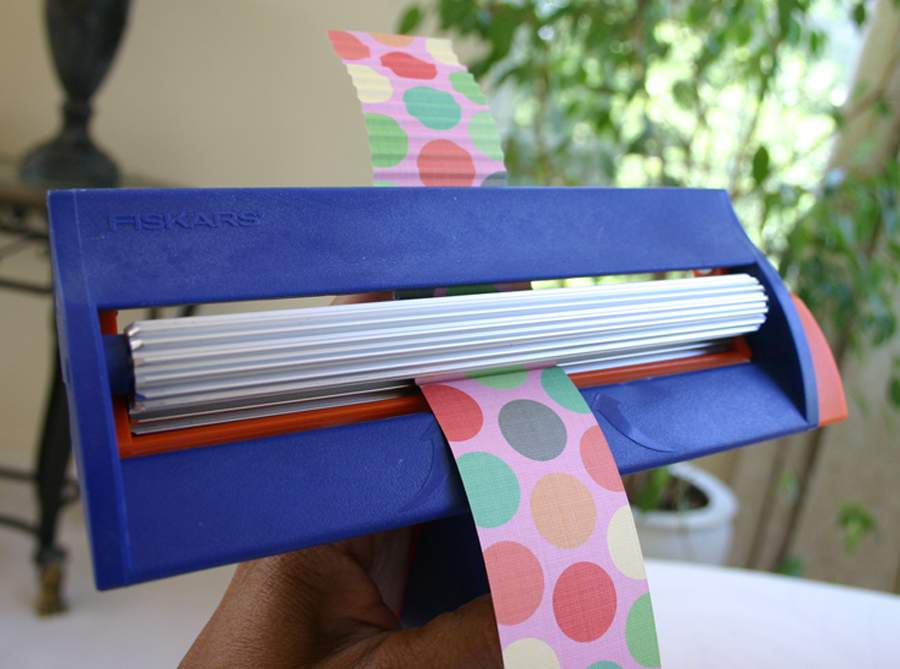
I used this crimper by Fiskars to give the paper strip the vertical ridges that you typically see on cupcake tins. I've had this crimper for years and it's always great finding a new use for an old tool or supply.
Just feed the paper through the metal rods, squeeze the handle at the same time and turn the orange knob on the side. The paper comes through the top of the paper with these wonderful ridges.
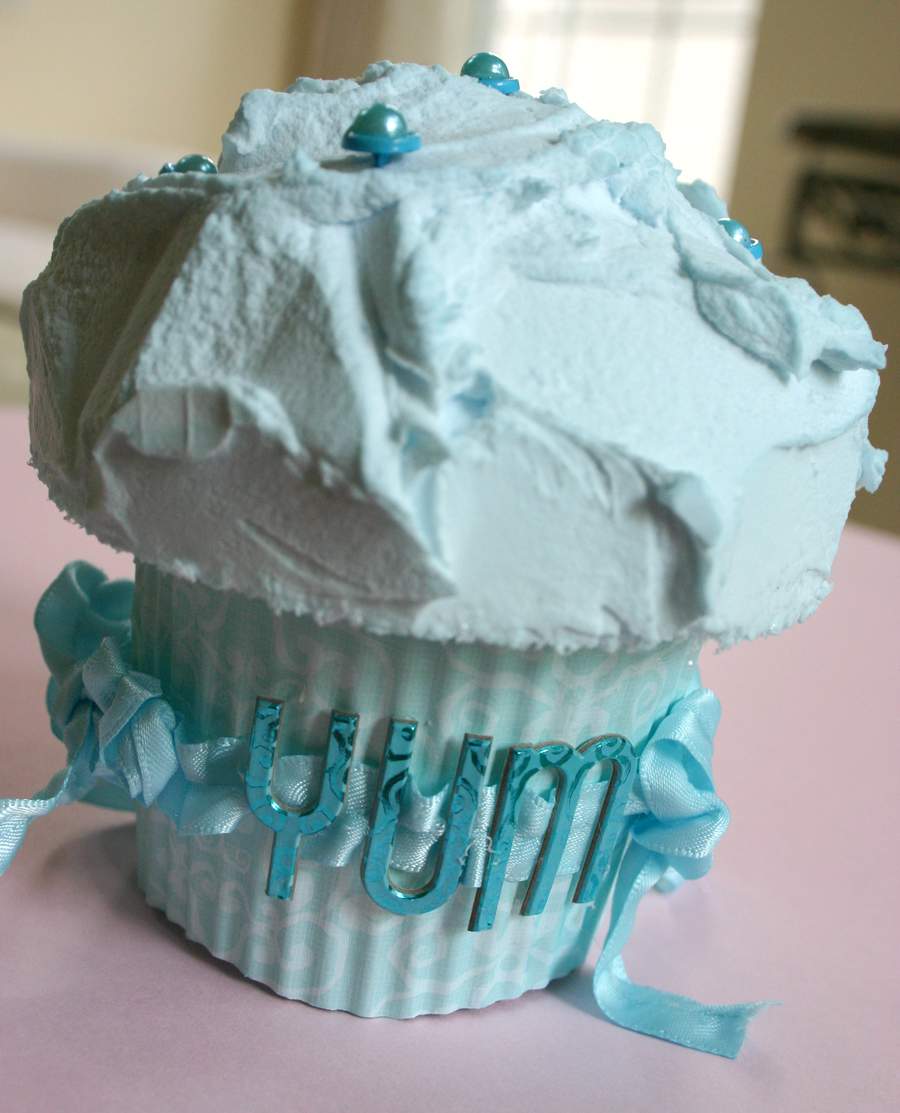
Use a hot glue gun to adhere the crinkled strip to the Styrofoam base. Then just embellish to your heart's content. For this base, blue ribbon and matching sticker letters add a festive touch.

Adhere the top portion to the bottom using hot glue. Then decorate the top of the cupcake as you please.
I used matching pearl scrapbooking brads on top. Since the colored spackling is hard at this point, you can use a paper piercer to create a tiny hole in the areas you want to add brads. Apply a small amount of hot gun glue to the tip of the brad and stick the brad right into the hole.
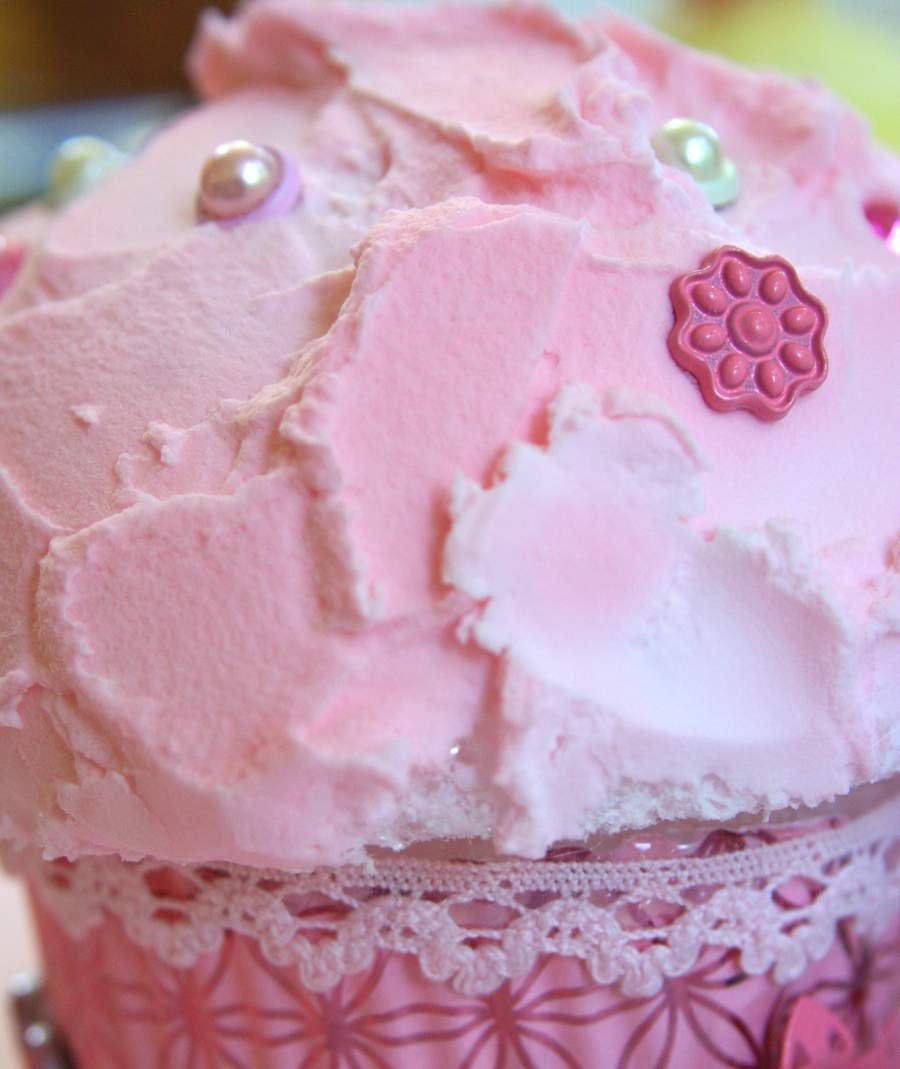
Here's a closer look at the embellished pink cupcake. I love how delicious that frosting looks. Ahem, I mean how yummy that spackling looks.

You can rummage through your scrapbook stash for lots of creative ways to decorate your cupcake tops. The possibilities are as fun as they are endless.

This butterfly topper was fussy-cut out of patterned paper. I curled tiny strips of craft wire for the antennae.
Use a tiny drop of hot glue to secure the antennae to the underside of the butterfly and then hot glue the butterfly body to the top of the cupcake.

These yummy-looking cupcakes were on display a few weeks ago at the annual National Craft and Hobby Association convention and trade show in Chicago. The event brings manufacturers and retailers together from all over the country to preview and order the latest and greatest in scrapbooking and crafting products.
I was one of several artists asked to create a few original cupcakes and other projects for the Chatterbox booth.
Meanwhile, this is certainly a project you can try at home and with supervision it would also be a great project for youngsters.
You can use these cupcakes as party favors, decorative table items or just create a few for the fun of it on a rainy day.

Just looking at these cupcakes makes my mouth water. They certainly look good enough to eat. Remember, no tasting-or you could end up talking to a dentist instead.

Lisa, I love your blog. Incredible ideas, photos, and easy directions. You add a ray of sunshine to my day – thanks!
These are great. they do indeed look good enough to eat.
Great idea! Love the blog, the photos and ideas. Keep ’em coming!
I have got to make some of those! What great decorations for my upcoming craft show. Thanks for sharing this fun idea.
Thanks for the great tutorial and superbly yummy idea! I hope you don’t mind that I share this on my post today.
These are just too cute, so yummy and non fattening too :o) Thanks for sharing the directions!
Those look great! Too bad I’m not a scrapper – I’d be more likely to make them with fabric 🙂 Thanks for the inspiration!
I always admire faux cupcakes and have several – now I can make my own!
Karla
oh my gosh I love this project!
Lisa, they’re so cute! I imagine them in a smaller size all over a Christmas tree. Maybe silver paper “cups” and white and pink cupcakes with dragees. You’ve got me thinking! The kids will be back at school in two weeks and this sounds like a perfect little Mommy project while they’re out of the house. Thanks for the great idea and tutorial!
I can’t believe my mouth is watering for spackle! Lovely.
Those cupcakes are spectacular. I LOVE cupcakes as you would see on my blog. They look like even I could make those. Absolutely adorable. Great job. Tracey
You have the most creative, clever, and beautiful blog in blogland! I always enjoy seeing what you will share next.
Those look SO real and now I want a cupcake! LOL
That spackling frosting is pretty amazing – who knew? What a fun project!
*grins* Now i’m craving for cupcakes!! Those are absolutely fab Lisa!
SUPER CUTE! 😉
I’ve always thought these were adorable and didn’t know how it was done…thank you soooo much for showing s all! So cute and low cal too! 🙂
Wow – these cupcakes are truly a work of art. You are so good at choosing the right colors, patterns, textures and embellishments that delight the eye in your various crafts. Thanks for detailed tutorial.
Very fun, thanks for the tutorial! =)
Those cupcakes look absolutely scrumptious!
Love, love, LOVE your blog. So many inspiring ideas. I’ll be back.
~Connie
Really nice project. Your tutorials are a bonus, the “icing on the (cup)cake” – thanks.
YUMMY! I actually thought it was real when I logged on! Do you ever do anything halfway? You are just awesome, awesome, awesome! Thanks for stopping by my blog, I haven’t kept it up, summer got in the way!
Yummm, making me crave for a cupcake now. I’m on a supervised No sugar diet due to the pregnancy. Why oh why! They are so pretty Lisa!
You have a wonderful blog. Thanks for checking out my blog, now I have this wonderful link!
Warning: Please keep these out of the reach of ADULTS who may be tempted to taste them because of the realistic looking appearance.
Wow – they look perfect. And tasty… Knowing that it is fake isn’t making me feel any less hungry…
Hello Lisa!
Your creativity simply amazes me!! I love these, and I just have to give them a try my little grand daughter would just flip over them! Thanks so much for sharing! Have a fabulous week!
Smiles…
Beverly
Lisa, I am more and more amazed over all your boundless creativity!!! I have no idea how it is possible to come up with such fabulous projects time after time, but I love to see them!
~Emily
Lisa,
You are just so clever!. I enjoy your blog so much and always amazed at your talent.
You are so creative! What a fun idea…they look so yummy…makes me hungry for real cupcakes! I love to read your blog and see all of your wonderful ideas. Thanks again for the great tutorial! =)
those are so sweet, the blue one is my fave!
Cute and clever! And your instructions are always so well-written. And of course, fabulous and inspiring photo-taking!… Thanks for sharing this “recipe” with all of us. 🙂
That is SO cool! I have to make one ~or more~ of these!
Lisa, you are so full of ideas! Those cupcakes look so real! Thanks for sharing and I always enjoy my visit to your blog.
They really look yummy … and are perfect for my diet :-)) Looking forward already to your next project!
Those are awesome cupcakes, and no calories! 🙂
How incredible the cupcakes are! I truly love how you do the how-to on all your projects.
Lisa, your photos are always fantastic and inspiring. Maybe sometime you should share some of your photography tips especially for doing tutorials like this!Please!
Cheers.
Hi Lisa, Wow, these cupcakes are amazing, and even though I know they’re not edible, I really must go bake something now to satisfy my sweet tooth!
Those are awesome, Lisa!
These are so cute! I LOVE cupcakes, and these look good enough to eat :). My hope to creat a sewing/craft area with a cupcake/candy theme. This project will definitely be kept in mind :).
Also, thanks for visiting and leaving a comment on my blog. I love reading comments!
Lisa, these are the cutest cupcakes ever! We made cupcakes for my daughter’s wedding (I’ll share the behind the scenes of that project tomorrow). They were no where near as cute as yours though!!! You are such a creative whiz, you never cease to amaze!
Happy day,
Melissa
once again – you blow my mind. those are adorable. they look as real as can be. youngsters heck, i would even try to take a bite if they were around me. too cute lisa, thanks for sharing.
What a riot! These are beautiful and a fun idea!
those are amazing! they really do look delicious! and love the tutorial! thanks for the congrats.
I love this project and I want to eat it! I can’t believe I missed the show either!!! I guess next year! Jen r
Lisa, your blog is just adorable:) you really have the best ideas and projects over here… these cupcakes you made are just the sweetest…i love that crimper, i never knew there WAS such a thing…how fun!!!
Beautiful!!! And good for you too. Not a calorie ingested!
I just found your blog…your cupcakes are precious..and such an inspiration..:)
Wow! Your cupcakes are looking so yummy! Pretty nice idea!
And thanks for the instructions – this is a cute idea for parties (even if you have to tell everybody twice not to take a bite! 😉 ).
yumm-o indeed! Those seriously look good enough to eat!!!
Say…you have something on my blog that’s yours ^—–^
Chat soon honey,
-Karla
Absolutely GORGEOUS!
Beautiful!
Denise Nantasket Beach Mass.
I just found your blog through a link at my friend Debra’s blog – her link is http://www.endoftheday.typepad.com/
I’m SO GLAD I decided to click – for I found your blog – which is totally delicious to the eyes, as well as inspiring! Just WONDERFUL – I am looking forward to more visits!
Lisa!!!
You amaze me! It will take me a long time to believe that is actually spackling and not real frosting…and your gadgets- that crimper, where on earth do you discover such cool tools?! I think I may just need one!
Oooh and your butterfly- just perfect!
These are gorgeous and definitely look good enough to eat!
these are adorable and look good enough to eat!
Oh my goodness…I’m so glad you commented on my blog so I could get your blog addy…amazing stuff here girl! Those cupcakes blow my mind! This was the first CHA I missed, too bad I couldn’t have seen them IRL…but I’m tickled to see them here 🙂
Have a great day!
Suzie
These are fantastic,the kids would love these
How fun are those!!!! Is there any end to your creativity? Love the new blog banner. B-utiful!
how absolutely adorable! I will have to make some to decorate my kitchen. I am known as the “cupcake lady” among my friends’ husbands, because whenever I come over I bring cupcakes. I just much rather look at cupcakes than eat them.
oh my! those cupcakes look fantastic!! 🙂 what a great idea!!!
You are all that and a bag of chips and I left you some love on my blog.
xoxo!
A.
You are one creative lady, love your work! Now I’m craving cupcakes because your…spackling…looked soooo good! Very cool project, may do some for the little girls room.
unbelieveable!!!! your talents just amaze me!
I thought these were real!lol Lovely!!
wow!!! how creative! i might have to do this for a birthday party in the near future! thanks for sharing!
-sarah
Hi. I just came across your blog and love it!! These cupcakes are gorgeous. I am going to have to try make some myself!
Daisy~
Thank you so much for this tutorial, without it I never would have been able to create my most recent project: Giant Light-Up Cupcake. http://madgypsystudio.blogspot.com/2010/03/if-youre-gonna-make-giant-cupcake-you.html if you have a second, please come check out the blog entry about it. I have linked your fantastic tutorial in it. Thanks again!
Wish I had discovered this blog LONG AGO….what wonderful tips! thanks so much