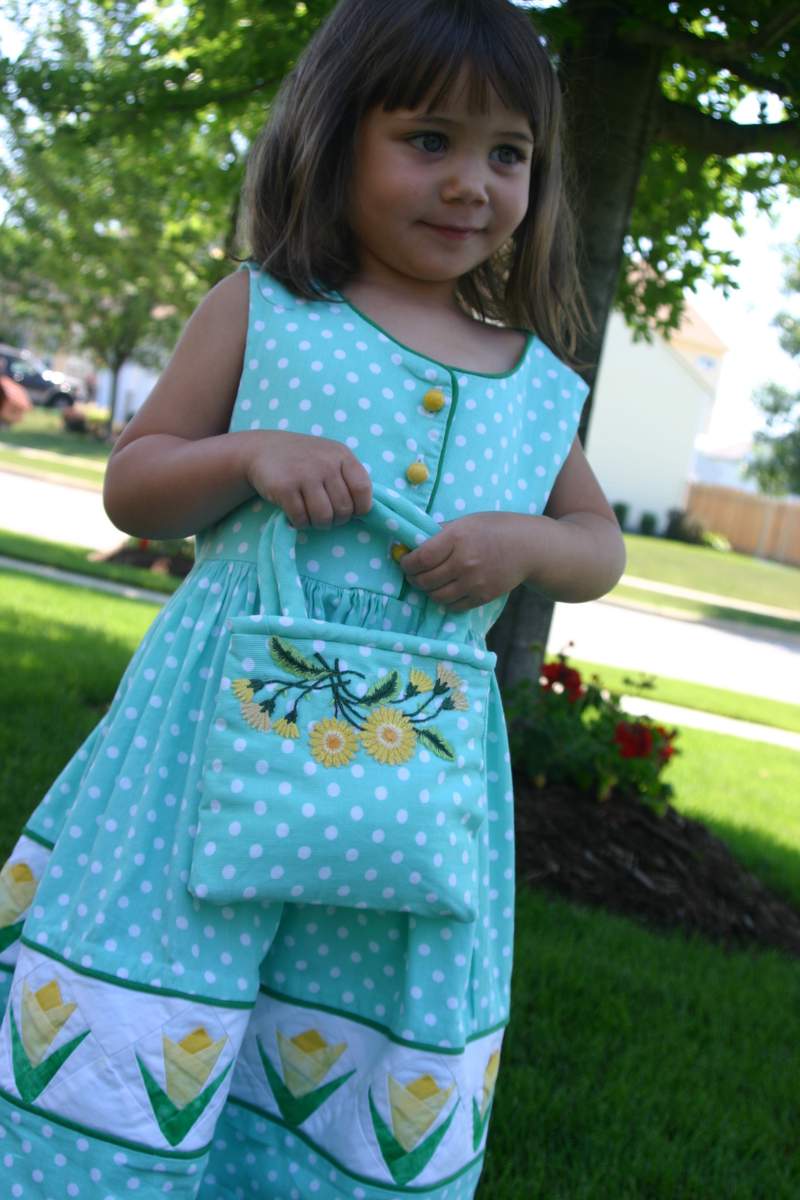
When I first saw this jumper inside the pages of Creative Needle sewing magazine a while back, I knew I had to make it. I called all over the country to find the pattern, the polka dot pique' fabric and even the little yellow buttons to complete the project. The cutest part of this yummy jumper, aside from the cutie-pie wearing it… is the adorable tulip border. 
The technique to create the individual tulips is called paper piecing, and it involves layering tiny strips of fabric over specially designed foundation paper. The picture below shows what the pattern looks like. You actually stitch right onto the top paper following the solid lines as your stitching guide, while holding the appropriate fabric cuts on the back of the paper. Each section to be sewn is marked so you just stitch on the line in numerical order. Once everything is stitched, you simply tear the foundation paper off the fabric and VOILA!… you're left with a perfect little tulip complete with super sharp leaf corners which would be nearly impossible to achieve any other way.
The tulip squares are then pinned on a diagonal and sewn into precut triangles to create the border. Add contrasting bias tape to the top and bottom of border to finish it off before attaching to the bottom of the dress. The number of squares you create is determined by what size pattern you select. 
This jumper pattern is from a book called Dimensional Paper Piecing by Janis Barham Shelton. It's available through Bonnie Blue Designs. While this particular pattern is only available in sizes 2-10, I think the border could be easily adapted to any standard jumper pattern.
Paper piecing takes some practice to perfect but once you get a handle on the technique it's so much fun to see the patterns taking shape with each flip of the fabric. I can't think of any other way to get the ultra sharp points this precise and consistent other than using the paper piecing technique.
This matching purse is from McCall's pattern #3169. The machine embroidered flower pattern was downloaded from Zundt Designs , stitched out and then hand sewn to both sides of the purse as an applique. I'll talk more about machine embroidery and share some really exciting embroidered projects later in a different post. 
I actually made this dress several years ago for my own daughter, but since she's outgrown it now, I enlisted the help of 3-year old Maeve to model it for you today. Maeve is the little sister of my daughter's best friend.
Maeve was so cooperative and fun during our brief photo shoot. When it comes to modeling, I think you can tell she's a real natural. Thanks Maeve sweetie!

Lisa!!
I have been waiting for an update. Gorgeous dress and model…isn’t it funny how you could also incorporate this into our scrapbook pages.
Thanks for sharing – hope you are well.
Mary
Wow!! What a beautiful dress!! Cute model too!
Just Gorgeous !
Norma (localocairis)
That is such a beautiful model and dress!
what an absolutely adorable dress! I love the matching purse–what a great touch!
See now this is enough to make me want to sew!!!!!
Cute Idea Lisa!!!
I love paper piecing and this dress is gorgeous.
Thanks glad you like TWR, just had a look at your blog and it’s now in our favourites list.