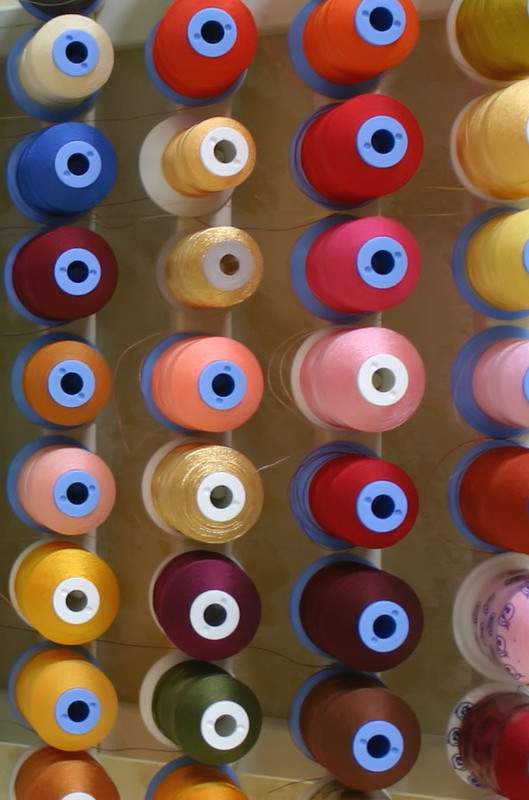
Anyone who has a fabric addiction probably has a thing for colorful spools of thread too. I mean you have to have lots of thread to sew all that fabric you’ve been collecting for years, right?
I used to keep my sewing and embroidery threads in a big, boring cardboard box. It was never the most effective storage idea.
The cardboard box was not only unattractive, it was difficult to get my hands on exactly what I needed when I needed it. I also had a hard time keeping track with what colors I already owned because I could never really see what I had on hand. How many times have you purchased a spool of thread only to find out later that you already had it in your stash?
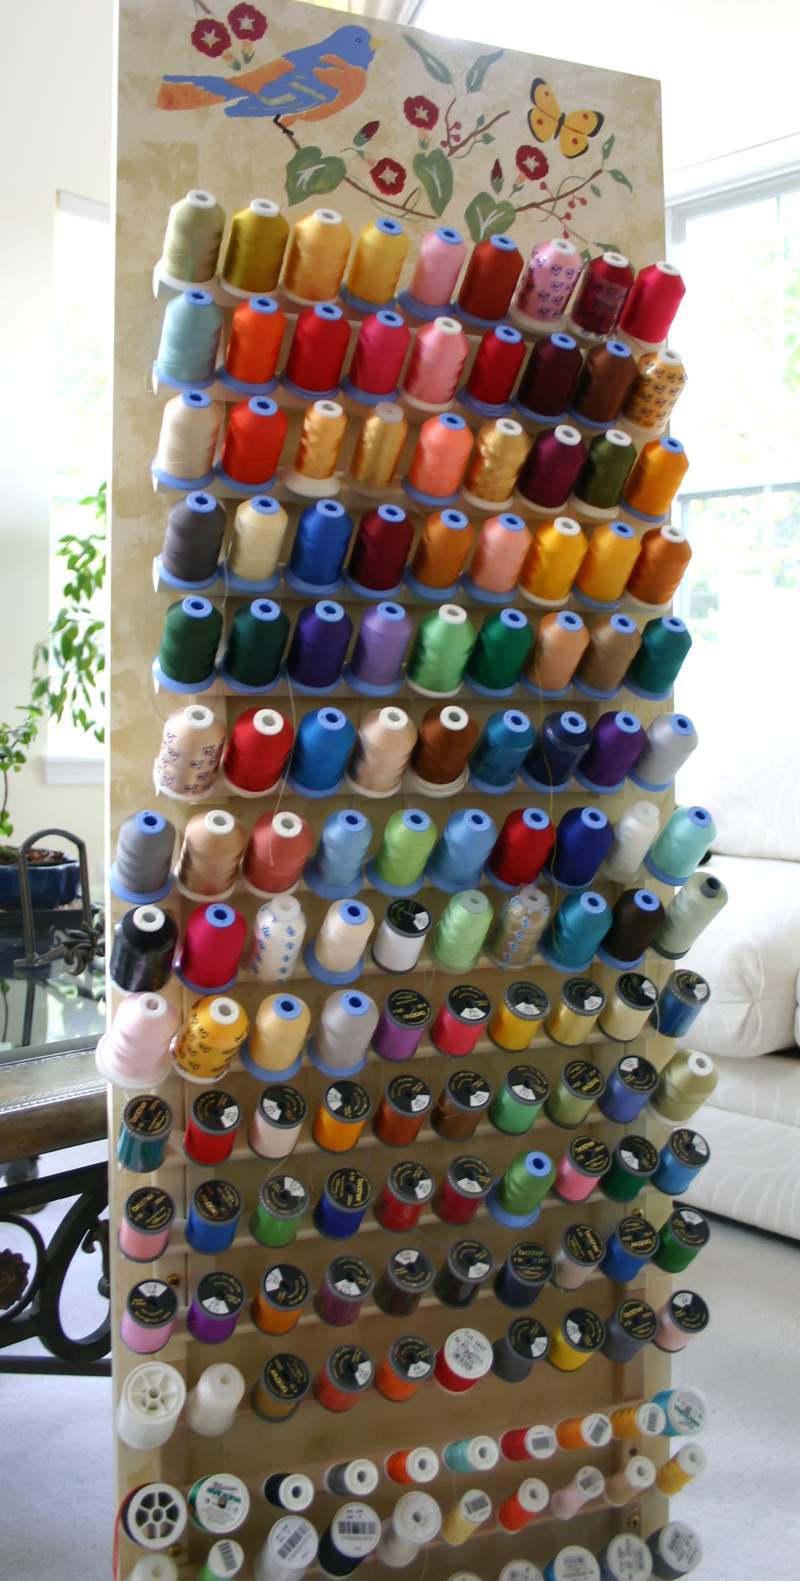
I finally solved the problem with what I think is the perfect thread storage solution. Take a look below at my thread board project which may also work for you.
This is a really easy project to make. Start with several inexpensive wooden spool holders like the picture below. These spool holders are available at just about any fabric store in the storage section.
You’ll also need a large pre-cut wooden board that you can pick up at any hardware or lumber store. Collect wood screws, picture wire, a heavy duty picture hook, optional paint and stencils and you’re ready to get started.
Simply screw the wooden thread holders into the board. The number of thread holders you’ll need depends on the size of the board you have selected. I used three thread holders for this project to cover the length of the board. The wooden boards come in various pre-cut sizes but you can also have a board custom cut at your local hardware/lumber store, generally at no charge for a project this small.
The pre-cut board I used for this project has a 1-inch depth, 16-inch width X 48 inch length. You may want to take your thread holder with you to the lumber store to insure you get the exact size board and wood screws you’ll need.
Center each thread holder before screwing it into the board. Insert one screw into the middle of the frame on both sides of each thread holder. Make sure your screws are long enough to go through the thread holder frame and about half way through your wood board. Be careful not to use screws that are so long they’ll poke through the back of the wood board. I used 3/4-inch wood screws. Line up each thread holder foot-to-foot for a continuous seamless appearance.
After you’ve screwed all the thread holders in place, paint the entire board. Using leftover paint from the designated wall will help the board blend into the room’s decor. I also added a subtle texture to my board by sponging a tan color lightly over random areas of the painted board. Because this is a fairly large painting surface, you’ll definitely want to make sure your workspace is well ventilated.
To add a decorative element to the board, I lined up the thread holders in a way that left about 7-inches of free space at the top for some stenciling. I think the little bluebird, vine and butterfly motif add a nice finishing touch to the project. You can find this stencil at Designer Stencils in the birds and butterflies collection.
Finally, install heavy weight picture wire on the back of your board, and hang on the wall using a heavy weight picture hook.
If you don’t want to mount the thread board to the wall, simply prop it up against the wall. That’s what I do with this second thread board that I made. One day I’ll get around to painting and mounting that one too.
This is a great use for an empty wall and because it’s a vertical storage solution, it won’t cut into valuable floor space.
Even if you decide to simply prop it against the wall, it still takes up a minimum of space. It’s fast and easy to construct and does not require any carpentry skills whatsoever.
This has been a wonderful solution for me because now all of my sewing and embroidery threads are fully visible at a glance and easily accessible.
It’s great to finally be able to kiss that awful cardboard box goodbye and good riddance. ♥


That’s PERFECT!
I have one of those spool holders (I really need 2) and I can’t count the number of times I’ve knocked it off the sewing table. 🙁
Thread everywhere!
I had it on a hook on the wall for awhile, but I bumped it once and down it came.
This project has my name written all over it! Thanks!
Kimberly 🙂
lisa, you make me want to purchase thread just to make a storage unit such as that. wonderful idea!!! i do have a few threads. used yarn today to stitch a scarecrow outfit together. boy, do my fingers hurt! 😀
OMG! I know what I am going to be making this weekend. That is fabulous. All my thread is in a plastic container. Thanks for sharing!
Love this!!!!! I dont have that much thread but you sure are making me want to go and get some! LOL
Do we need to give you a thread intervention? Love your collection. What a great project. I just bought one of those and it takes up too much space on the table. I’m going to make one of those. Thanks for sharing!!!
you always make everything so doable thanks for your tutorials..Jennifer
That’s adorable! I wonder if you could use ribbon too?
great idea…it is a work of art in itself…blessings, rebecca
Lisa, Now I would make that spool holder if I had that much wall space available. I work from my dining room table and my desk in my bedroom. My craft supplies are stored everywhere. I have bought the same thread so many times that I have two or three of each color now and never “just the right color”. I really need to have one of those. Thanks for sharing!
Lisa! This is so pretty! You rock gal!
That’s so pretty! And, oh my gosh, you have a lot of thread!
I love it. What a great idea. Thanks for sharing.
We are looking to move and one room I’m going to make a craft room. I already have 2 of those wooden spool holders and need another. I like this idea a lot.
Cheers
I love that! HOW PRETTY!
The end product is fantastic and I love the painting at the top! Great job!
What a GORGEOUS display of thread it makes !!!!!
Norma
What a fantastic idea! Very Clever!
You have a very interesting blog. i am sure I will gleam a lot of fabulous ideas from you 🙂
Have the Best of Weekends………Rosie
what a great idea and the bird looks so pretty.
What a great idea! I love how visible all your thread is and the bird is fantastic.
your thread holder is wonderful. it really shows off all your pretty threads. thanks for sharing how you made it.
That is ART! Love it!
OK this is remarkable!!! If I could sew I certainly would be making me something like this. very cool! I love all the colors!!
Lisa, what a great idea and thanks for the step by step instructions on how to make one.
Just stopping by to say hi!
And wow! You are a talented woman!
Beautiful creations of all types here!!!
Happy to meet you!
Hi Lisa!!! You seem like the very creative type! I sew too!! 🙂 Have an awesome weekend!
This is a great idea…goodbye cardboard box!
What a great project! Love your blog & thanks for visiting mine! 🙂
Hi Lisa,
What a great idea.
Cheers
Libby
This is so fantastic. Looks lovely!
a beautiful board, a wonderful solution and a very thorough tutorial thanks!!!
{and thank you for stopping by petunia and leaving sweet words}.
What a marvelous idea and it’s so beautiful to look at!
Manuela
Your thread display is visually appealing I could just get lost looking at it! Enjoy it!
Hi Lisa,
Wonderfully fantastic! Love the beautiful colors and stencil.
Btw,regarding storage shelves… found two matching shelf cases at Home Depot, sixty percent off. One had a broken door but didn’t need doors so this was no problem. Now hanging on wall above work desk. Best of all I can reach up and retrieve exactly what I need!
But enough about my discovery.
Looking forward to seeing more of your creations!! Take care Lisa.
Cheers!
omg that is just perfect!! I have all mine in a bag which is a pain when it comes to needing the colour that is always at the bottom! lol
Thats just awesome!!
Next time I take mine down, I’m totally making the wood part and making it one unit. It’d be SO much easier than hammering the racks on the walls like I did.
Thanks for the idea!
BRILLIANT!!!! Thank you for sharing that (I know what Hubby is doing this weekend now!). What a beautiful and practical way to decorate your surroundings!
Wow! First time here. Great blog & posts : )
Wow! First time here. Great blog & posts : )
LOVE IT! Too cute the way you added the bird at the top. Thanks for linking this to the challenge. It works PERFECTLY! Talk to ya soon!
LOVE THIS!!! ok do you have any ideas what to do with the small spools of thread?? id love to find a way to store them together to make it easier to match them up, love to know if you have any ideas! 🙂
I’m so glad you linked this post from your current post, I really need to do this! Let’s see – I’ll need about 6 of these, at least – sigh.