The Fourth of July holiday weekend is right around the corner and with that in mind, I think you’re really going to enjoy today’s post.
Throughout this post, I’m paying tribute to Old Glory with a handful of fun takes on our beloved Stars and Stripes.

You may already have many of the supplies for this on hand.
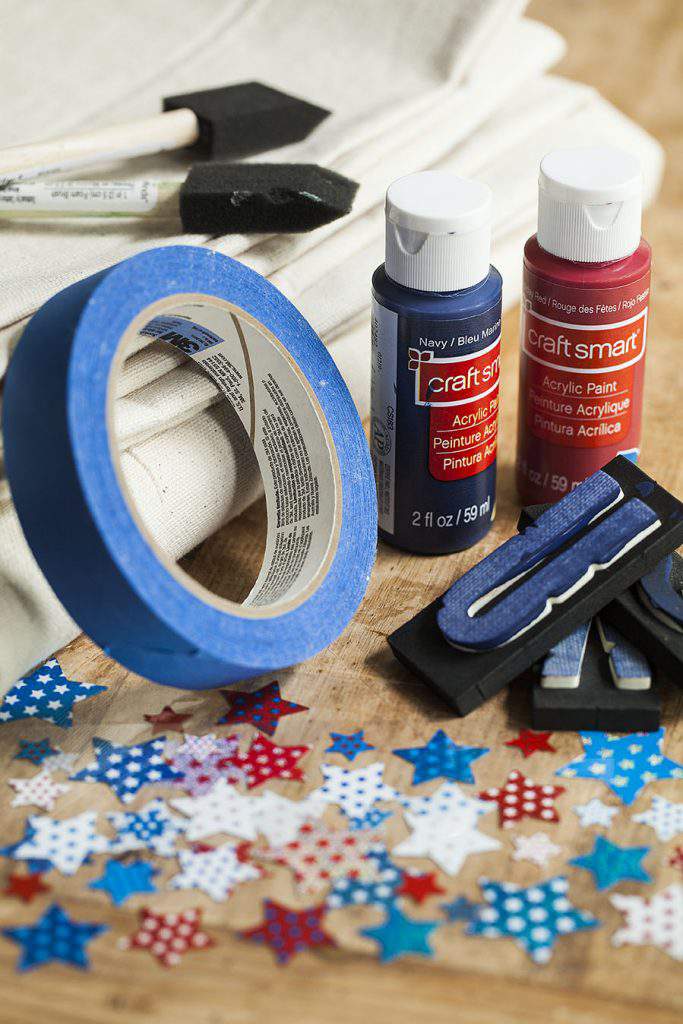
Grab some painter’s tape, red and blue craft paint, canvas fabric (although, I used a cut from an old drop-cloth) and some star stickers.
Drop cloths are crisp and durable fabric and you can use it for so many projects.
You can see another one of my drop cloth projects from an earlier post HERE.

Use the painter’s tape to mark off a box in the upper left corner of the fabric.
Adhere the star stickers in random arrangement inside the box.

Carefully paint the entire area inside the box.
Paint right over the stars and allow everything to dry completely.
Then, carefully lift up the star stickers to reveal the stars created on the drop-cloth.

After creating the box of stars, the next step is to create a guide for the stripes.
I used a clear quilter’s ruler and a water soluble marker to draw the placement for the stripes.
The space between each of my stripes is about 1-inch.

Make sure you smooth the tape down with your fingers to ensure there are no gaps in the tape.
Gaps allow paint to seep under the tape which could mess up your straight paint lines.
After laying out the tape, paint carefully between the tape to create the stripes.

Allow the fabric to sit for about 30 minutes to completely dry.
Then, just gently pull up the tape to reveal great the good looking stripes.

I added a little lettering for some added color on the lower right corner.
Use a damp cloth to gently blot the blue marking lines to remove them.
You should also set the paint to help preserve the project.
To set the paint, cover the painted image with a thin piece of fabric and then iron right over it.
The heat will set the paint and the extra piece of fabric provides a barrier so the paint will not come in contact with the hot iron.

Before I made the large flag, I painted a small square of drop cloth just to make sure the idea looked as good in reality as it looked in my head.
Even though my first red stripe didn’t line up with the box of stars, I still thought this practice flag could be put to good use.
Consider wearing your patriotism on your back or adding a patriotic pocket to a canvas tote bag.

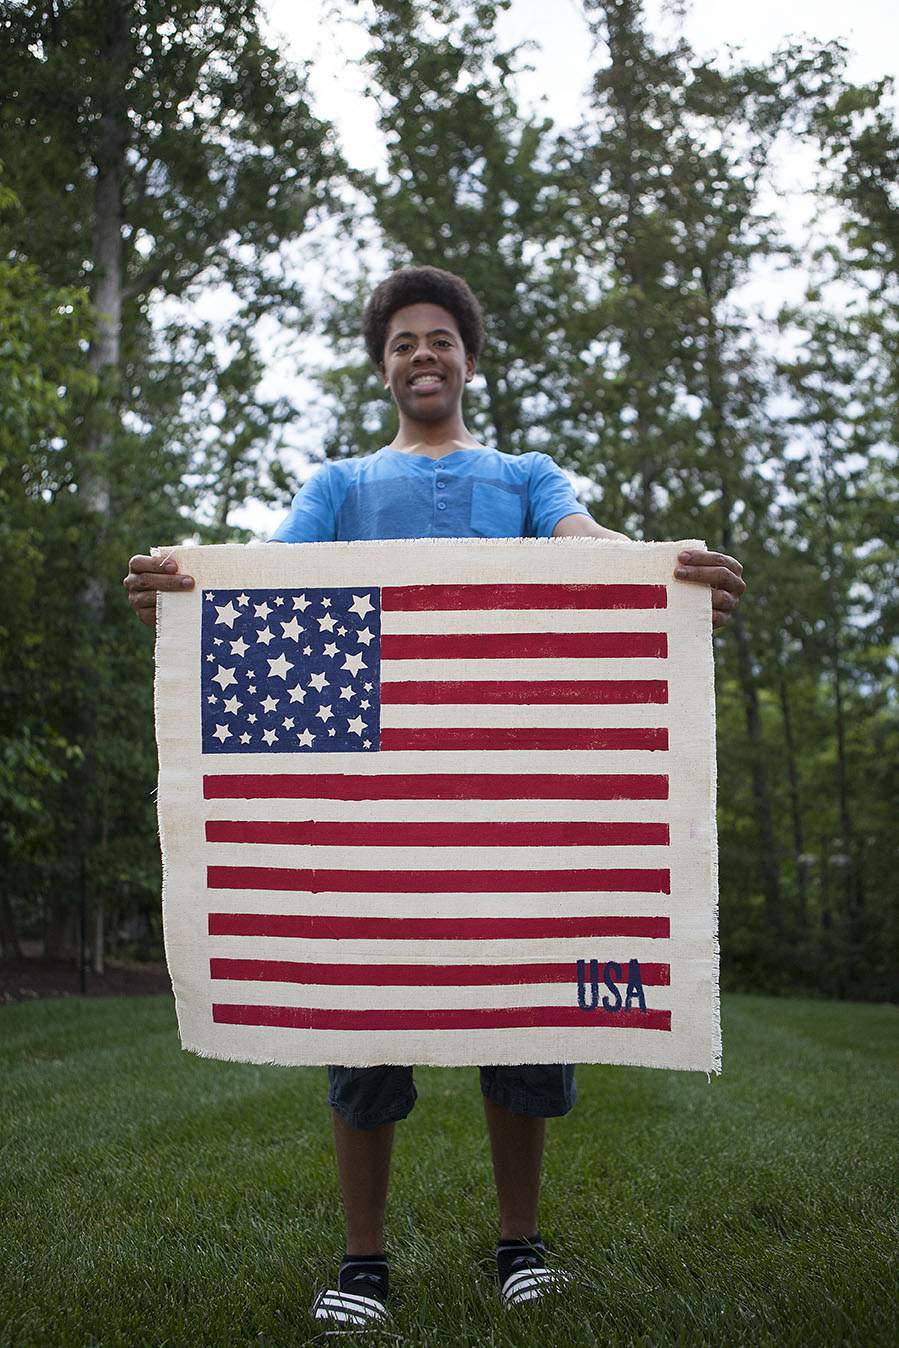
Meanwhile, here’s a look at the finished oversize flag which measures about 25″ by 25″ so, it’s pretty big.
After I made this flag, it occurred to me that I could actually use it in a number of different ways.
Before I get to that, check out my flag pillow (and young helper) below from a similar project several years ago.

I just had to throw in this blast from the past because I love the comparison between Jordy way back then and now.
By the way, this pillow is made of large linen fabric strips, drop cloth and applique stars.
If you’d like to see how to make it, you can check out my earlier post HERE.

OK, let’s get back to my latest flag project.
Hey, you can’t go wrong with pillows so I made another one.
Just cut a second piece of fabric to match the size of the flag.
Stitch all the way around leaving a small area at the bottom open to insert the pillow-form.
Slip-stitch the bottom edge closed.

If you don’t want to make a pillow, just display the drop cloth flag as-is.
Remember, this one measures about 25″ x 25″ and if you have a glass tabletop, slide the flag under it for a little red, white and blue pop under your drinks.
Now, that sets a patriotic mood.

My final drop cloth flag project will greet visitors to your front door.
This festive door hanger is so simple to make.
Turn the top edge of the fabric over about 1-inch and stitch raw edge in place to for a casing.
Cut a dowel to size and slide it through the casing. Tie each end of the dowel with jute (or some other string) and you’ll have a door hanger you can be proud of.

One flag painting technique… 5 different flag projects.
Pretty cool, huh?
I hope everyone reading this has a wonderful and safe 4th of July holiday.

Thanks for stopping by.
See you back here next time. ♥


What a cute idea! I love all your cute crafty things!
Thanks for being so gracious and sharing your talent with the world!
Thanks so much, Renee. I appreciate that and I’m so glad you’re enjoying my projects.
Hope you’re trying out a few of them yourself.
Have a wonderful week.
Lisa,
Great ideas for using a handcrafted American flag… I like the randomness of the position and size of the stars. When I saw your copy of the British Country Living in your tote bag, it made me happy to see we both like the magazine. One more reason why I feel a connection to you and your boundless creativity….
Judith
Thanks so much, Judith!
Yes, we’re definitely on the same page. I love the British CL with their large glossy photos, article and beautiful styling.
I have to say have a stockpile of them going back years and years. I just can’t bear to part with them-lol. I wish I could, it would certainly free up a lot of space.
Hope you have a wonderful holiday weekend.
Great project, and great ideas, all beautifully executed!
I appreciate that, Rebecca.
Hope you get a chance to give this easy paint technique a try. If not this year, save the idea for this time next year.
Have a safe and fun holiday weekend and thanks for popping by for a visit.
Oh, it looks awesome! I wish I had the time to make a beautiful flag like this for our 4th of July party, but too much work in the garden, and now I have a impingement on my right shoulder 🙁 , but for sure I’ll save this diy for another opportunity 🙂
Oh, I’m sorry about the shoulder, Regina. Hope it heals soon and you can do all the things you want to in your garden. Definitely keep this project in mind for future reference.
Enjoy the upcoming holiday weekend.
Jordy has gotten so big and grown up…so suddenly, it seems! He’s still adorable!
Ha-ha, yes once those braces came off, Jordy suddenly looked all grown up to me too (especially when you see those two photos together.
Time is flying.
Thanks so much for stopping by, Sheila.
Happy holiday weekend to you.
Very Cool Flag Ideas – Thanks!
Thanks so much, Jeanne!
Hope you had a wonderful holiday weekend too.
Just amazing!….just seeing this (after the 4th)….Love this x 5!….and love your “assistants”
Lisa, as usual, whatever you do is always a joy to see. I so enjoy your blog. I’m always thrilled when I open up my computer and see that you have posted because I know it will be enjoyable. Your young son is growing into a handsome young man. He is lucky to have a wonderful mother to teach him many things. Thank you for being so creative.
Thank you so much for the kind words, Rita.
You’re so sweet.
It’s nice to know you’re inspired by my creative efforts and I appreciate you letting me know.
Have a great week and thanks for popping by for a visit.
xoxo