R egular readers of this blog may recall my issues with my dining room over the last year where I have struggled to figure out how to decorate the space. Well, I'm still working on it.
With that in mind, I decided to add a stencil to the space.
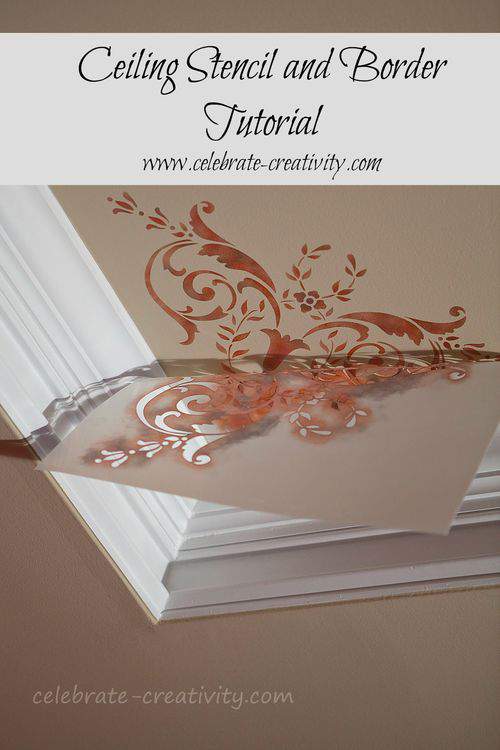
Throughout this post, I'll show you how to transform a ceiling with a mylar stencil.
Here's a look at the dining room space before the stenciled.
FYI-the upper walls Spanish Red (#1301 by Benjamin Moore ) and the ceiling Lenox Tan (HC-44 also by Benjamin Moore).
However, despite that color combination, clearly this room needs more pop.
When it comes to adding pops of color in a room, stenciling can be a fun and super easy option.
NOTE: Acceptable spelling: STENCILING OR STENCILLING
The design in the photo below was created using two separate stencils.
The supplies I used for this project are from Royal Design Studio (RDS) which offers a huge variety of products including stencils, paints, brushes as well as tutorials and videos to help even the most reluctant stencil-DIYer execute beautiful, high quality projects.
NOTE: Royal Design Studio provided me with the two stencils and the stencil cremes used for my ceiling project. I'll have more about Royal Design Studio's involvement in this project further down in this post as well as info on an upcoming RDS stencil giveaway.
The Royal Design Studio stencils I used for this project include the 19th Century Border Ceiling Stencil and the coordinating 19th Century Border Stencil.
This is a great combination of leaves, flourishes and florals.
I also used Royal Design Studio stencil cremes.
While you can use regular acrylic paint for stenciling, I think the cremes have a much smoother application.
Stencil cremes go a very long way and you don't need much to complete most projects.
RDS stencil creams are also much thicker than typical craft paint which makes it much easier to work with.
As a way of adding dimension and interest to my stencil project, I decided to use more than one color to keep the finished application from looking too flat.
RDS has 18 various cremes available. I used Rennaissance Red and added subtle shading using Bronze Age and Pearl Oyster.
Before starting any stenciling project, I highly recommend you stencil a test sheet first in order to get some practice and also get a feel better for the stenciling technique.
I painted a piece of foam core the same color as my ceiling (Lenox Tan) and then practiced my shading technique.
The key to stenciling is to make sure you apply the color using a "dry brush".
You achieve this by dipping the brush just a bit into the paint or creme and then "off-loading" most of the color onto a paper towel.
The color in a stencil project is built up one layer at a time.
This technique also allows you to create a more transluscent image if you like as well as allowing you to add subtle shading and complimentary coloring.
My test board also gives me a good chance to see exactly how my project will look before actually painting the ceiling.
Practicing first also gives me a chance to tweak my technique.
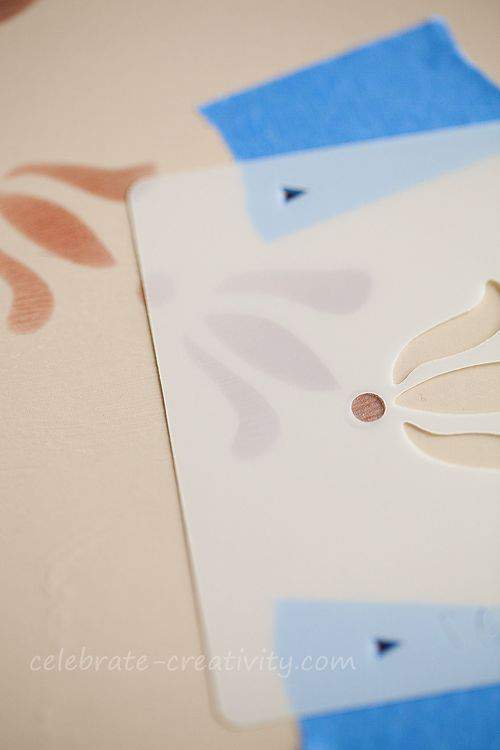
When using stencils that create a continuous pattern, you'll notice little notches in the mylar.
These are called "registration marks" and are there to help guide you in lining up the stencil as you crate your continuous image.
Place a piece of painters's tape under the registration mark and trace the triangle directly onto the tape. Line up the stencil with the registration mark on the tape and move and repeat every time you position the stencil for the next section.
When stenciling, apply the creme in a circular motion to build up the color.
Don't forget you're using a dry brush and most of the paint has been off-loaded.
After I finished my practice board, I wanted to get an even better look at how it might work on my ceiling.
I used duct tape to temporarily adhere the board to the ceiling for great perspective.

OK, I like how this looks so far.
This is definitely a go.
Now, I generally don't use stencil adhesive because I don't care for the tacky feeling.
However, if you are painting on a ceiling you must use an adhesive to hold the stencil firmly and fully in place.
Without the adhesive, gravity will draw the stencil downward and that makes it impossible to stencil effectively.
IMPORTANT NOTE: Please use REPOSITIONABLE adhesive and NOT permanent adhesive. You can pick up repositionable spray adhesive at most craft stores in the hobby paint section.
This is how the stencil looked during my first painting pass.
Notice how light the color looks? Remember, build up the color slowly with additional layers so I was able to make the image a little darker with additional passes.
One of the things that I love about stenciling is the evolving reveal.
It's a great feeling when you pull that stencil back for the first time and see how nicely it's shaping up.
Remember what I said about using the registration marks to line up each section? Well, here's another way of keeping everything lined up.
Instead of using regisration marks each time I painted a new section of the border, I simply laid the stencil over a few elements that were already painted.
When stenciling a border like this, it's also important to make sure you are maintaining a consistent distance from the edge of the wall or molding as in this case.
Most walls, ceilings and moldings are not perfectly angled so it's a good idea to monitor this distance as you stencil in order to keep the border looking perfectly straight.
Here's a look at my ladder workspace.
You don't need much but if working with more than one color, try to keep verything within an arms reach.
Since you end up using very little color, I used the inside of the container caps as my painter's palette.

This particular stencil combination is designed so that the border connects to the main stencil at an angle which I think helps to soften the presentation.
Looking good so far, don't you think?

Here's another look at the stencil from another direction.
I think both stencils produced a lovely presentation.
Interestingly enough, the border design initially made me think of small birds walking single-file in the snow.
Some people may shy away from a project like this because they think it might take too long.
I don't mind saying that I actually thought this project would take a lot longer to complete than it did.
When I first started my intention was to time myself so I could give you an exact number of hours but I forgot to set the clock after the few breaks I took to give my neck a quick rest.

My best guess is that actual brush-to-ceiling stencil time only took about 5-6 hours spread out over a two-day period because I did take my time.
Not a bad time commitment at all so don't let that stop you from tackling a stenciled ceiling project.
Once you find your rhythm, you'll roll through your project in no time at all.

I love how the ceiling now looks. The entire effect is more easily visible when standing inside the room.
Still, it's a subtle addition that doesn't overpower the space and adds a decorative touch of color and interest to the area.
Of course, the effect also has the added advantage of being hand stenciled which is always a fun detail to point out to admiring visitors.
Next, gotta find an area rug I really love.

IMPORTANT NOTE: Royal Design Studio provided the paint cremes and the two stencils for this project. However, I've used RDS stencils and supplies for nearly a decade. I feel comfortable writing this post and recommending Royal Design Studio to you because I regularly use their supplies with beautiful results that I've been very happy with.
My commitment to you is that I will always maintain the integrity of this blog by reviewing products that I fully believe in and/or have some experience using in my own creative endeavors.
Big thanks to Royal Design Studio for their stencils and cremes. Do pop by the RDS site for some great ideas, stenciling tips, quality products and photo inspiration. ♥
WANT TO SEE MORE HOME DECOR IDEAS?
I'm continuing to participate in various linky parties around blogland. For more great home decor ideas from fellow bloggers, check out Beth's soiree over at Home Stories A to Z. You'll also love the inspiration and projects on display over at Kim's linky event at Today's Creative Blog. Don't miss the beautiful creativity at Susan's linky over at Between Naps on the Porch. Also, Lucy over at Craftberry Bush is hosting an awesome Inspiration Gallery Linky party with a ton of gorgeous projects and DIY ideas.
COMING UP ON MONDAY
These are just some of the stencils I've purchased over the many years from Royal Design Studio.
Coming up next week (1/21), you'll have a chance to add to (or begin) your own stencil collection.
Royal Design Studio is sponsoring a stencil giveaway here ($50 value) and I'll have all the details next week.
Start thinking about what you may want to stencil and then stop by this blog to enter the giveaway.
I hope you pop by again next week.
See you then.


Great job! It looks fantastic~~ And I love red(ish) colored walls in a dinning room! My dinning rooms walls are red too.
Lisa, that is simply beautiful. I am in awe of your many talents.
It came out lovely! Great job!
Lisa, your stenciling came out beautiful! You have such an eye for detail and elegant taste.
I love it Lisa! It looks wonderful! I might need to try this in my bedroom. It definitely needs some pop! Thanks for the informative post! Keep up the good work!
it looks great. Very pretty!
Very nice, Lisa. I was bit concerned about you being on that ladder by yourself. You did a great job. The room looks beautiful.
Beautiful job.
I admire your work Lisa, you are very creative and the ceiling looks absolutely fantastic!
It’s beautiful Lisa. The stencil is just perfect with your beautiful wall color!
It turned out so beautiful Lisa!
Penny
I like the stencil cremes. That color looks so rich and smooth. I’ve been thinking of doing some stenciling in along the walls in some of the rooms but I will wait until after I put in the wall tiles. I plan to put wall tiles on areas that get a lot of impact from people leaning against them or just touching them as they pass.
I admire your idea and I’m glad that you took breaks to rest your neck. Being in that position for hours without a break would not have benefited your neck at all.
It turned out so beautiful Lisa!
Penny
Very nicely completed! I haven’t stenciled in years! Your dinning room is gorgeous!
nice touch to the room, Painting on ceilings is already more difficult , I can’t imagine stenciling! good job.
That turned out so nice! I host a DIY link party every Monday and would love for you to join! http://homecomingmn.blogspot.com/2013/02/the-diyers-link-party.html
What’s the best adhesive to use on a spray painted ceiling ( to stencil on it without pulling the paint off)?