One of the things that I love about food photography is that it constantly challenges me to try new ways of presenting my savory subject.
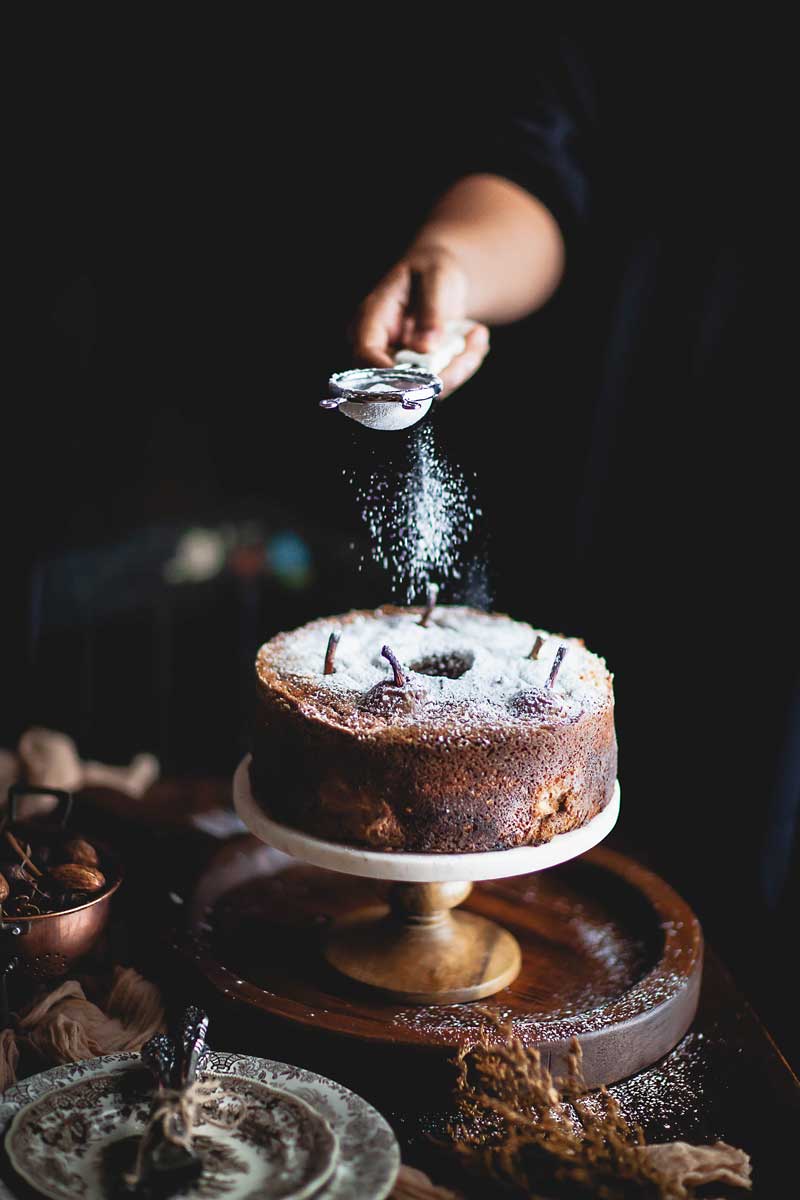
I’m sure you’ve probably noticed the images across social media featuring dry ingredients sifted and suspended in mid-air.
This fresh pear and pecan cake recipe provided a perfect opportunity to try my hand at this stop-motion effect.

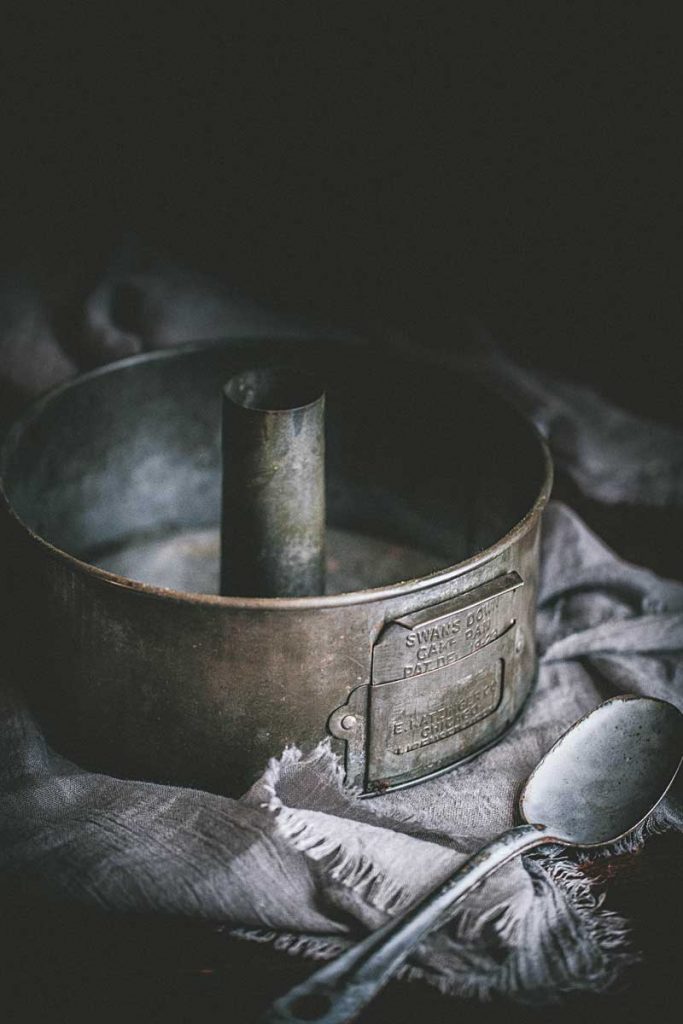
Before I share more about this cake, allow me to talk about this lovely, old-fashioned tube cake pan.
I found it at a roadside flea market a while back.
It has such vintage charm with its “Swans Down Cake Pan” embossing on the small, sliding, doors on either side.
The doors not only provide ventilation for the baked cake but were also designed to allow a knife to slide into, to help release and remove the cake after it’s baked.

After a bit of online research, I discovered the pan was patented back in 1923 by E. Katzinger Company in Chicago.
This old ad above was part of a promotion for Swans Down Cake Flour which included the vintage cake pan.
It was an early marketing effort to ensure that whenever home bakers used the pan, they would be reminded to use Swans Down Cake Flour.
I think this represents an interesting part of baking history and I’m happy to own a small piece of it.
Maybe it’s the nostalgia or perhaps the pretty patina but whatever the appeal, these Swans Down cake pans have now become coveted collectibles.

Spiced Pear & Pecan Cake
Ingredients
- 4-5 pears, to press inside batter
- 2 pears, peeled cored and chopped
- 2 cups white sugar
- 3 cups sifted all-purpose flour
- 1 teaspoon salt
- 1-1/2 teaspoon baking soda
- 1 teaspoon ground nutmeg
- 1 teaspoon ground cinnamon
- 1/2 teaspoon ground cloves
- 4 egg whites
- 2/3 cup canola oil
- 1 cup chopped pecans
- 1/2 cup confectioner’s sugar, for dusting
Instructions
- Combine the two chopped pears and the sugar to and let stand for one hour
- Preheat oven to 325 degrees F (165 degrees C). Spray a 10 inch tube or bundt pan with non-stick cooking spray.
- Slightly beat the egg whites and combine them with the oil, chopped pecans and chopped pear mixture.
- Whisk the flour, salt, baking soda, nutmeg, cinnamon and cloves. Stir in the chopped pear and sugar mixture.
- Pour batter into the prepared tube or bundt pan.
- Gently push 4-5 whole pears down into the batter so that they stand upright in the batter.
- Bake at 325 degrees F (165 degrees C) for 1 hour and 10 minutes.
- Use a wooden skewer to test the doneness of the center of the cake. Skewer should come out clean.
- Remove from oven and let cool on a wire rack for 10 minutes before removing form pan.
- Allow cake to cool and lightly top with confectioner’s sugar just before serving.
Another unique visual aspect to this cake is the baked-in, upright pears that make this recipe that much more interesting.
The pears are gently pushed down, right into the cake batter.
As the cake batter bakes and rises, the pears do become partially obscured but they’re still distinct enough to create an amazing focal point.

This cake has a wonderful pear-filled texture and taste.
It’s not too sweet but the small chunks of pears are delicious bites that work well to break up the thickness of the cake.
You’ll get a nice crunch from the chopped pecans with every bite.
And I just love the way the browned, whole pears and their stems seem to be peeking out of the top of the cake… just waiting for you to cut a slice.

Speaking of slice…. how about this one below?
Initially, I wasn’t so sure how the whole pears would fare in this recipe. I thought they might end up hard after baking.
However, all the pears were surprisingly soft and easy to slice.

Meanwhile, I’ve been making a concerted effort to remember to document a few shots of my photo setup.
I love seeing how other photographers stage and style their work and I’m happy to share a look at my arrangements too.
You don’t necessarily have to have a fancy studio to achieve great shots.
This setup is just a small corner in my dining room.

If you’re wondering what that weird, chrome contraption is on the other end of my camera…. it’s a C-stand.
It allows me to get much better overhead shots and it’s a great tool to have in your photography arsenal.
Before I started using a C-stand, the only way I could have gotten the shot below was to put everything on the floor and straddle the food.
Trust me, this setup is much better.

Have fun baking, styling and photographing your food.
Thanks for stopping by.
See you back here next time. ♥

Lisa,
Another stunning photography shoot of a delicious sounding recipe! I pinned this to my Cuisine Pinterest board. Thank you for the photography set-up photo. I was hoping you were sharing how to get the powdered sugar stop photo.
Judith
Thanks so much, Judith.
The key for me in getting this shot was to getting to have my on a tripod and to have the camera set on “continuous” shutter mode and also set the camera to a very fast shutter speed (I think it was 1/1250).
My daughter helped me by being my hand model and I ended up snapping about 25 shots and this one was had the most clarity. It wasn’t as hard as I thought it was going to be. It just takes a little patients for me because I’m new at this technique.
I also ended up with far more confectioner’s sugar on top of the cake than I would normally have-lol.
Thanks for giving me the idea to write a technique post on this. I’ll work on that.
Hope all is well on your end and happy “almost” Spring.
WOW!!!….Now I must say that you are truly the professional food photographer!!! Yes, add this to your most extensive resume!….Gorgeous Lisa!! and how great that you found that vintage tube pan! And, that Pear cake!!!…This is one for the recipe box for sure!….Hope you are well and enjoying the fact that Spring is coming soon!
Awwww, thanks so much for that, Shirley.
I’m always on the lookout for vintage stuff like that.
I lucked out with that tube pan, for sure.
Hope you’re enjoying the new Spring season.
Oh, Lisa!!! That is gorgeous! I can’t believe how beautiful it looks. How in heavens did you get that dark background? it really focuses on the cake. And that cakepan. Isn’t that wonderful?! To think back on all the things that have been tossed out because they were old. I wish I had my mamma’s hand rotary mixer. You know the one I’m talking about. With that handle that you had to turn to get the paddles to move. Your hand model did a great job!! Big hugs!!
Thanks, Marisa.
Yes, now that my kids are in college, I have to put them to good use when they’re home-lol.
Oh, I know exactly the kind of hand rotary mixer you’re talking about. You never know how something old like that can be used down the line.
But you can’t grab everything, right?
Happy Spring to you, sweet friend.
What a delicious way to celebrate the end of winter! Is the small monitor attached to the stand a part of the unit or is it sold separately?
Delicious indeed, Sandra.Thanks.
The monitor is a small field monitor that is actually attached directly to the HDMI outlet on the camera itself. It shows exactly what the camera sees.
I also have a remote control switch (with a long cord) that is also plugged into the camera so that I can stand well below the camera and snap the photo.
Hope that helps.
Happy day to you.
Hi Lisa, I love these action shots. You have done a great job. Those props are amazing and compliment the food very well. What lens did you use for the tablescape?
Hi Christina, thanks so much for your kind words.
I use a few different lenses for my work and the lens I used for that overhead is a 50mm Canon lens.
You can read more about the various lenses I regularly use on my FAQ page.
Happy day to you and thanks for popping by.
You are such an amazing artist! Thank you for your beautiful post today.
Thanks so much, Becca.
You’re so sweet and I really appreciate you taking the time to leave me such a nice compliment about my work.
It’s my pleasure to create these posts.
Hope you have a wonderful day and enjoy this second week of Spring.
Hi..sorry..I know this post is a few months old, but I have a question about the whole pears in the cake. What do you do when eating this cake with the core and seeds?
Hi Colleen, I had the same concern when I first made this.
I just carefully remove the seeds with my fork before I eat it.
The core was entirely soft (surprisingly). You can always cut around it.
I haven’t figure out how to remove core and seeds before slipping them into the batter without disturbing the look of the whole pear.
Good luck with yours. Let me know how it turns out for you.
Happy weekend,.