It’s fairly safe to say, there’s no such thing as too much chocolate.
OK, who’s with me on that?
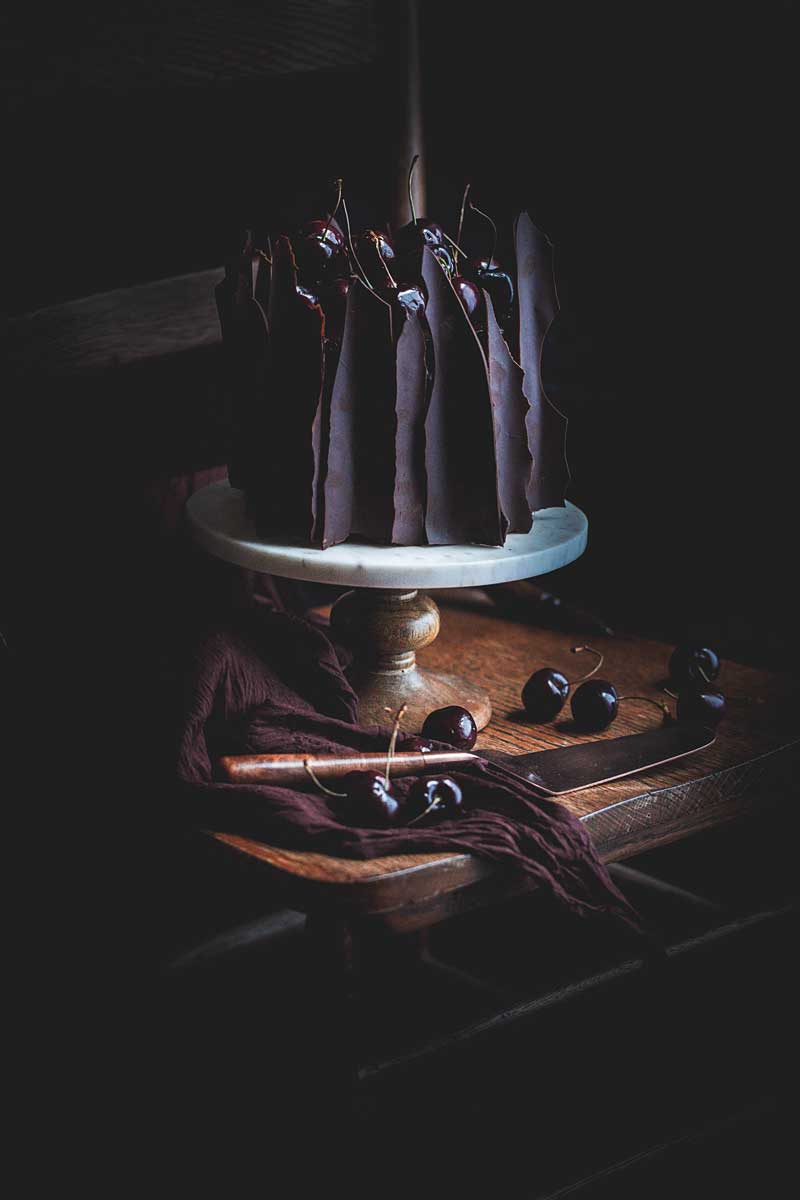
This chocolate dessert will take chocolate lovers to new delicious heights.
Throughout this post, I’ll share how to make chocolate shards to add some fun and fancy to your next chocolate cake.

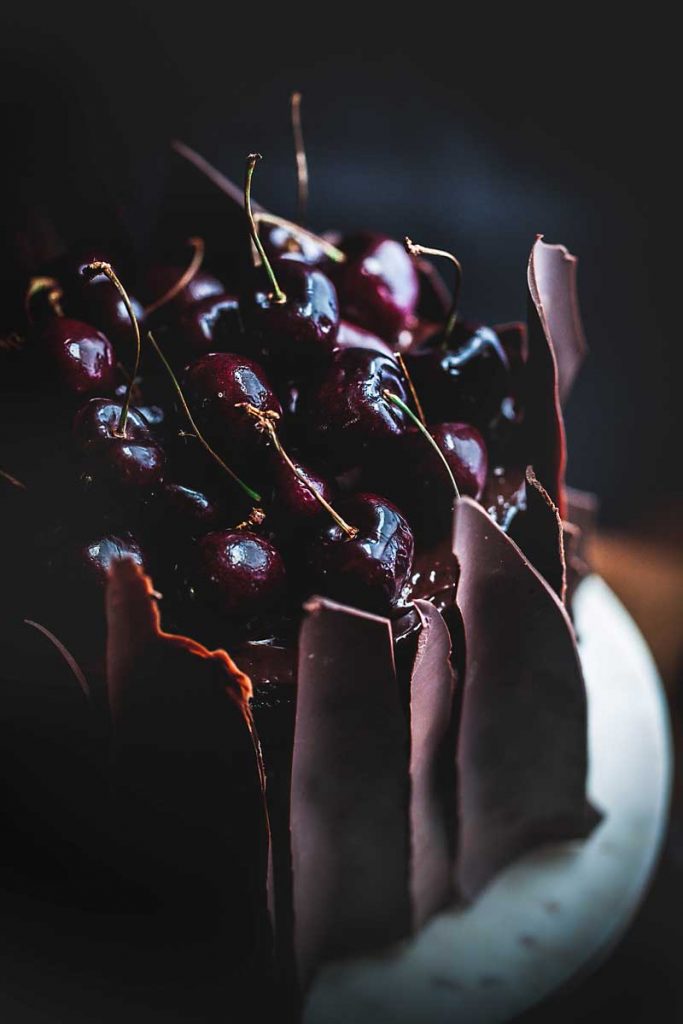
When chocolate shards adorn a dessert, the shards become the star of the show.
Chocolate shards stand slender and tall and almost at attention when attached to a cake.
They’re a wonderful way to add a touch of whimsy and another layer of decadence to a dessert presentation.

Baker’s chocolate or chocolate chips work just fine for this.
First, use a double boiler technique and medium heat to temper the chocolate.
Once it’s melted, pour the chocolate onto a sheet of parchment paper.

Place a second sheet of parchment paper on top of the chocolate and use an offset spatula (or rolling pin) to slowly and carefully spread out the chocolate between the two sheets of paper.
Spread the chocolate carefully and try to keep a small clearance around the edges.
If the chocolate gets too close to the edges of the paper, it will seep out and make a bit of a mess.

While holding on to the ends of the parchment paper, carefully roll the chocolate.
Once the chocolate is rolled, place on a baking tray and place in the freezer to harden for at least an hour.
TECHNIQUE TIP: To help maintain a firm and smooth chocolate roll, insert the cardboard tube that the parchment paper was rolled on.
The cardboard tubes that foil, plastic wrap and parchment paper are wrapped around are great for projects like this. They’re stronger and much smaller than paper towel cardboard inserts.
Next time you come to the end of your box of parchment paper or other products, save a few of the cardboard tubes for future use.

Once the chocolate has completely hardened in the freezer, you can start creating the shards.
Gently unroll the chocolate and the pieces will just break apart in large sheets.
I think it’s actually kinda cool to see the chocolate break up with each unfolding rotation.

Carefully use the back of a butter knife to break the long pieces into smaller lengths depending on how large you need.
Cover the cake in chocolate ganache and gently attach the chocolate shards against the side of the cake.
GANACHE TIP: To make chocolate ganache, place 1 cup of chopped dark chocolate or chips in a heat safe bowl and set aside. Bring 1/2 cup of heavy cream to a simmer over medium-low heat. Pour the hot the hot cream over the chocolate and lightly whisk until smooth.
If using to frost a cake allow the ganache to cool until you get the desired consistency.
Also, I used a regular box mix for this chocolate cake and 6-inch diameter cake pans.

How fabulous would this cake look on your next dessert table?
You’ll get a lot of ooohs and ahhhs on this one.
By the way, one of my blogging friends, Judith at Botanic Bleu wrote a really nice feature about this blog as part of her Inspiring Creativity column.
Judith has been a sweet supporter of my creative efforts for a long time and I’m happy to call her my friend.
I’d love for you to check out her site and also meet some of the other bloggers she’s written about over at Botanic Bleu.
Thanks for stopping by.
See you back here next time. ♥


Oh be still my heart! That chocolate dessert is amazing. Thank you for the instruction on making the chocolate shards….looks pretty simple but I can sometimes mess “simple” up. LOL I love the touch of cherries…..makes me think of dark chocolate covered cherries at Christmas. My mouth is watering as I type this.
Kari@meandmycaptain
Thanks, Kari.
You will love making these. Even if you want to make fancy cupcakes, you can break the shards accordingly to fit whatever dessert you’re serving.
Let me know how you end up using your chocolate shards.
Happy day to you.
Lisa,
Stunning!
You make it look so easy … and delicious. Thank you for sharing your creative talents with bonus tips of how to recreate your works of art.
Thank you also for sharing a link to your feature as part of an Inspiring Creativity Series. Let’s change the world, one person at a time, with encouraging words and by inspiring her/his inner creativity.
Judith
Oh my Lisa!….you did it again….creating a masterpiece that looks like it took days to do! You are truly, truly an inspiration…you do everything to the utmost perfection…it is no wonder why many people view you as their inspiration. I will be saving those cardboard rolls!…off to Botanic Bleu!
The cake looks delicious but your photography is the real show stopper! I love seeing the things you create. 😊
How beautiful that cake looks and I love the moody photography!
Thanks for showing how easy making the shards are. The cake is a work of art, as is the photography.
You’re so creative and inspirational! As a chocoholic I will have to try this…may take me months to get around to it but one day 😉
I always wondered how this was done… thank you for the tutorial! I love your blog <3
My pleasure, Carolyn.
You’ll enjoy making these too.
Have a fun (and safe) week.
So beautiful photos ! Also, thank you for step-by-step lesson. Enjoy the day !
I’m just discovring your blog and I’m mesmerised by your pictures! This dark almost black cake with its shards of chocolat and glossy cherries is amazing! I love the style of your pictures 🙂
Thank you so much for your kind words about my food photos.
I’m still learning everyday via other sites, on-line study and practicing techniques in Lightroom and Photoshop.
FYI-I have a “PHOTOGRAPHY” category in the navigation bar (under Lifestyle) of my site that features a few things I’ve learned along the way.
Happy holidays to you and thanks for popping by for a visit.
Beautiful and this looks like a very good “grown up Halloween cake”. Your photography, as always, is stunning. This could even be a “Lord of the Rings” cake. Very Mordor.
Stay safe.
Thanks so much for those kind words about my photography, Nancy.
Very Mordor? lol. I love it!
Hmmm, I think you’re right about that.
Stay safe and well around your shire.
Absolutely GORGEOUS!!
~ could you please share with me the particulars regarding those CHERRIES, what type are they, and where might one source them! I think the typical maraschinos would just not compare!
Thanks so much, Vanessa.
These are regular stemmed cherries from the produce aisle in my local grocery store.
I do remember they were packaged in a clear bag (if that helps you spot them).
The cherries in my photo probably look much darker than they really are because of the dark editing.
Glad you like the image.
xoxo