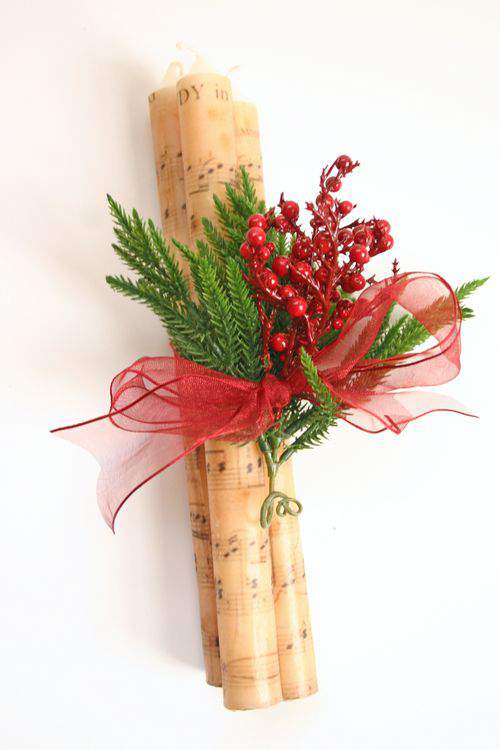
As the countdown to Christmas kicks off, it’s time to start thinking about those handmade gift ideas.
If you’re stumped for something different to create with your own hands this year, I’ve got a great idea for you. You’re going to love this.
Throughout this post, I’ll walk you through how to make these pretty, decorative candles. They’re super easy to make with only a few supplies.
If you have a computer, a printer and a little bit of time, you can easily customize these candles with any image you like.

In addition to double sided tape, tissue paper and a hot air gun, you’ll also need the following: (1) ribbon (2) decorative twig and (3) assorted candles.
Make sure you use candles that have a cylinder shape with the same width from top to bottom. I initially tried this project using tapered candles and the paper was much harder to line up and avoid creases.
You’ll also need an image to transfer to an 8 1/2 X 11″ sheet. You can use a photograph, a phrase or anything that can be transferred to an 8 1/2 X 11-inch sheet.
I liked the idea of using musical notes for a vintage look so I conducted a google-search for vintage sheet music. Loads of pages came up.

Select the desired image and then save to your file. Most images like this are presented in a low resolution format which may make your resulting image slightly blurry.
To counter that, import the image into your photo-editing program and manually increase the resolution.
You’ll want to be careful about how you use images that you do not own. Many images you find on-line are copyright protected attached restrictions on usage and penalities for violation.
This is a particularly sensitive issue if you plan to use images for commerical purposes. You can easily find what’s called “copyright-free” images which do not have usage restrictions or prohibitions. Just google “copyright free images”.
Now that you’ve selected an image, let’s get ready to transfer it to tissue paper.
When I first tried this project out, I used vellum which is an-almost clear, lightweight paper that is commonly used in scrapbooking. Vellum does not work, it’s far too thick for the desired result and you’ll just ruin a good candle if you use it.
Tissue paper works best for this project. 
Cut tissue paper down slightly smaller than an 8 1/2 X 11 inch piece of cardstock.
Use a tiny sliver of double sided tape across the top edge of the cardstock and adhere the top edge of the tissue paper to the cardstock. Make sure the top edge is nice and flat.
The cardstock provides the right amount of support for you to run the tissue paper through your printer.
Once the image is transferred to the tissue paper, carefully lift it off the cardstock and remove the edge from the double sided tape.
Because tissue paper is extremely fragile you may lose some of the tissue paper if it doesn’t detach completly from the double sided tape. This shouldn’t be a problem as long as you remember to use only a sliver of tape and adhere it as close to the edge as possible.
Line up the tissue paper with your candle. You’ll need to cut enough tissue paper so that it will wrap completly around the candle.
Apply a small amount of glue to the wrong side of the tissue paper, along the top and bottom edges.
Carefully adhere the tissue paper to the candle, pressing firmly as you go to smooth out creases or air bubbles.
Hold the candle upright and run the hot air gun along the entire candle. The wax will melt through the tissue paper and then dry on the outside of the tissue. This process totally embeds the tissue paper image into the wax as if it had always been there.
Don’t put the hot air gun too close to the candle because you don’t want to melt too much of the wax which will cause the candle to lose its original shape.
If you have a slight amount of tissue paper overhanging on the bottom before you cut it, simply fold it across the bottom of the candle.
You can also just cut out a small circle of the tissue paper image and apply it to the bottom of the candle by heating it in the same way. This gives the bottom of the candle a more finished look. 
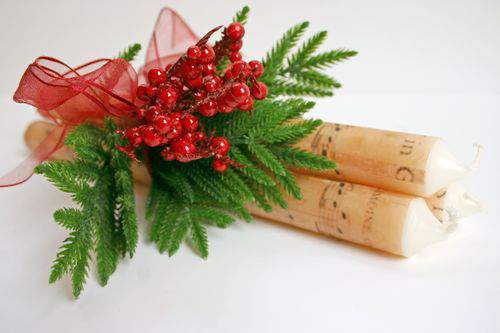
If giving a set of candles as a gift you can embellish the front with a holiday sprig. Don’t forget to remind the gift recipient that the candles should not be burned but used for decoration only.
Use pliers to carefully twist the wire end of the decorative stem to close off that sharp end. Then, wrap the candles in a pretty ribbon and add the decorative stem for a perfect holiday gift.

Remember, this technique can be used for any size candle. Placing an overall image on a larger candle may require some tissue paper piecing.
IMPORTANT: These are decorative candles ONLY and should NOT be lit. Even though the tissue paper is embedded and coated with wax, once the flame touches the uderlying paper the flame extends beyond the wick and becomes far too wide (the width of the candle) to be considered safe.

You could decorate candles to suit any occasion or season to use as home decor or great gifts.
Instead of giving grandma and grandpa (or other loved ones) a holiday card featuring the family portrait, consider a special candle embedded with the annual family snapshot or a favorite old black and white photo. (These would make great anniversary gifts too).
There are tons of possibilities to create your own vintage decorative candles.
Have fun and happy holidays. ♥

Those are beautiful!!!
Kind of a shame you can’t safely burn them though.
You always have the most wonderful ideas!
Love this tutorial!!! Have you tried usuing repostionable adhesive to hold the tissue to the card stock for printing? Do you think that would work? Can’t wait to try this. Off to buy candles!
Fab, Fab, Fab, Thanks, thanks, thanks!
Another great idea Lisa! You are fabulous!!!
Those are super adorable! 🙂 You have the cutest ideas here! Hope you are enjoy the holiday season!
Another BEAUTIFUL project, Lisa – this is really wonderful!!!
Soooo pretty Lisa! I love your choice of the vintage music sheets. Thanks for sharing!
What a beautifully photographed project … 🙂
Lisa, these are really lovely! I’m a candle lover, and a music lover too, so the combination is beautiful. Thank you for including this in my Lovely Links post linky, it was great to find your blog and meet you! 🙂
Linda. x
Wow! This is fantastic. Thanks for sharing. I added you to my favorite blog addresses!
with love from Holland,
Ineke
I just saw similar candles in PB and stood there for a minute trying to remember this technique. I had planned to try vellum. glad I read here so I can use tissue paper. Thanks!
Very nice! I’ll have to save it in my files for next year, I’m out of time! Love the vintage music look. Thanks for sharing such a detailed tutorial.
Christmas Blessings, Heidi
Wow that is fantastic! I am in awe.
This red ribion is looks very nice. I just like this card, the colours used for the stamp are perfect and that background script paper really caught my eye.