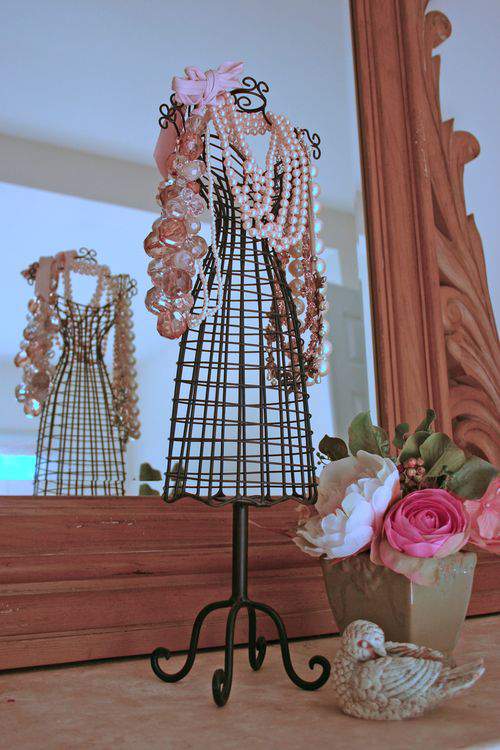
I love miniature dressforms. They’re good for simple decoration on a dresser or as you can see in the photo below, for holding and displaying jewelry.
This wire dressform is one of my favorites in my small collection.
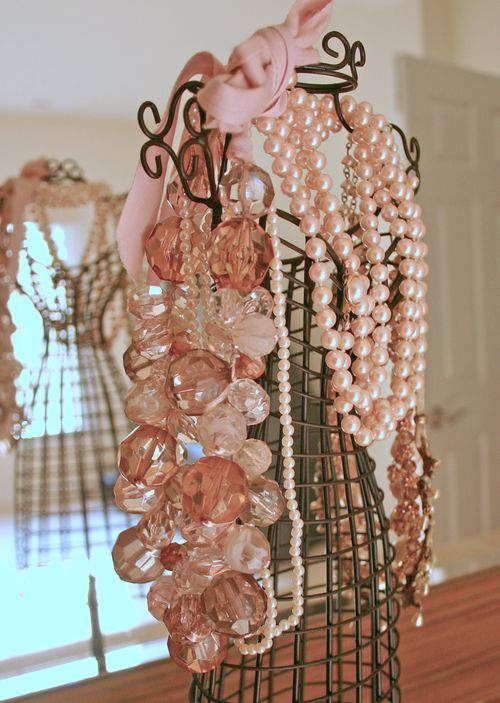
The only drawback to this particular dressform is that I can’t fit as many necklaces on it as I’d like and the ones that do fit have to be piled up on top of each other.
Well, this post is all about creating a solution to that necklace storage problem by giving this dressform outstretched arms.
You’ll only need a few simple supplies for this easy transformation project, including a few wooden dowels and matching paint.
Spray paint the wooden dowels in a well ventilated area (outdoors is best).
I choose a fine textured paint finish that has a matte appearance so that it looks closer to the wire on the dressform.

Also grab a few hanger screws at your local hardware store. Hanger screws have a flat end as well as a pointed end.
These screws come in various widths and lengths. Make sure you choose have a width that is not larger than the width of your wooden dowel.
 You’ll also need a pair of drawer knobs that you can also find at your local hardware store.
First, insert the flat end of the hanger screw into the two drawer knobs.
Because the dowel will essentially become the arms of your dressform, determine how long you want those arms to extend on either side of the center and then cut the dowel down to desired size. I cut my dowel down to 18-inches.
After cutting dowel down to size, screw one drawer knob into one end of the wooden dowel.
NOTE: Depending on the width of your dowel you may need to drill a small starter hole into the center of the dowel first. The first few times I screwed the point into the dowel without a starter hole, the dowel cracked. A small, drilled hole helps prevent the wood from splitting.
 This dressform is the perfect design for a project like this because the dressform already has two perfect arm openings built into the wire.
By the way, I found this dressform at Pier One Imports.

Insert the wooden dowel directly through the arm openings.
Once the dowel is through the arm openings, simply attach the second drawer knob on the other end.

Take a look at my necklaces now.
No piece is piled up on another and there’s lots of room to see everything here and get to it easily.
Screwing on drawer knobs (as opposed to gluing on an end cap) also allows you to remove the dowel later, if you decide you want to return to an armless dressform.
This dressform makeover magic project is a simple, one-day task that will make your wire dressform more practical and useful and your jewelry much more visible.
Of course, when you can actually see your jewelry, you’re more likely to wear your jewelry. ♥


Excelente tu explicación. Una muy buena opción para tener nuestras prendas más organizadas. Saludos y feliz fin de semana. ♥
Dearest Lisa, i too adore dressform and have a miniature one too for my dresser. But i do want a real dressform for my little studio for making approns and dresses. 🙂 No luck yet with purchasing one. You did such a wonderful work on this makeover!! Inspiring! Thanks so much for sharing! Have a lovely merry happy weekend and love to yoU!
Oh Lisa this is brilliant – I need to go shopping, lol!~ LOVE it!
My daughter is sitting here with me and now wants one lol.
Lisa,
That is so pretty. Thanks for sharing. You always have the best ideas.
Brilliant way to add extra storage and to still enjoy the original dress form you love. However I really liked the pink pearls all wrapped up on the form. Happy creating…
Great work…And superb idea…these are simply superb…i love those ornaments a lot…Thank you very much for sharing! Have a Wonderfull merry happy weekend.
VERY Clever Lisa! I LOVE the look — thanks for showing us how to achieve it!
Hello Lisa!
Love your little dress form. Before was just lovely, but after is great!:o) You certainly share the sweetest ideas, thanks a whole bunch:o)
You and the family enjoy a lovely week.
Smiles♥
Beverly
Although I love your pretty wears the way they were on the dressform, this is a lovely and neat idea to add more storage. Thanks for sharing such great ideas.
Great idea! I have a lot of jewelry so adding the arms would really make the dress form practical.
Hi Lisa
I just saw your animal crackers post – WONDERFUL!
How do I say this without sounding like a total stalker? I love your photo – you look like such a warm friendly person 🙂
Found you through BYW, XO Laura
That’s so creative and cool. I’d never be able to come up with something like that. You are so artistic and handy!
Im in love with this miniature dressforms. How creative.
I’m very much impressed with decoration and outstretched arms. Love your little dress and bead work. I need to say that this is a simple supply form you.
Dear Lisa, I have the same dress form and a small collection like you! I love what you did with it!!! Thank you so much for sharing your idea.
Cute … now she looks like she is pumping iron… or maybe I should say pumping gold! It turned out adorable!
beautiful … what a great idea! Now I have to look for one of these little forms for my growing collection of necklaces!
Thanks!
Lisa what is the cm of the width of the arms? I bought the same dressform from Pier 1. Thanks your ideas are so awesome!!
Im in love with this miniature dressforms. How creative. I’m very much impressed with decoration and outstretched arms. Love your little dress and bead work. I need to say that this is a simple supply from you.
I bought supplies to add the extending arms to mine as you did. It is a wonderful idea! I would not have thought of doing this myself. i got my dress form at tj Maxx. I have an addiction to French general jewelry kits so this will be perfect! I might even have to make two!
Diane
Really nice post. Spray paint the wooden dowels in a well ventilated area (outdoors is best). Its awesome 🙂