I
t's March already and the official start of Spring is just a few weeks away. I think everyone is ready for warmer temps.
With Spring in mind, I thought you'd enjoy seeing this special cookie whose name will make you think of the upcoming warmer season.
This cookie is called a Springerle (pronounced SPRING-ER-LEE) and it's characterized by intricate, imprinted images that appear right on the cookie itself.
The images imprinted on the cookie are created using special wooden molds or molded rolling pins, which I'll discuss shortly.

In the interest of background, Springerle cookies date as far back as the 14th century. The name appears to have come from an old German dialect.
Some of the earliest images depicted in Springerle cookies were Biblical scenes which were often used to help educate those who couldn't read or write.
Springerles are traditionally considered a Christmas cookie in many parts of the world but the modern molds and the diversity of available images means the treats can be created to suit any season or occasion.
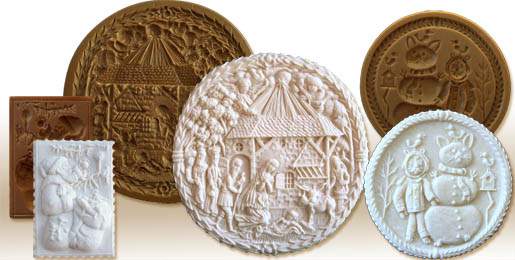
The Internet photo below shows various, dark-colored molds and the resulting, light-colored cookie.

You can see the two molds that I used for this post in the photo below.
You can purchase these molds, The Bicyclist and Prim and Proper as well as browse hundreds of stunning and intricately designed Springerle molds if you click here.
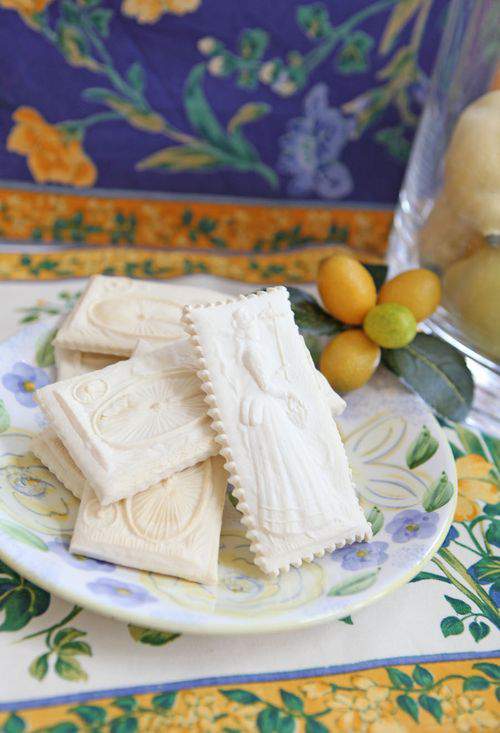
Springerle cookies are usually rectangular or circular, typically white (or light brown) and are made from eggs, flour and sugar and a few other minor ingredients.
Most Springerle molds come with a recipe booklet and you can also find various dough recipes on line.
You don't want to roll the dough out so that it's too thin because that could impact the integrity of the image that will be pressed into the dough.
I recommend you roll the dough to at least 1/4-inch in thickness.

Just like a cookie cutter, use the mold to press gently but firmly into the rolled dough.
Press down on all sides as evenly as possible.
Gently lift the mold from the dough and you can clearly see the image of the woman with the parasol.
I love this old fashioned image.
Once the image has been pressed into the dough, you'll have to carefully cut around the edges to create the exterior cookie shape.
You could use a pizza wheel to cut the shapes but I used this small pastry crimper just to add a little more visual interest to the edges of the baked cookie.
Once you cut along the sides, carely remove the dough around it to lift the cookie.

It's a good idea to lift each cookie away from the dough. That way you won't damage the cookie edges you just cut as you're molding the next cookie.
Place parchment baking paper on cookie sheets, place your Springerles and cover overnight.
In order for the cookies to bake properly they must dry for about 24 hours before placing in the oven.

I originally started writing this post last November with thoughts of making it a holiday-themed blog entry.
Even though we're now approaching Spring, I thought you'd still enjoy seeing what the holiday Springerles look like.
Here's a look at the mold I used for the Christmas cookies in which all four of the images are on the same block of wood.
There are lots of molds available that are much larger than this and include 10-12 images on one block. You can create a lot of images pretty quickly using this type of mold.

Meantime, baking times will vary depending on size and thickness of the Springerle.
Although I didn't do it for my first batch, it's actually wiser to bake like-sizes together so you can best determine the appropriate baking times which can range from 30-45 minutes.
The anise-flavored, biscuit-like cookie may not be as sweet as many people like but you can always search on-line for additional recipes to suit your taste.
You should also store them in an air-tight container to prevent them from getting to hard.
By the way, it does seem unusual to use a Christmas cookie picture for this Spring-themed blog post, but I thought these turned out so beautifully it would be a shame not to share the photo.
Meanwhile, there are so many elaborate decorations that can be created using Springerle molds. Take a look at the Internet photos below which feature some incredible molded images which have been applied to desserts.
The cake on the left was featured in the December 2009 issue of Martha Stewart magazine.
Now, this is really intricate work and really illustrates just how fancy you can get if you want to.
Baking beautiful treats is not the only way these Springerle molds can be used. You can use them in card making and other paper crafting projects.
Just a few supplies are needed including (1) papercasting compound (2) Mold release to help prevent casting material from sticking (3) vellum paper or construction paper (4) note cards with envelopes (5) craft rolling pin and (6) Springerle molds.
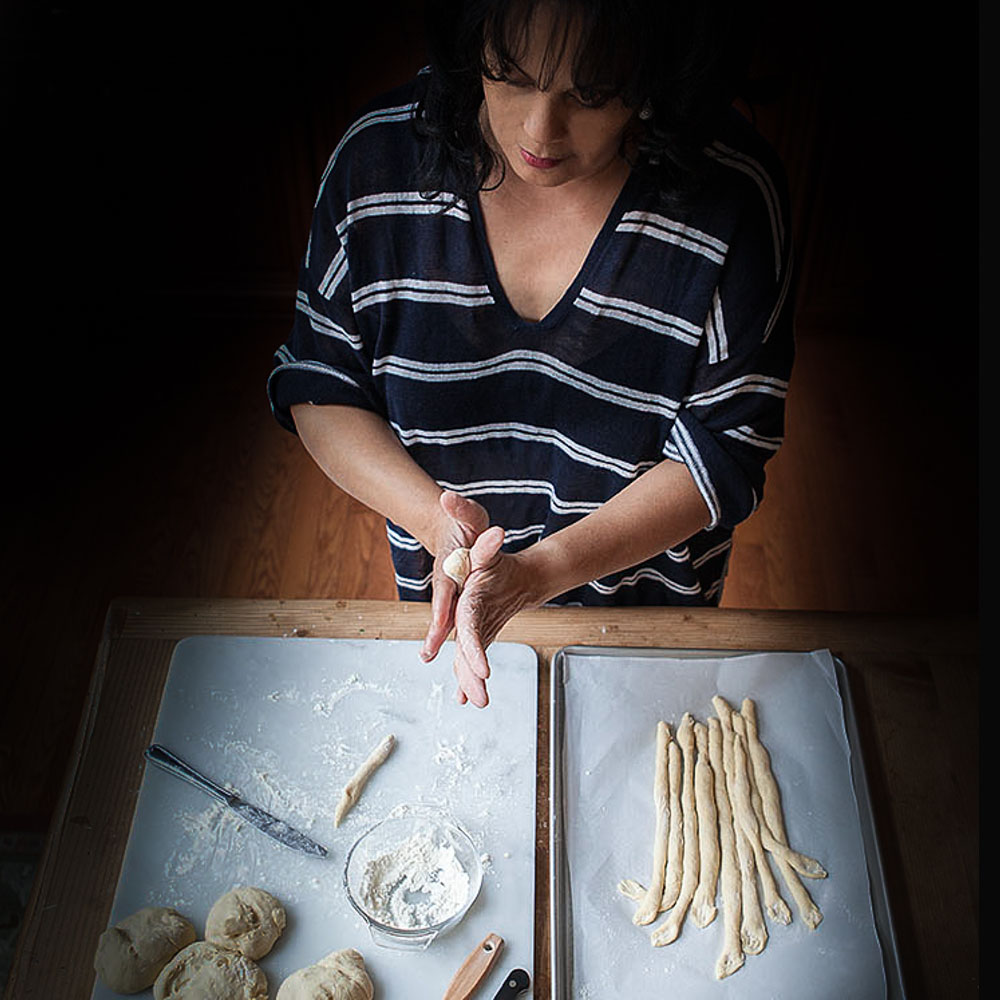
Simply roll the papercasting into a small ball and then the dough just as you would regular baking dough.
To create the image, lightly spray the inside of the mold with mold release solution and then press the mold into the papercasting.
Apply the same pressure and technique that was used to create the Springerle cookies.
Here's a closer look at the papercast images I created using the same molds that I used to make the cookies.
Note: These molds are designed for cookie making or crafting projects but it's important to follow the proper cleaning instructions that come with the mold when going from crafts use to baking use.
Here's a simple card I made using the molded papercast. It's actually pretty fun to play around with the molds and papercasting dough.
The texture of the casting is so soft and dainty. The crafting possibilities are endless.
Once dry, papercasting projects can also be painted for additional effect.
The image below is from House on a Hill which manufacturers a delightful and diverse collection of Springerle cookie molds.
The company also features loads of crafting ideas using Springerle molds like the project shown here.

I think if you were giving a box of Springerle cookies as a gift, a matching card would be an unusual and unexpected addition to the presentation.
Springerle cookies obviously don't have to be saved for the holiday season. Imagine how beautiful these would look served at a ladies tea, brunch or fancy lunch.
Please remember these cookies are at least a 24-hour endeavor because the cookie cutouts have to dry before baking.
However, I think the results are worth the extra time and with warmer weather fast approaching, Spring Springerles are just in time for the new season. ♥


Those are beautiful!!! They’re really almost too pretty to eat (ALMOST–I DO have a major sweet tooth).
I have a friend that is always looking for ways to kick her handmade cards up a notch–I’ll have to pass this on to her.
Thanks for sharing!
These are beautiful Lisa!!!! You did a great job as always!
Beautiful cookies Lisa! I always chuckle when I see springerle cookies — when I was a little girl, my mother and our neighbor bought some pretty molds and decided to make some springerle cookies. They came out of the oven like cement and were inedible. They never made them again. I love the beautiful molds on the website — thanks for the link!
How beautiful – I love that you can use them for cookies OR crafting. Gorgeous post, Lisa!
These are beautiful. You’ve gone to so much work in your study of this lovely cookie. Your’s turned out so nice. I didn’t know a lot of what you researched, such as drying for 24 hours before baking! I would love to taste one, now!
Happy up-&-coming SPRING! ~Heidi
Lisa,
I was just reading about this a week or so ago! What a wonderful idea to incorporate this idea with card making. Your inspiration and tutorials are so nice to read. Thank you so much for sharing. Have you seen the new Graphic 45 Once Upon a Springtime paper collection? It’s beautiful. Wonder what this technique would look like with them?
Thanks for sharing! I never knew they had to dry 24 hours before cooking? I have a lot of the ceramic cookie molds that were popular in the 90’s. Maybe I will try them out with your recipe. They always seemed to “spead” out to much.
Beautiful post.
Reminds me of Wedgewood! Beautiful!!
How beautiful! Thanks for sharing!