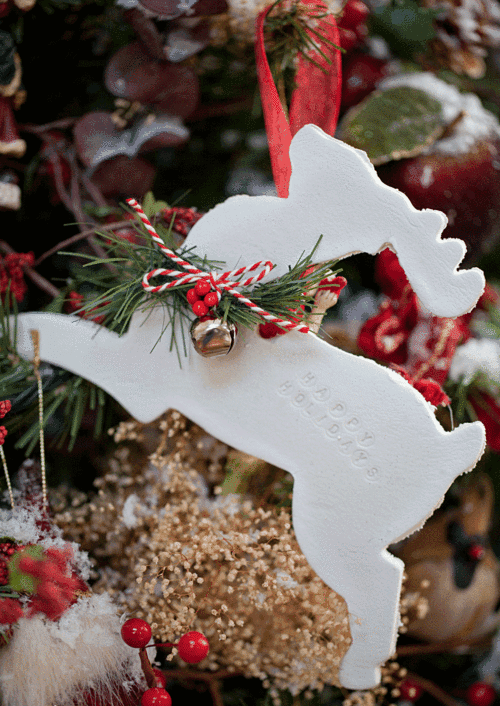
When I was a little girl, making handcrafted tree ornaments was a regular tradition under the supervision of my mom. As an adult, it’s an annual activity that I’ve now incorporated into my own household with my own family.
Welcome to Day 2 of my holiday series, 25 Days of Christmas, where today’s project centers around reindeer ornaments… a fun and easy keepsake that can be hung or gifted to loved ones.

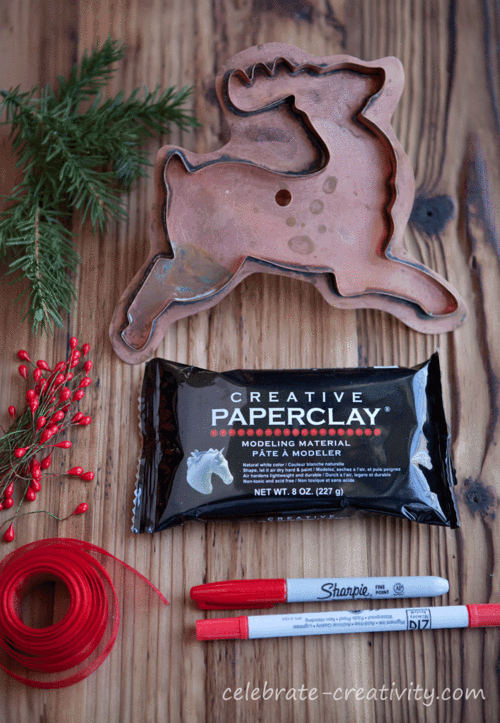
You’ll only need a handful of supplies for this project including a cookie cutter and paper clay.
Paper clay is a lightweight modeling clay that dries quickly and is very easy to work with.
Red markers are optional.

For the embellishing elements, I used a few sprigs of artificial pine needles, red stamens, silver bells and some trusty peppermint-colored Baker’s twine.
You’ll find a million uses for this red and white twine and every crafter should keep some in their stash.

Roll out the paper clay to about 1/4-inch thickness.
You can handle the paper clay just as you would cookie dough.

I love the look of these jumbo cookie cutters and they’re really a fun size for this ornament project but any size cutter will do.
While I made all my ornaments with the one reindeer cookie cutter, consider mixing up the shapes for a little variety.

What holiday cookie cutter shapes do you have in your kitchen drawer?
Stars, hearts, Christmas trees, mittens, snowmen, bells, candy canes and gingerbread men cutters would all look adorable as paper clay ornaments.

Once the shape is cut out, use a straw to punch out a small hole for the ribbon or string holder.
It’s best to dry these ornaments on a cookie rack so the air can freely circulate around the entire shape.
It took about 48 hours for these reindeer shapes to dry completely.

Metal letter punches can be used to embed a word or phrase directly into the paper clay.
You could also personalize your ornament by imprinting a child’s name into the clay.

Imprint your message as soon as you cut the shape out because once the paper clay is dry, you won’t be able to add any messaging.
NOTE: This is where the optional red markers come into play. I left my imprint plain but after the ornament is dry, you could use a fine tip marker to carefully fill in the letters to add a dash of color to the finished ornament.

Once the ornament is dry, you can start embellishing it.
Tie the ribbon in a knot on one end and then gently slide the knot down to the small hole toward the back of the ornament to conceal the knot on the backside of the ornament.
TIP: Once the ornament is completely dry you can use a small nail file to gently sand away any rough edges if you want to.

Loop a strand of Baker’s twine through a few silver bells.
Clip some artificial pine sprigs and twist a few berry stamens around the wired pine needles.
Then, tie the bell around the stamens and finish off the collar with a small bow and tails.
Gently fold the wired pine sprig around the neck of the reindeer to create a festive and colorful collar.
This same embellishment could be added to whatever shape you end up using use.
Your reindeer ornament is now ready for display or gifting.
In fact, a small set of personalized paper clay ornaments would make a lovely gift.
You could make a set of reindeer and imprint the name of one of Santa’s reindeer on each one.
What a keepsake that gift set would make.
Consider starting your own tradition of creating paper clay ornaments.
It’s a fun and easy holiday craft for kids too.
TIP: Don’t forget to imprint the date on the back of the paper clay ornament before it dries, so years from now you’ll have a reference on when it was made.

Day 2 down, 23 more days to go in my special holiday series.
In cased you missed it, here’s a look at:
Stay tuned, there is a lot more fun and inspiration ahead.
Hope you stop by again tomorrow (12/3) for Day 3 of my 25 Days of Christmas series.
See you then. ♥

Oh so sweet Lisa! I’m loving your series and can’t wait to see more!!!
I love these! I’ve been curious about paperclay for some time now and this looks like a great project to play with. You are so creative. Thank you for sharing another great project!
Lisa,
I love this idea. I just happen to have a deer cookie cutter that I haven’t used in years. These paper clay deer would make pretty package toppers. Great idea!
Warm regards,
Rosalie – Sparks NV
Thank you for beautiful ideas. Where can you buy the metal punches for the alphabet and numbers. Thank you. Cam
Glad you like this ornament idea, Cam.
You can find the letters on Amazon.
Just search for “metal letter punches” and you’ll get a ton of options.
Good luck with your project.
Happy day to you.