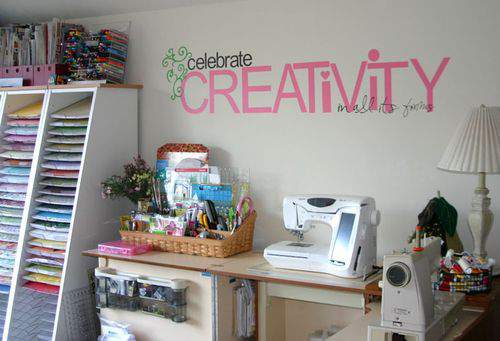
For the past few months I've been working to organize my new crafts area and while the progress has been slow, it has at least been steady.
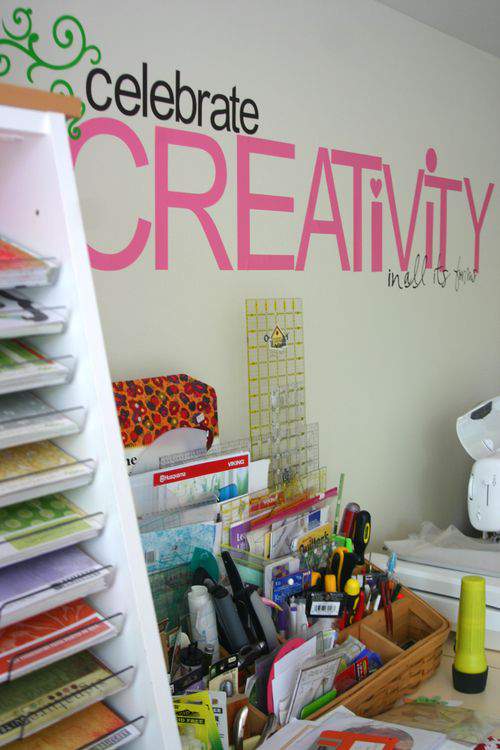
I recently added some wall decor to the space to incorporate some more personal identity into the area and I think you'll enjoy seeing how these fun letters were created.
The words resemble hand painted letttering but they're actually made out of vinyl and they're super easy to make.
The wall signage was made using a digital craft cutter, which allows you to cut out various images as well as any true type font.
After installing the requisite software program onto your personal computer, plug the digital cutter device into an available serial port on your computer.
The vinyl used to make the lettering comes on a roll like this and is available at most scrapbooking stores or on-line.
Since just about any true type font can be used, there are loads of lettering choices. Simply open the digital cutter workspace screen in your computer and enter the desired letter or text.
For the letters "CREATIVITY", I had to print them individually to get the size I wanted for each.
After typing the letter or word in the computer, simply load a piece of the adhesive vinyl adhesive into the digital cutter which receives the letter or image from the computer screen and cuts it out.
The vinyl has a backing which protects the adhesive. After the cutter creates the shape or letter, the backing of the vinyl is peeled off just like contact paper.
If you have a lengthy word, you may need to spread it out to get a better perspective on how it might work on the wall.
Note: The instructions on the Adhesive Vinyl roll specify that a special transfer paper is also needed to help adhere the letters to a wall surface. While transfer paper may be needed for some projects, I did not need it for this.
After the letters are cut, peel the letters off the backing slowly. Take extra care during this step because the letters are quite fragile and the vinyl tears very easily.
To prepare for letter placement, determine the center of the wall area. I think it's a good idea to select the letter that sits at the very center of the word and make that,the first letter you adhere over your pre-determined center wall mark.
Once that center letter is in place, start adhering the letters on either side working from the center outward. This makes for a more symmetrical placement of the word. If any letter in the lineup is slightly skewed, it's easy enough to lift it off the wall and re-position it for a more perfect alignment.
Once the main word is positioned in the desired location, just add to what you've started with additional words or decorative elements.
For the subtitle "in all its forms", I used a true type font called Susie's Hand. This is one of my favorite fonts and I use it quite often for journaling blocks in scrapbooking pages and projects. It's also the same font used in my blog banner title.
Susie's Hand is a free font that you can download from the Internet if you click here.
Don't discard the large pieces of vinyl sheet scraps because the leftovers can also be used for lots of smaller images and lettering projects.
I used scraps and this heart-shaped hand punch to add a touch of whimsy above the letter "i" in CREATIVITY.
I thought a few green flourishes would add some additional balance to my wall project and also break up the dominant pink in the lettering.
These flourishes are also created by the digital cutter.
Just play around with the additional pieces to find the arrangement that works best.
I suspect this pink and green color combination may be especially sweet to all my Alpha Kappa Alpha sorority sisters out there.
This wall art is completely removable and it's no problem to peel the letters or flourishes from the wall without any damage to the surface.
There are so many wonderful ways wall letters can be used to add to your home decor, especially with some of the pretty cursive or script-like fonts that are available.
By the way, for those of you who have inquired lately about the progress of my Belfry, you can see at least one corner is slowly coming together.
I still have lots I want to do in this attic space but it's nice to see the room less cluttered and finally taking shape.
Meanwhile, if you're thinking about vinyl lettering for your wall consider the following ideas; greetings in an arched entryway, words on the instep of hardwood stairs, labels for large glass storage jars, names of favorite authors on a home library wall, a phrase or nickname over a baby's crib or some playful words and shapes in a child's play area.
The possibilities for Wordplay are endless.


Where do you learn about all of these new products? Thanks for the information. The Bat’s Belfry is really shaping up and I think I will like it as much as the Bat Cave in your previous home.
That silhouette is very neat indeed! I have never heard of it. Thank you.
I love the vinyl lettering and your space is great.
Wow! That amazing! Love your space 🙂
I love the vinyl letters! Perfects saying to look at as you create and craft away.
Thanks for sharing a peek into your studio.
My favorite has to be that big comfy looking chair. Perfect for day dreaming up new ideas.
Lisa,
I love your Wall Art. I put a link to your blog entry on the forum of my local scrapbook store (Just4Keeps in Edmond,OK) so they could see your creativity. They sell the silhouette and the vinyl and all that goes with it, and it is great for people to be able to see someone who actually made wonderful use out of the products.
Love your blog, and thanks for your email yesterday.
Sharon
what a fun new toy! I’m going to check it out!
BRILLIANT! I want one!!!!!
I’d love to have one of those! I’d use it to make some extra money! Vinyl words and sayings are so big in home decor these days!
You have a wonderful space in which to create!
Manuela
so perfect for you craft room, looks like it is coming together!! I love these vinyl words and decor, so easy to use and when you get tired of them, you can take them off!! my kind of decor! thanks for sharing!
This blog entry is right on the mark. I just bought a Silhouette this past Saturday. I’m away on business this week but I can’t wait to get back to try it. I didn’t realize it cut vinyl letters too. Great job! The belfry looks fabulous so far.
I always wondered about how that was done! Thanks for showing us, Lisa! Your studio is beginning to take shape – so light and airy – and I just love the comfy chair!
Cheers!
Lisa, it looks amazing!! TFS!
very cool! Love the paper storage too!
Wow…your room is just amazing! Every inch of it just says “create!” And it was interesting to see the vinyl lettering technique…
I’m digging the word art. I wanted to do some free hand painting of lyrics from one of my favorite songs, this is a whole new way of doing it now. I love how it looks in your creative space.
that is so awesome lisa – LOVE IT!!! i love the chair in your belfry. so comfy and inviting.
Lisa:
Your room is absolutely beautiful The way that your sun hit your craft room reminds me of how the light comes in through my french doors (in the living room).
Great decor!
Wow Lisa — your Belfry is looking gorgeous. What a super fun idea to use the lettering. I love words on walls — well anywhere, really!
Ooooh! I love the LIGHT in your new space! The lettering is perfect for your wall and for inspiration!
Great wall words!!! Thanks for the tutorial! I have the vinyl, the cutter, the idea, I just need to do it! Maybe this weekend! Thanks for sharing the progress on the “Belfry”, it is looking good!
This is exactly the type of project I was looking to try! I’m so excited I know the correct supplies and machines to buy! Thank you thank you sooo much!! This was wonderful!! 🙂
what an amazing space!!!
That is FABULOUS!!
I’m completely hooked on the vinyl wall decals. But I just buy them from etsy sellers because I don’t know how to make them myself. 🙂
What an inspiring, creative space you are creating!
I never thought to put words on the wall of my studio! Thanks for a great idea!
I love it Lisa!! Great job using your silhouette. Thanks for linking me here 🙂
Your studio space is looking amazing Lisa.
Hello Lisa!
Your space is coming along just beautifully and lots of room too!:o) I know you are having a wonderful time pulling it all together! Enjoy a lovely week.
Smiles…
Beverly
love your wall! i’m always drawn to the name of your blog-i love celebrating creativity and growing in it, too. I’m having a little creativity blog party this week-stop by if you can!
love the vinyl roll tip, too. didn’t know it came like that.
Love, Love, Love your studio! Great idea for the lettering. Hope you are doing well!
Wow! Look at that ROOM! Can I move in, please?
Can I ask where you got your paper storage? I LOVE it.
The lettering is wonderful! TFS
oh my goodness !!! love love the wall and your studio is awesome !!! such a great big space to play in , so envious of you !!!
xo,
beth
Wooooow, I concur with everyone else, I absolutely love this room! I especially love how much light pours in the window. So beautiful!
Wow! elegant room, I love your digital craft cutter and vinyl’s really great to use.I wonder how much is the software and that digital craft cutter, I guess it’s so expensive!,and I thought, I can’t afford!LOL